This holiday season seemed to come out of nowhere. I feel like it was just Thanksgiving and now we’re days away from Christmas. Earlier in the year when we were arranging furniture we had a plan for how we were going to decorate, where we were going to put the tree whether we were going to get a real tree this year to commemorate our first year in the house. What we were going to send for Christmas cards, all planned out.
It all snuck up so fast we ended up doing absolutely nothing.
No tree – it seemed like way too much work to set it up for only two weeks then have to take it down.
No wreath – This actually did get unpacked and was going to get hung on the front door with a Command hook however the package instructions said to apply in 50 degree or warmer temperatures. Since we’re hovering around 20 that didn’t happen.
No Christmas Cards – we did order an Elf costume for Chloe and took some sub-par photos with my cell phone and had a plan to take “real” pictures with the camera and order cards but it never happened.

Here’s your Christmas Card
I’m looking forward to seeing friends and family over the holidays but as for the decorating … maybe next year.
We did make Christmas cookies for my annual Cookie swap at work. I found This recipe on Pinterest and it looked easy and pretty. I mean it’s sugar cookies how hard could it be?
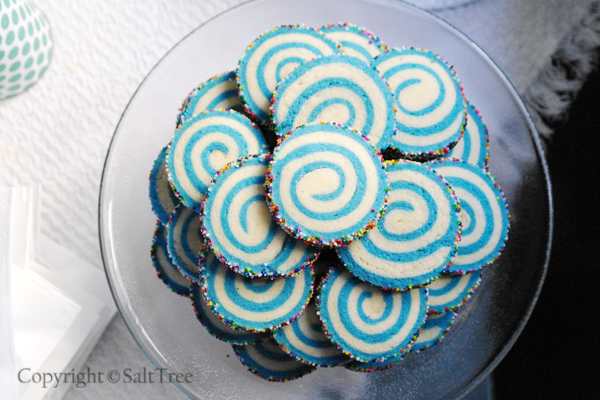
look how pretty they are!
NOT EASY First off I don’t think I realized just how much flour is in sugar cookies. My kitchen was covered – flour everywhere. Also because I had to make so many I thought it would be easier to make a whole batch of colored dough rather than splitting the batch in half per the recipe directions. That’s all well and good until you roll out your full batch of colored dough and your full batch of regular dough and it takes up the ENTIRE island then you have to pick up one and lay it on top of the other. Never again I tell you… Never again…
I didn’t even attempt the pretty sprinkled edges after that debacle. I was sure it was going to be a complete disaster when I went to cut it into cookie rounds that it was going to smoosh and turn into a giant blob. Luckily that was the only part that went ok. The first batch tasted kind of floury so we topped all the additional ones with extra sugar before baking and that helped.

Not as pretty… but not too bad..
How about you did you go all out and decorate for Christmas this year? Or did the late in the year Thanksgiving have you saying “Maybe next year…” like it did for us?