Hicks House

From Builder Basic to Beautiful


2 Comments

Lofty Ideas

One would think that after all of the hoopla surrounding the shed foundation and the delivery of the shed that we would have immediately started using it for storage and moving all of our possessions out of the garage. You must not be too familiar with this blog… nothing is ever that easy in the Hicks Household… everything must be customized :-).

What the shed was missing was a loft, what better way to store things you don’t need constant access to without taking up space on the precious ground level? You may be wondering, how does one build a loft? Is it hard? Well I actually had no physical part in this, but I can say as far as difficulty that it only took Ken one day, and he was done by dinner time.

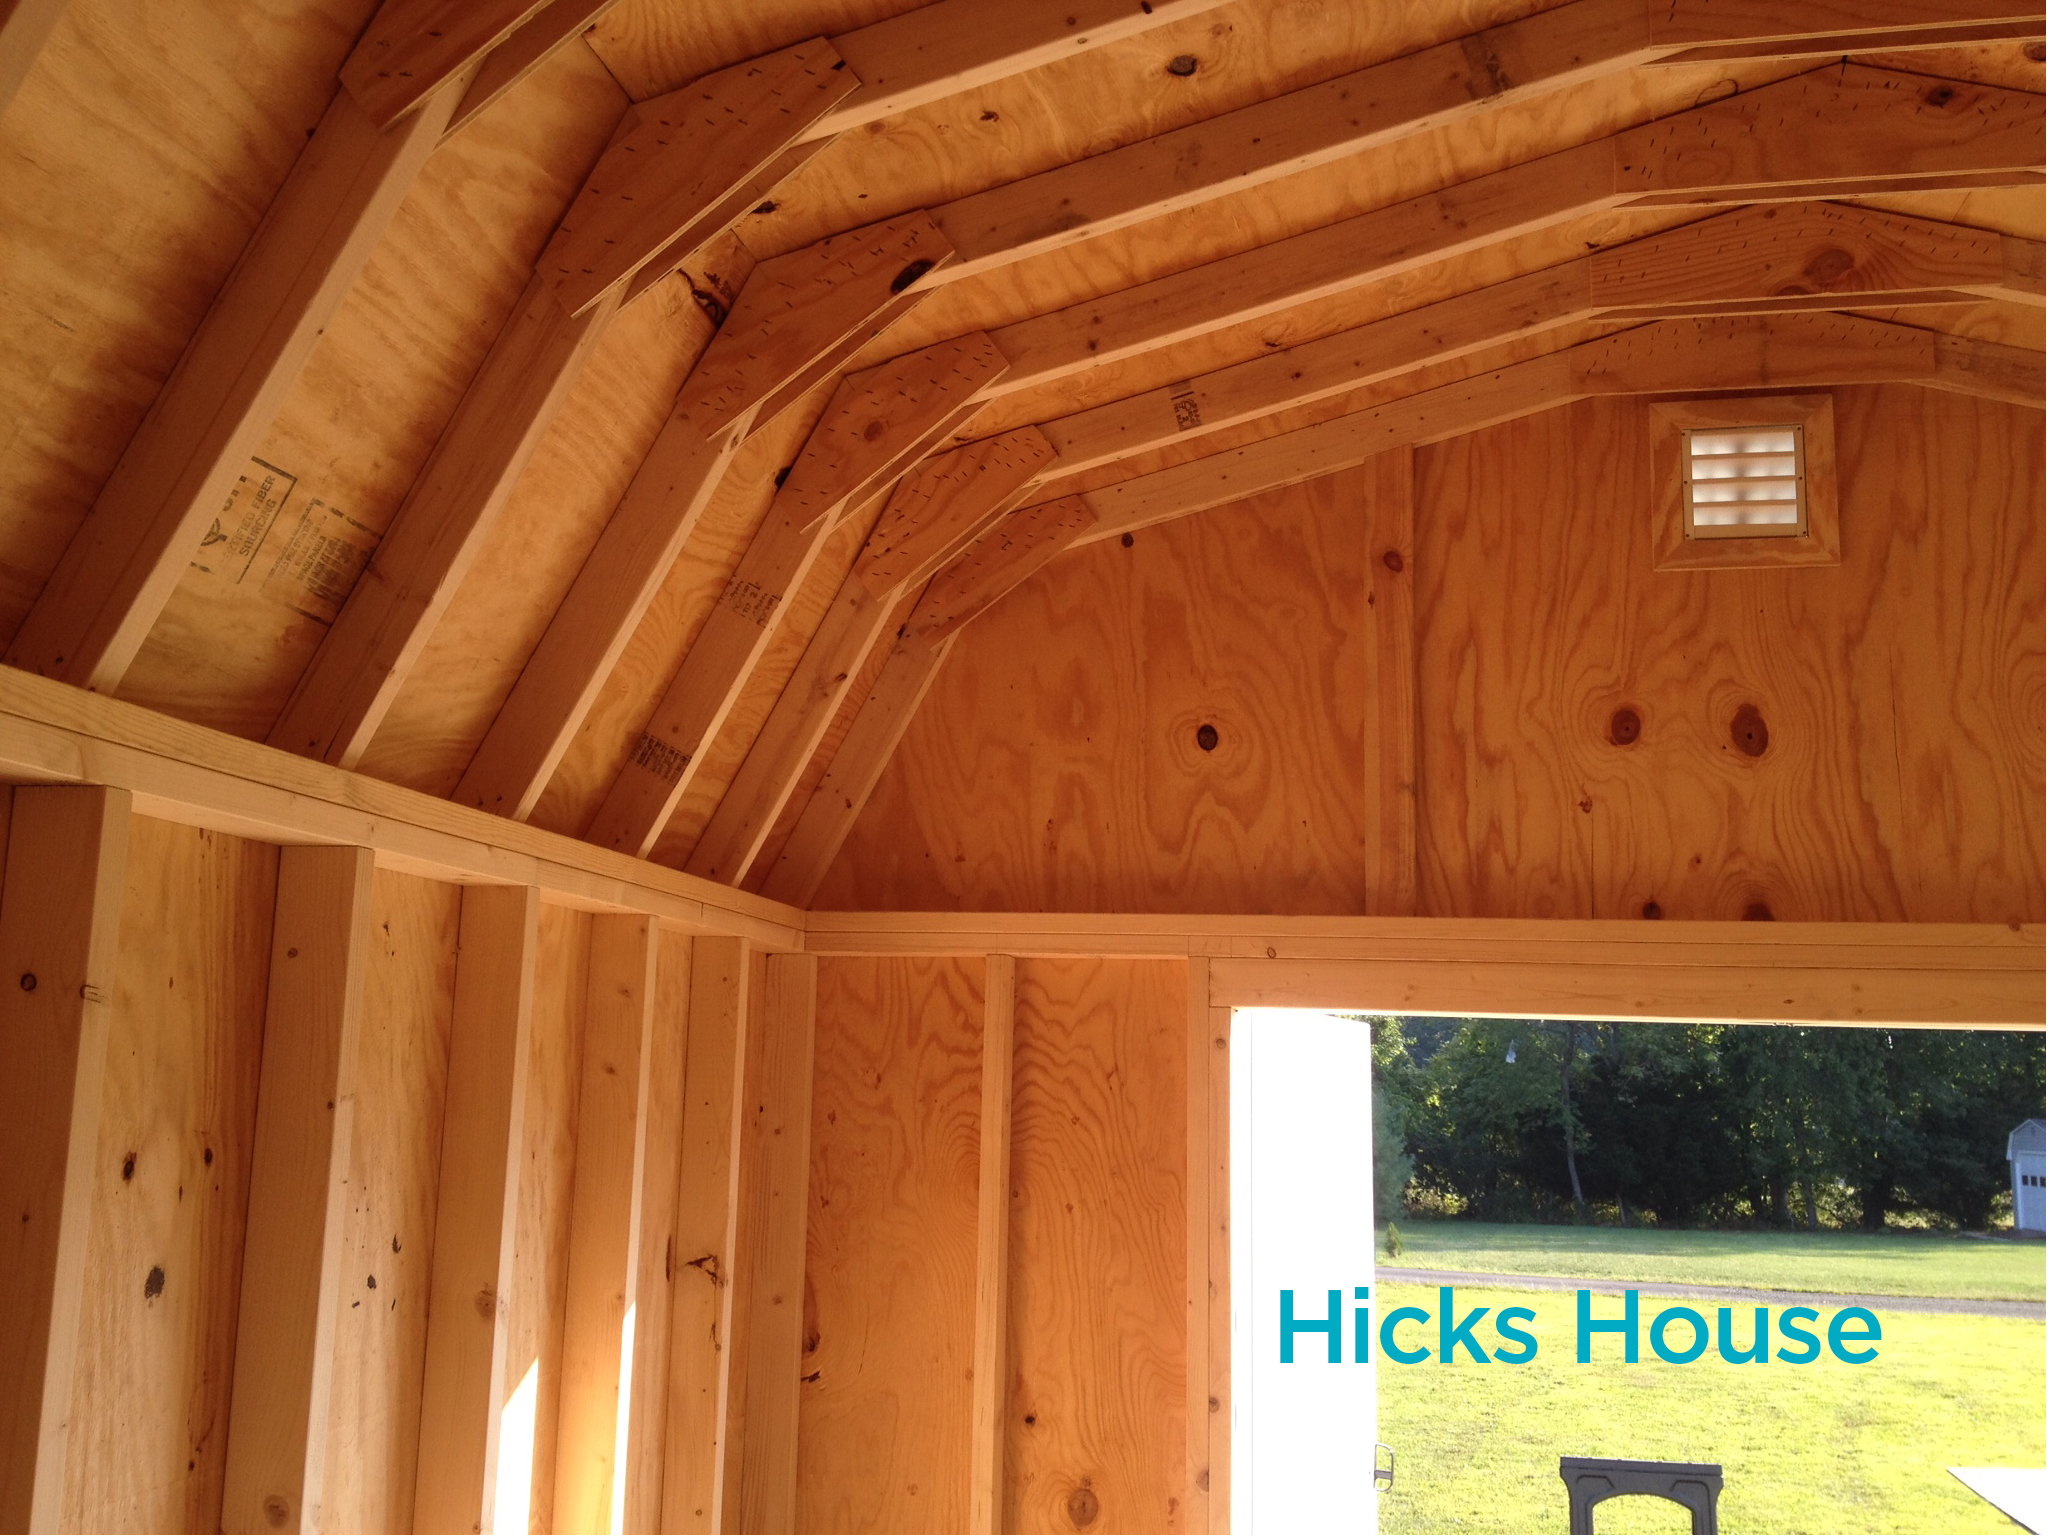
The inside of the shed looked like this with all of the wall supports exposed:

Lofty Ideas | Hicks House

Ken was able to take advantage of that by cutting several two by fours to the length of the shed and attaching them to the existing supports with wood screws.

Lofty Ideas | Hicks House

It then looked like this:

Lofty Ideas | Hicks House

He then measured the length and width of where the loft would go and cut some mdf boards to fit. It ended up using 2.5 boards with the larger ones on the sides and a skinnier one in the middle. (I did help with this part, holding the mdf still while he cut – I like to think I played an integral part in this project but I’m not fooling anyone).

Lofty Ideas | Hicks House

The mdf was then placed on the support beams,

Lofty Ideas | Hicks House

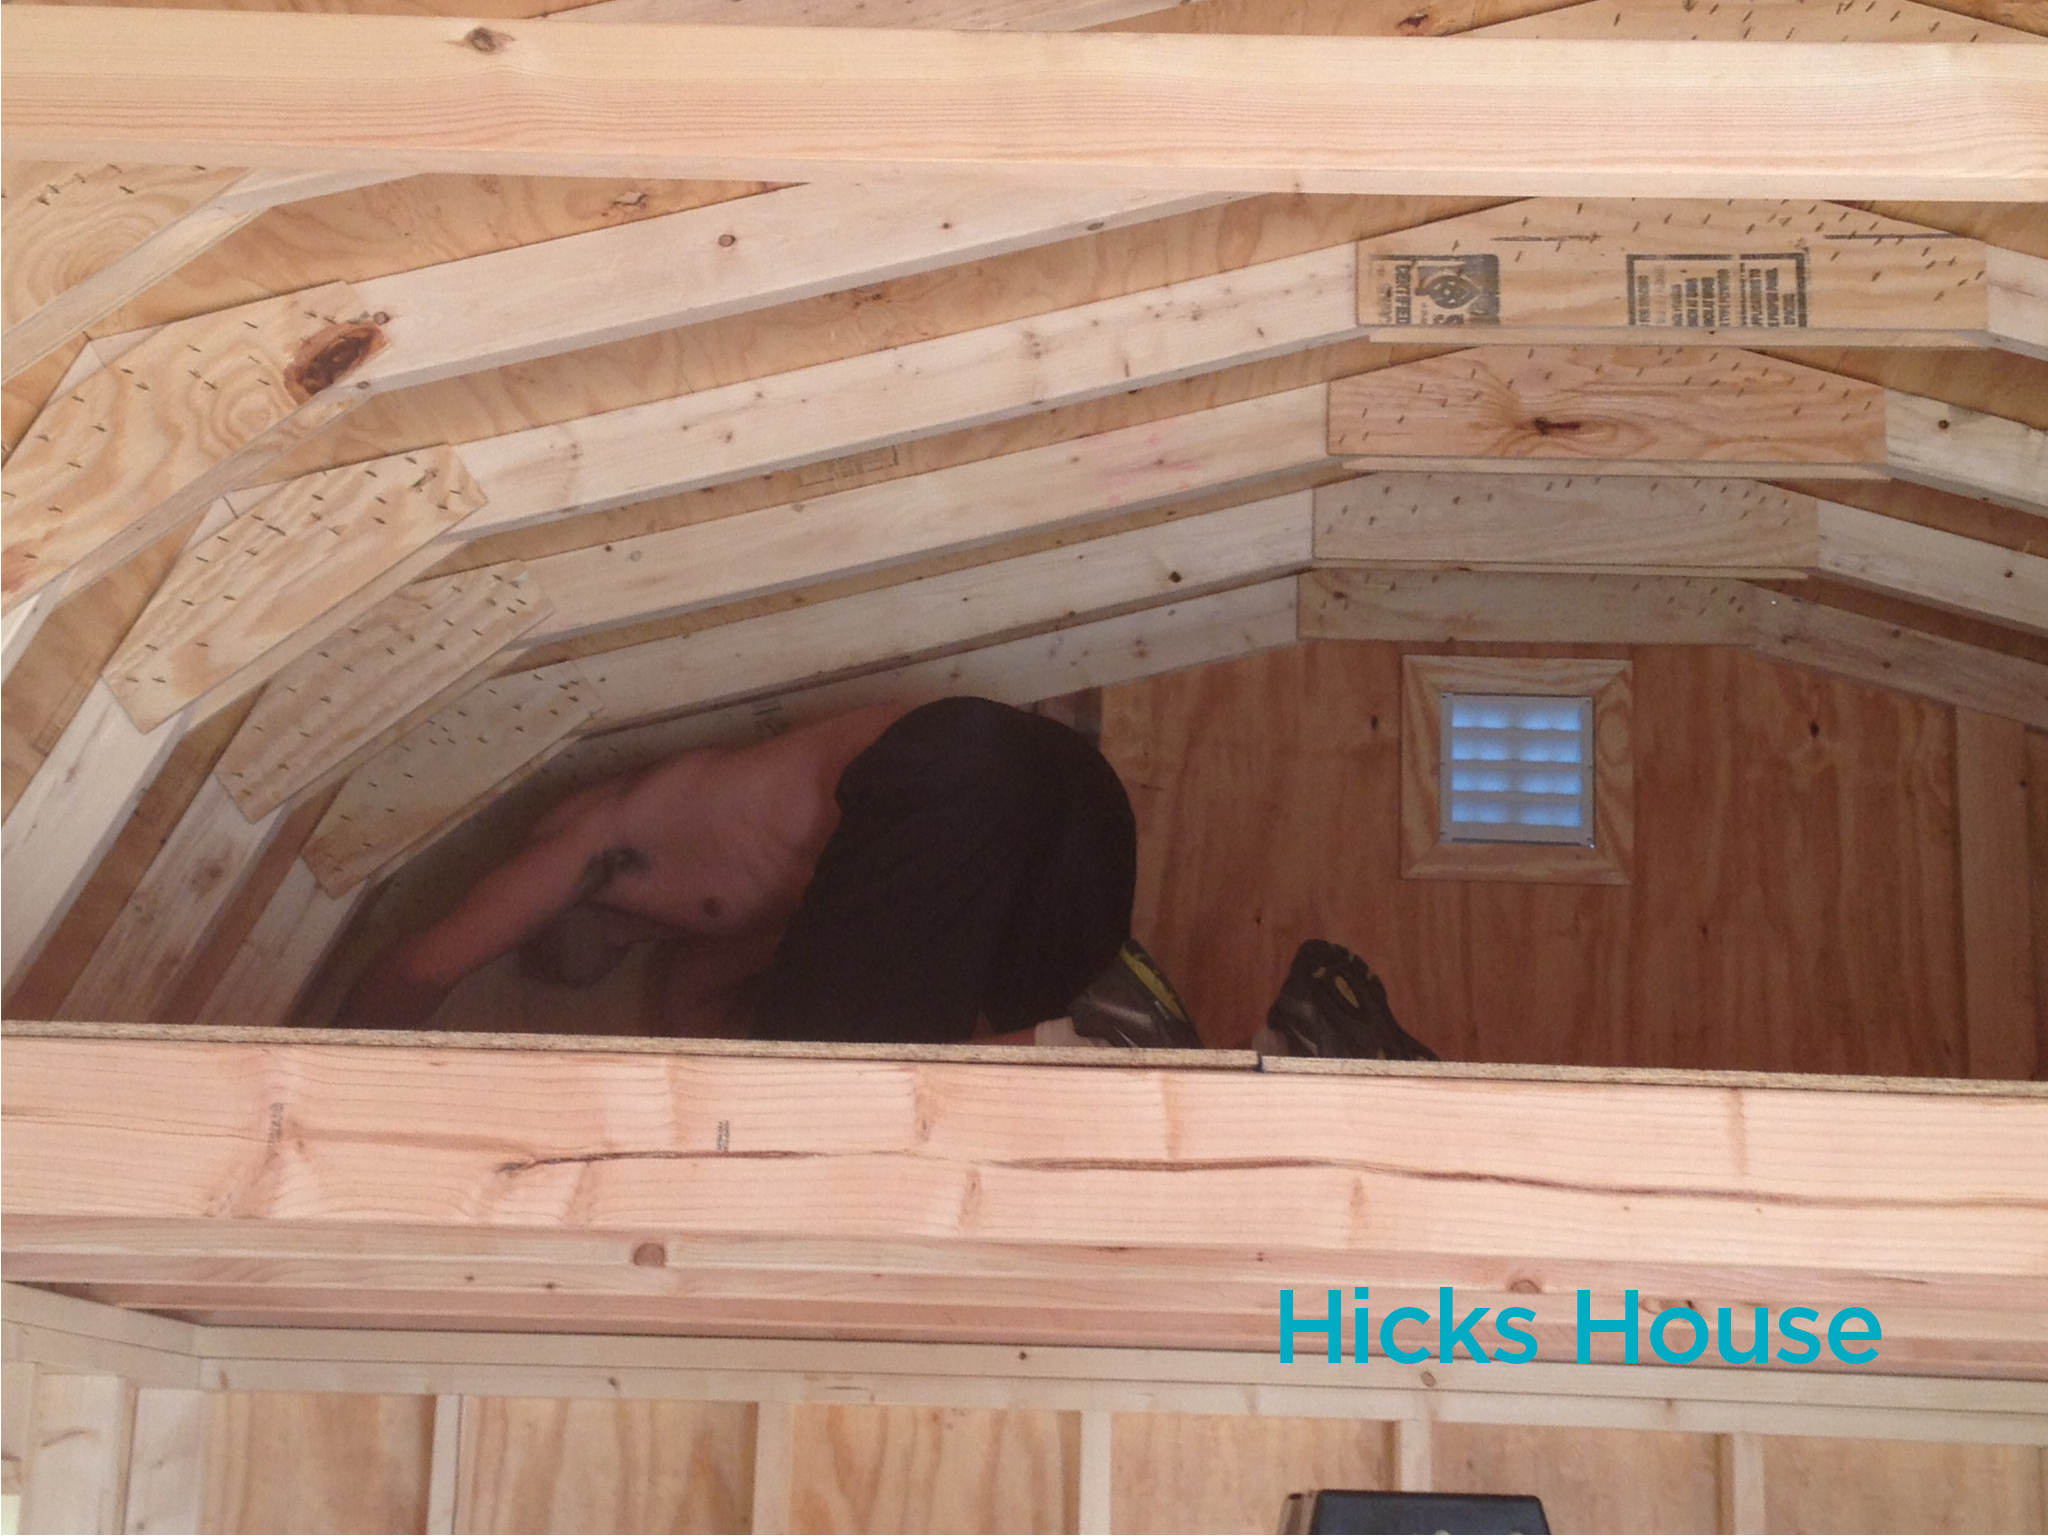
And then Ken crawled up there and used nailed them in along the supports to ensure they didn’t go anywhere.

Lofty Ideas | Hicks House

Now its all ready for extra storage space!

Lofty Ideas | Hicks House

Once we’ve filled it, we will finally have both cars in the garage! Just in time for fall and the upcoming cold temperatures.

What do you think? Do you want to install a loft into your shed or garage now? If you missed us building the shed foundation and getting the shed delivered you can catch up here:

shed foundation

shed delivered

Hicks House


2 Comments

Baked Eggplant Fries

Baked Eggplant Fries | Hicks House

This is one of my favorite side dishes in the history of the universe. The first time I tried eggplant fries it was at a local pizza restaurant, they were fried not baked and I fell in love. It sparked a mission to find a way to make them at home, and at least somewhat healthier as we refuse to buy a deep fryer.

Ingredients

  • One medium to large eggplant (dependent on how many fries you are looking to end up with)
  • Italian Seasoned Bread Crumbs
  • Olive Oil
  • 2-3 Eggs (We used the whole egg, you can substitute just egg whites if you are looking for a healthier alternative, however you may need extra eggs

Baked Eggplant Fries | Hicks House

Preheat your oven to 425 degrees. Put your breadcrumbs in a bowl (we don’t measure this, just go by eye and add more if we run out). Crack and whip your eggs in another bowl or in a Tupperware. Use a third bowl or Tupperware for your olive oil – again we don’t measure but 2-3 tablespoons to start should be good.

Cut the top and bottom off your eggplant then cut in half. Turn each half so the cut side is facing up and then cut into cross sections creating your “fries”.

Baked Eggplant Fries | Hicks House

Then begin your breading process. Coat the fries lightly with olive oil. Eggplant tends to soak up oil very fast so just do a couple at a time – remember we are baking not frying. Coat in the egg followed by the breadcrumbs making sure to fully coat all sides. Transfer to a baking sheet and continue until you have breaded all of your fries.

Baked Eggplant Fries | Hicks House

Spray lightly with some more olive oil – this helps to get the outsides crispy.

Baked Eggplant Fries | Hicks House

Bake for 7-10 minutes, flip and cook an additional 7-10 minutes. Your fries will be sizzling and bubbly but the outsides will still seem soft. Now here is the trick to crispy fries – flip a second time switch your oven to broil and cook for approximately 5-7 more minutes. WATCH THEM CLOSELY! They will brown quickly, you want a nice browned look to them but if they look like they are starting to burn take them out.

Serve with your favorite protein and dig in!

Baked Eggplant Fries | Hicks House