
During our “Operation Rent the Condo” one of the things on the list to make the place as pretty as possible was to replace all the old flat panel wood grain doors with white 6-paneled doors. I originally thought this was going to be such an easy project – I mean they sell the doors already white and pre-drilled so all you have to do is hang them right? WRONG

For starters because our condo was built in the early 1980s, or just because of the way it was built each doorway is not identical to each other. If you are buying pre-drilled doors this is a big problem as they will not line up. So we bought the ones that were not yet drilled – which although cheaper required a lot more labor from Ken to get them ready.
Measure each door, mark where the hinges go, where the knob goes, router out the hinge holes drill the knob hole. It was a big production. However it happened pre-blog so there are no photos of all that.
Perhaps the most helpful of tips though is how we painted the doors (yes you still have to paint them – even though they look white they are just primed). I thought the idea was ingenious, and even though Ken said he didn’t come up with it on his own I’m giving him credit anyway :-).
Step 1 – Drill 2 screws into the bottom unfinished part of the door and one screw into the top unfinished part of the door only about 1/4 to 1/2 way. You are going to use the screws to balance the door on sawhorses so no surface of the door is actually touching the sawhorse.

Top of the door with one screw
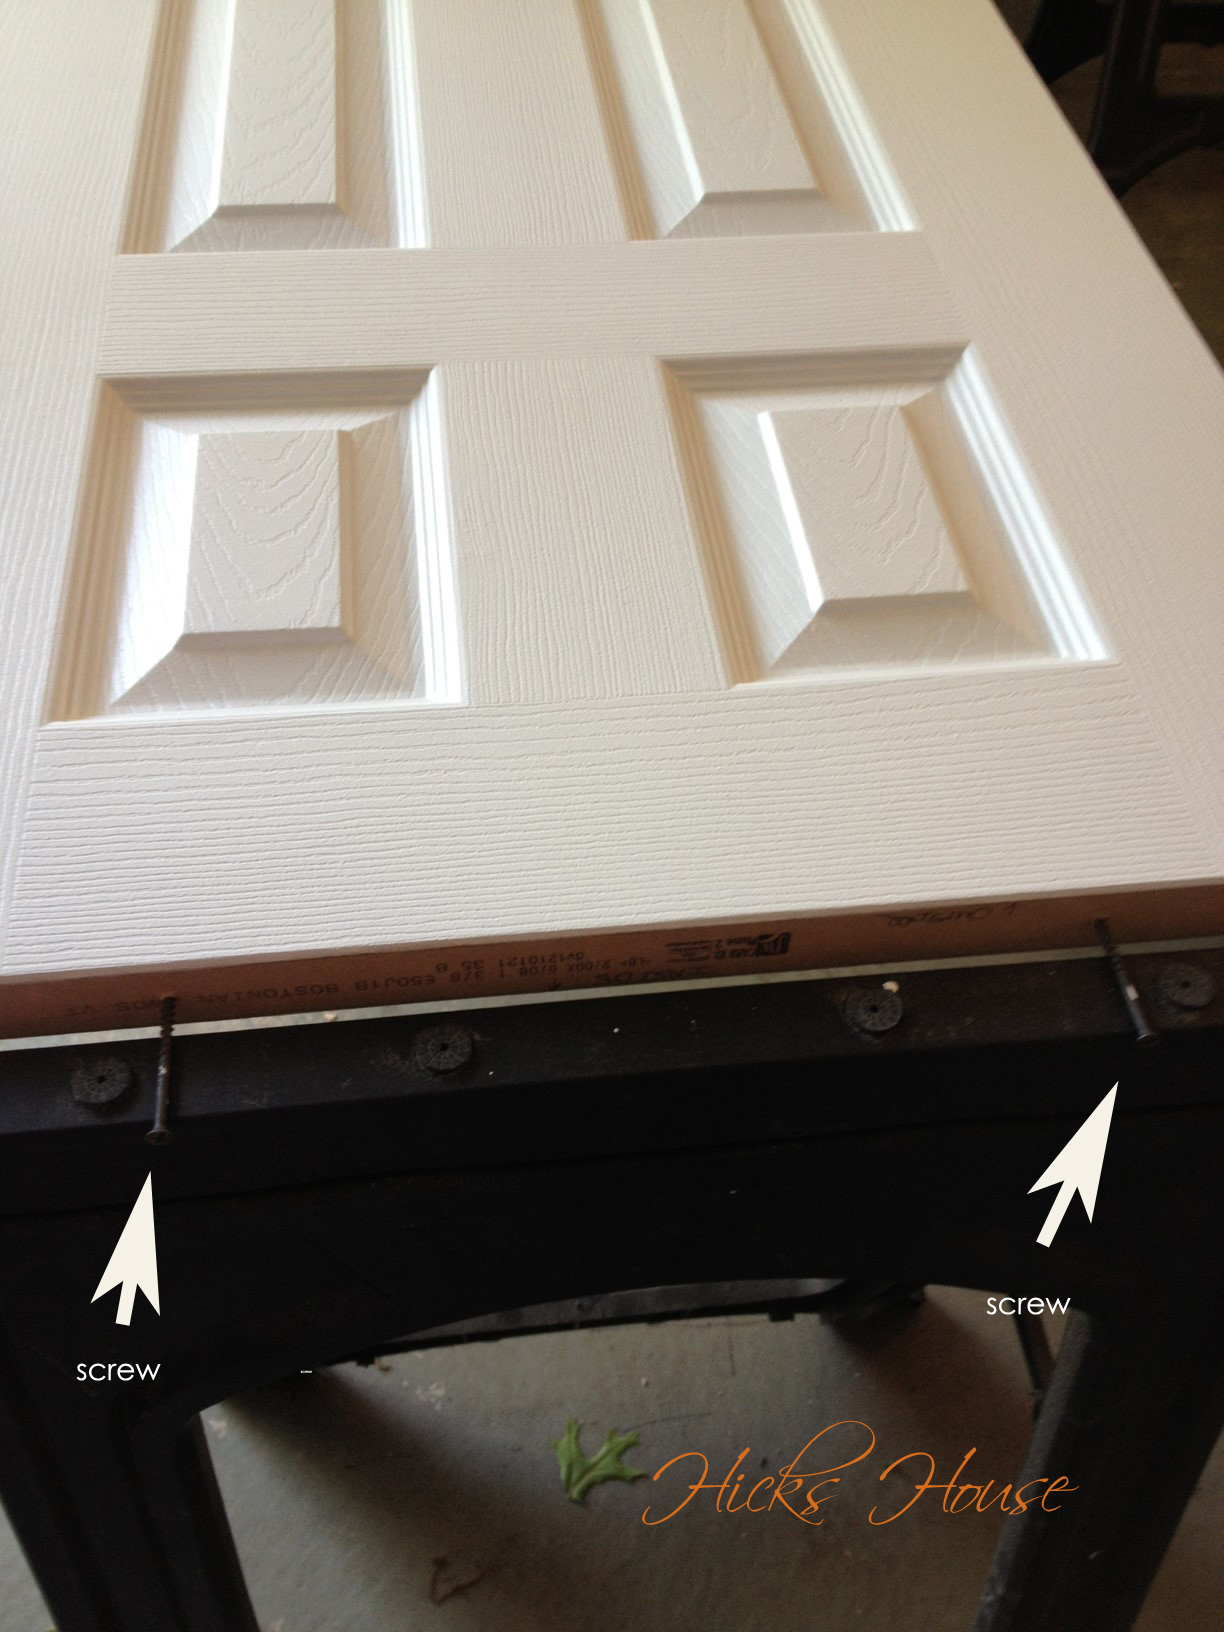
Bottom of the door with two screws
See how the door is balancing on the screws? This is important, you’ll see why in a minute. Don’t worry about the little holes this will create as once the door is hung you won’t be able to see the top or bottom edges.
Step 2 – Paint the door. We used Beher Ultra Premium Ultra Pure White Trim and Door paint in Eggshell and rolled all the flat parts of the door then did the panel cut outs with a brush making sure to get the corners real good.
Step 3 – Flip it! That’s right you don’t need to wait for it to dry because the door isn’t touching anything! Here’s how: On the end of the door that has two screws, pick up one screw in each hand just enough so the side with one screw doesn’t lift off the saw horse.
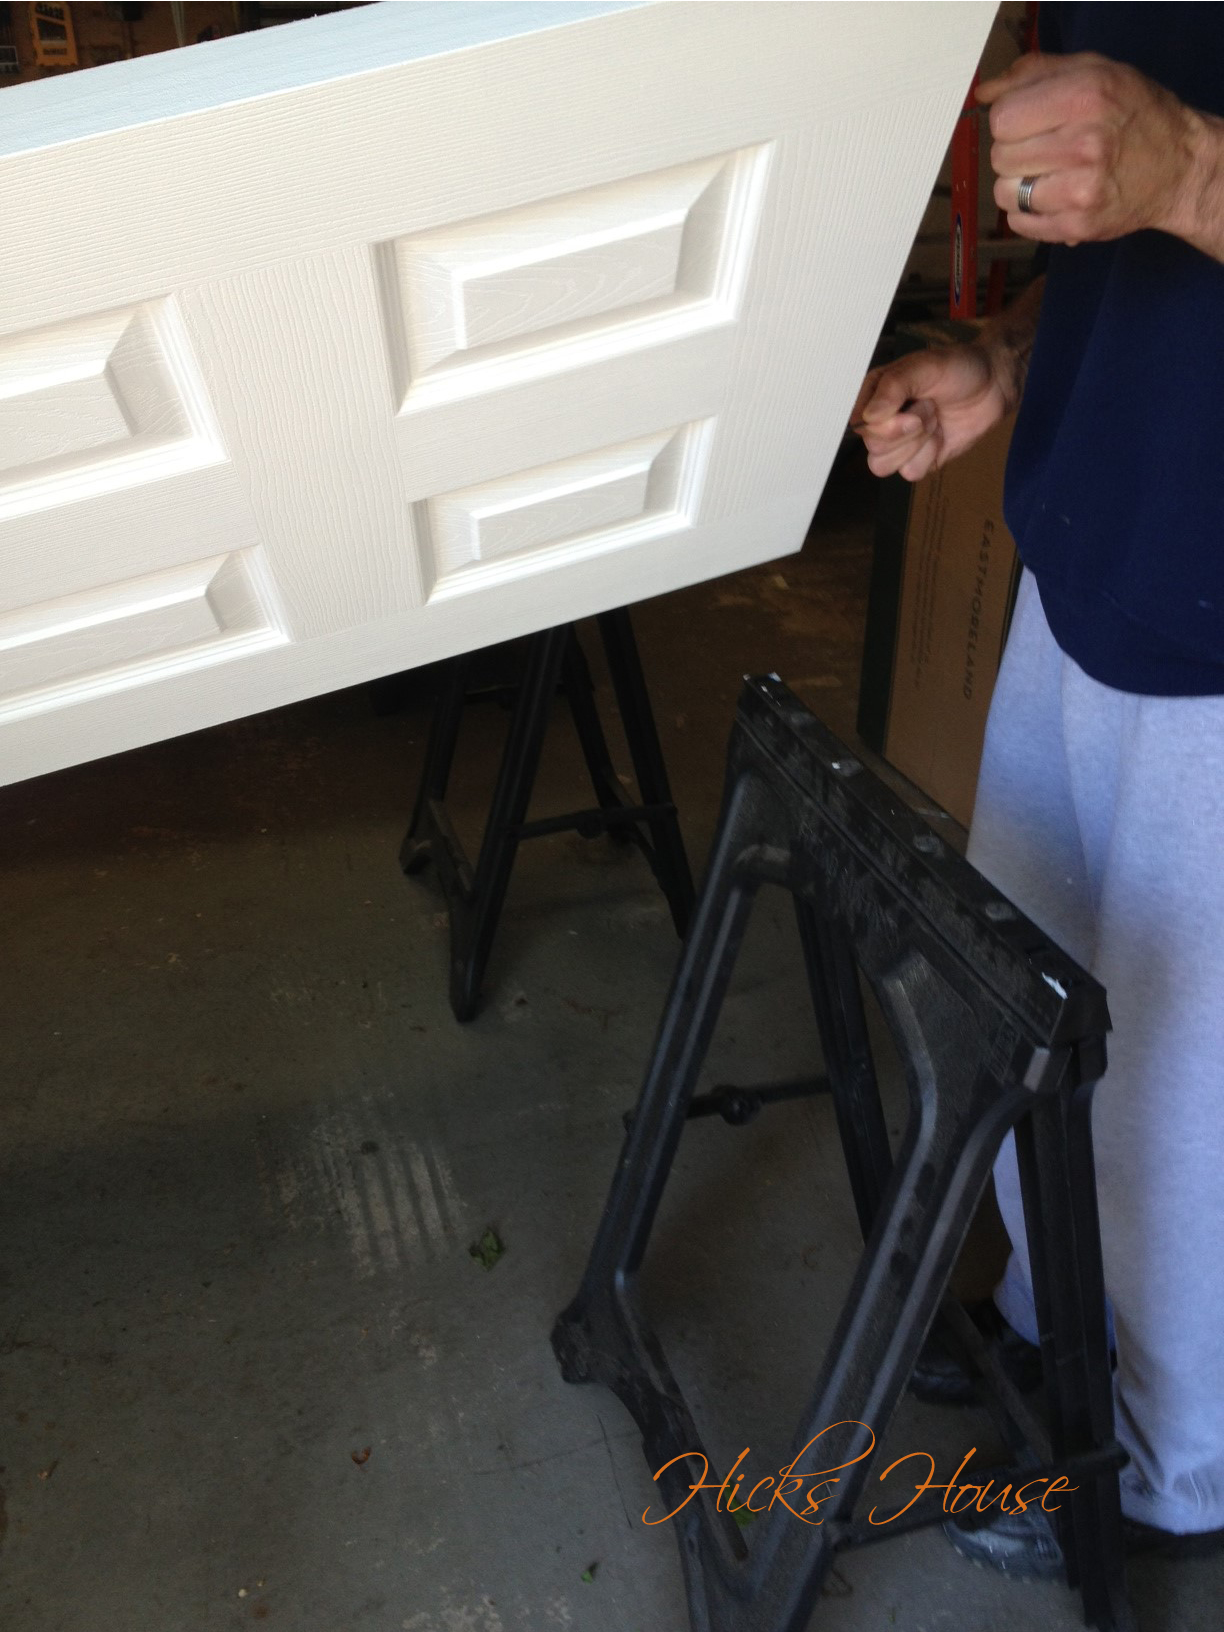
Pick up the two screws
See how the door is balanced on the one screw?
Flip it 180° so the unpainted side is pointed up and then rest the two screws back on the sawhorse. You can know pain the other side while the first side dries. I know, my mind was blown as well. My husband is a genius.

Three doors set up all at once.
We had more than 6 doors to do and only room to do three at a time, so we also came up with a neat way of drying them in order to free-up the sawhorses. Again the screws came in handy. Ken tied a wire around the top screw then we stood them up on the bottom two screws and tied them to some sort of pipe hanging from the ceiling of the garage. (This made me nervous but I was assured it was OK and nothing bad happened)

Drying station
If you’ve ever tried to paint doors by resting it on the sawhorse or worse not taking it off the hinges, this method will change your life. (for the few times in your life you have to paint doors anyway)
