Hicks House

From Builder Basic to Beautiful


2 Comments

Half Bath goes Blue

The painting continues over here at Hicks House. You may remember our color scheme that I shared at the begining of the year. So far I’ve shared “finished” pictures of the dining room and halls, the next room to get the royal treatment was the half bathroom downstairs.

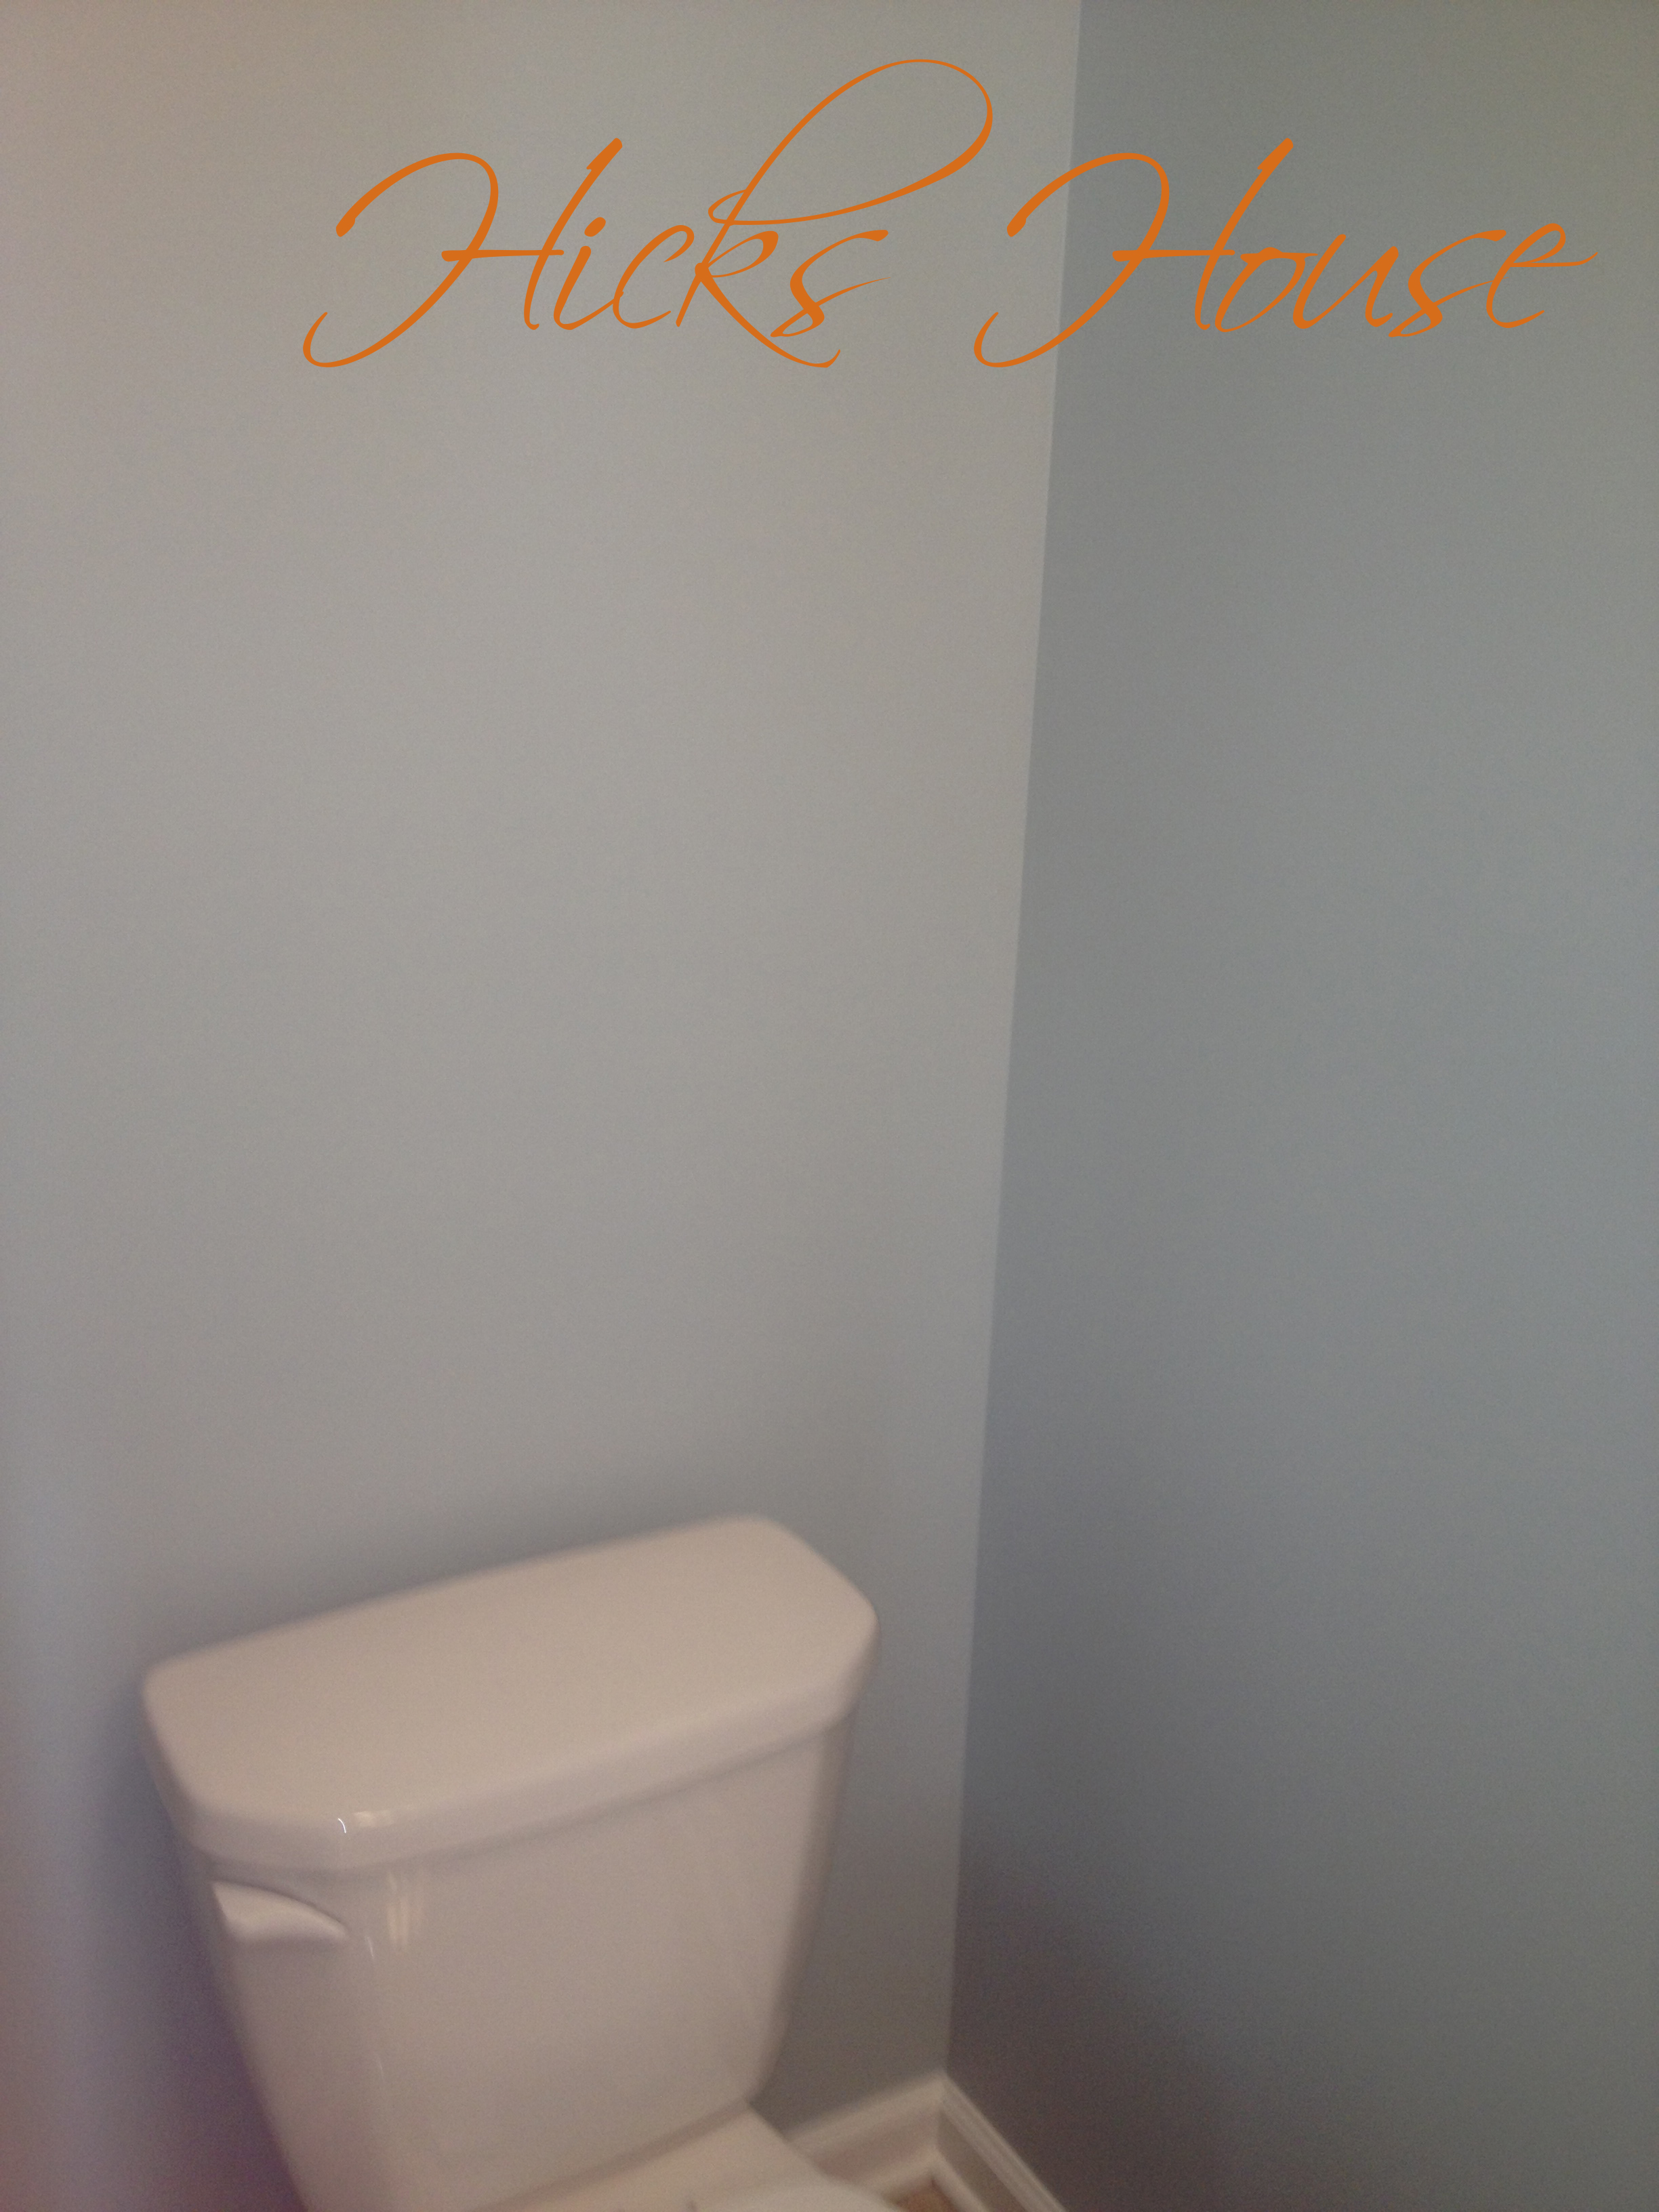
From the color chart you can see that we chose Woodlawn Blue for this room. So far of the rooms we’ve painted this is Ken’s favorite color. It’s a very soothing light blue that feels very “spa-like.” It didn’t photograph all too well (story of this blog – if you’re reading this I could use a new camera – that would be a nice gift…) mostly I think because the room is so small its hard to photograph especially since I didn’t want to be seen in the mirror reflection (I hate that). But here it is:
Hicks House | Half Bath | Woodlawn Blue

The tightness of the room was also challenging to paint, I couldn’t fit the full sized ladder in here so I had to cut in the ceiling on a step stool standing on my tip-toes. Great for working out your calves… not so great for straight lines. Also painting behind the sink required me to twist up and around the pedestal sink to get around all the water lines. Not my finest moment.

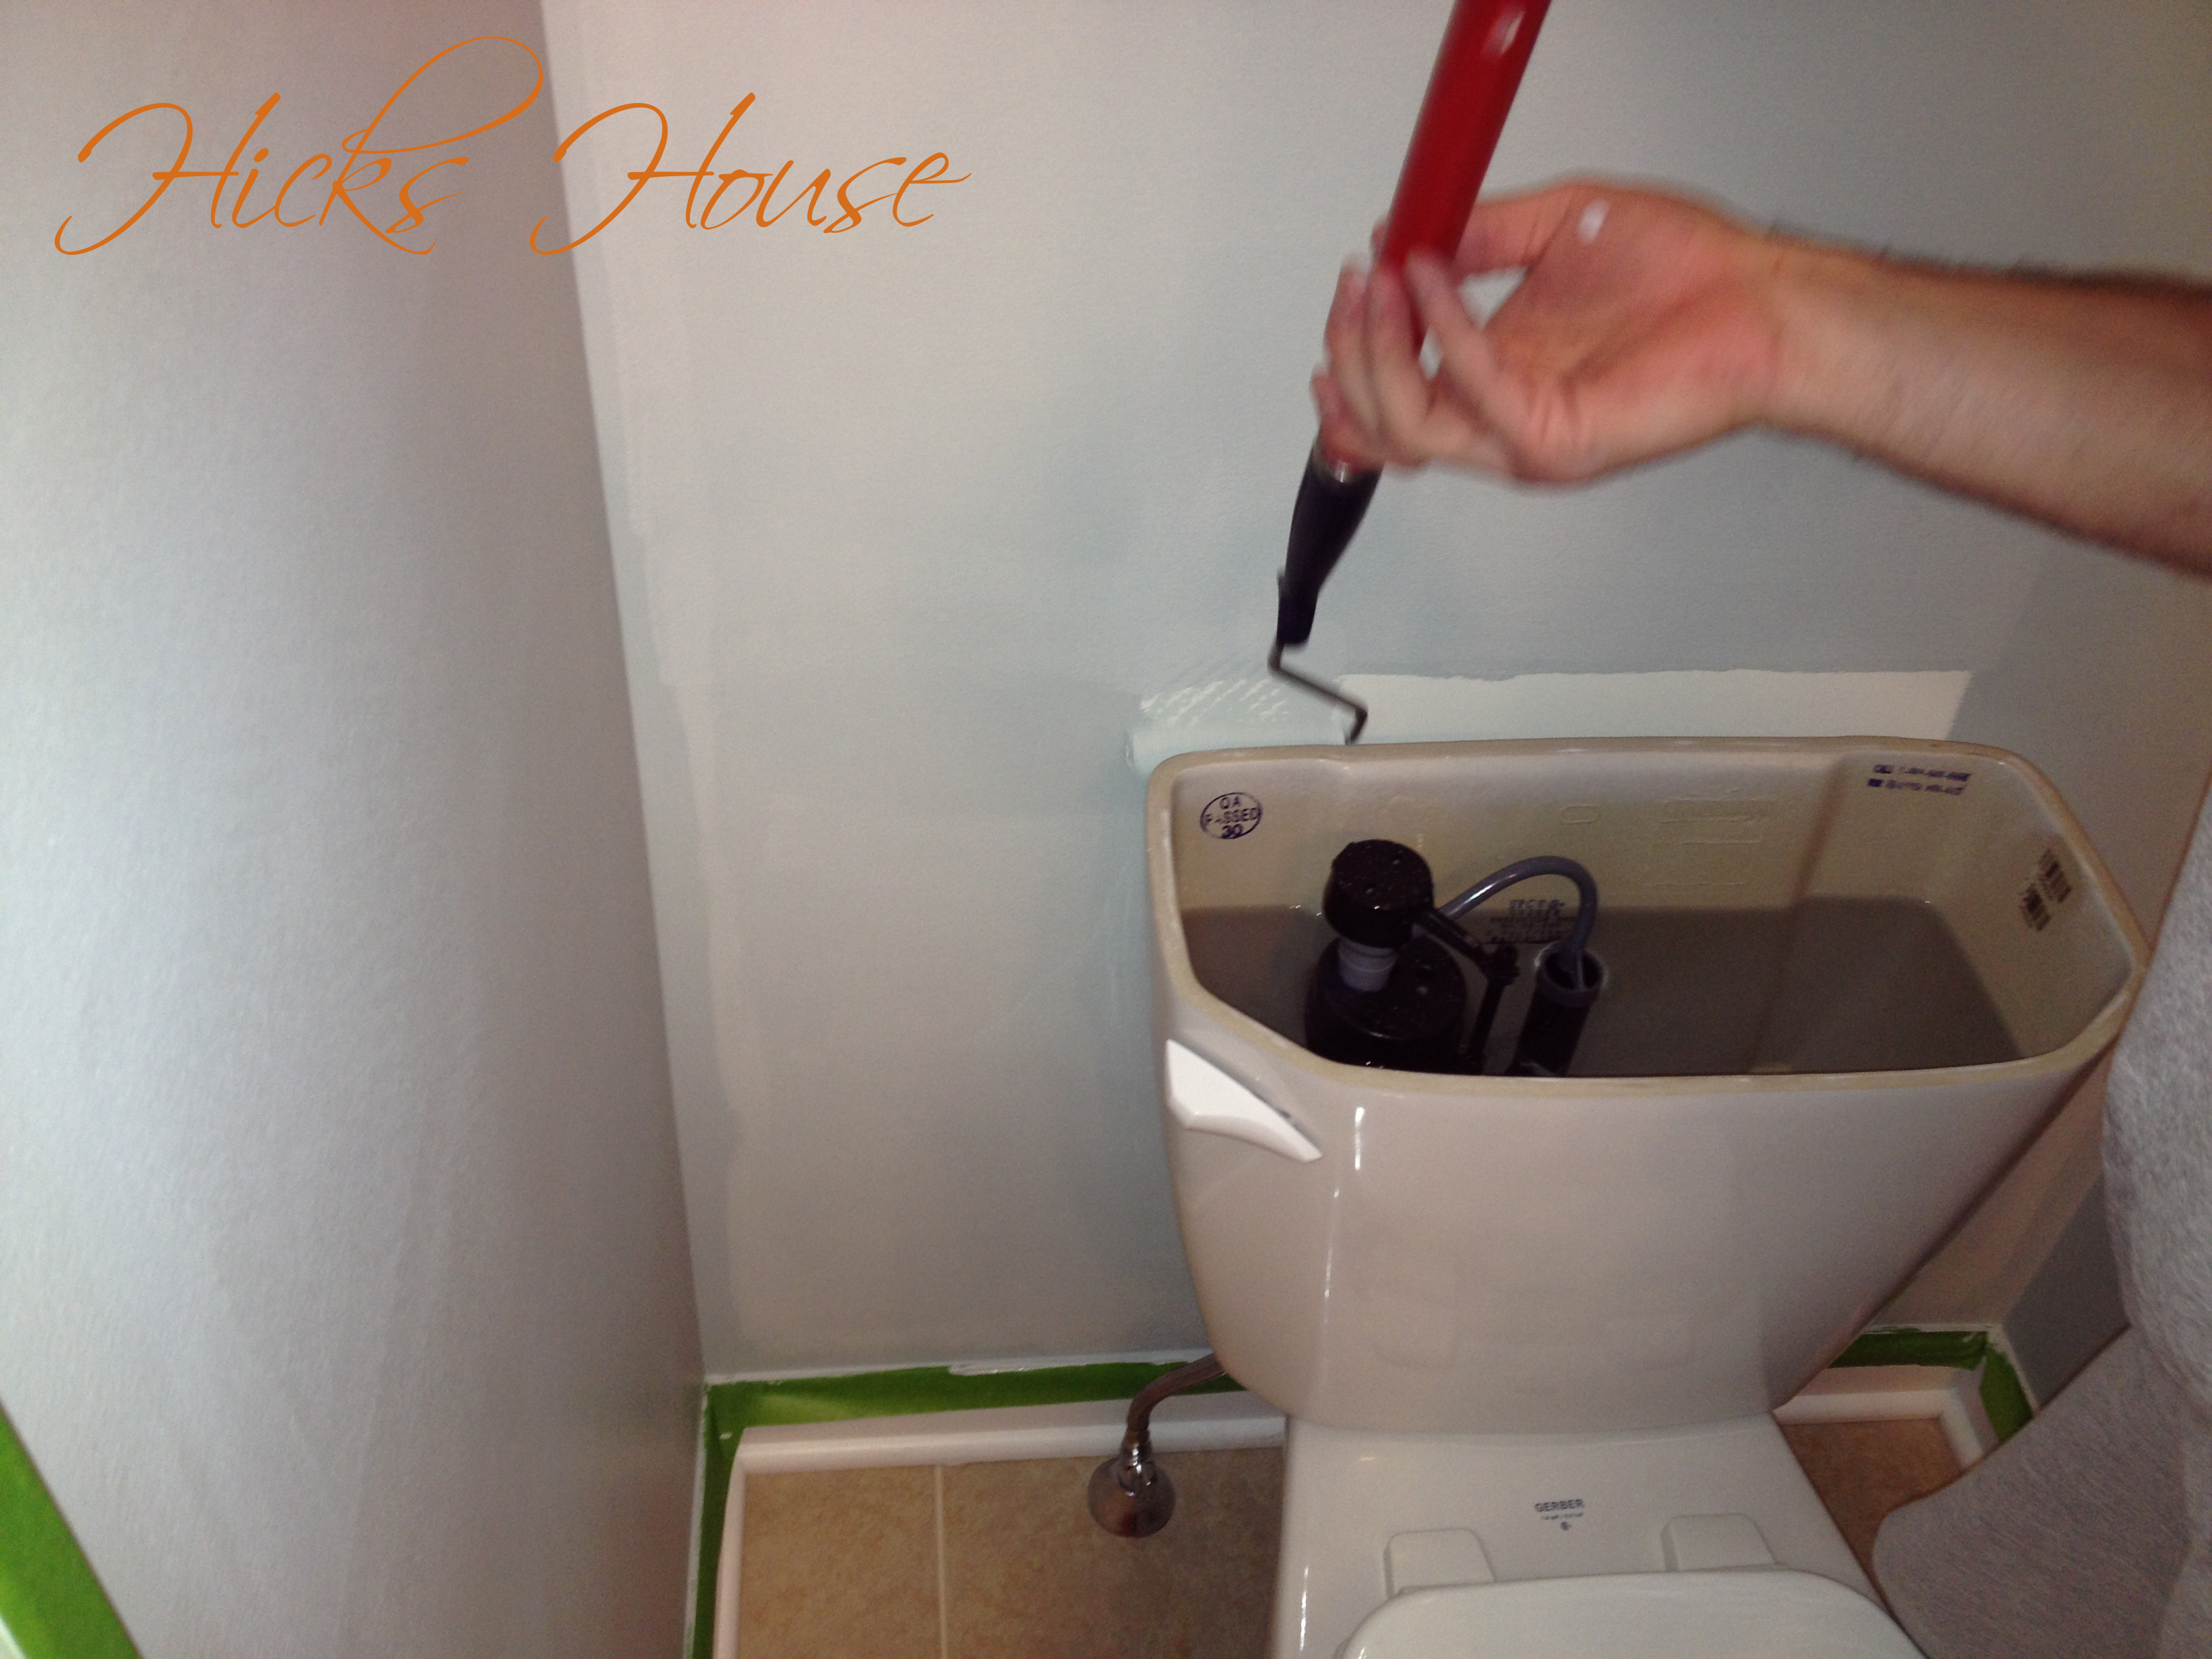
Luckily painting behind the toilet wasn’t as difficult. In the condo when we had painted the bathrooms we also had to remove wallpaper requiring us to remove the entire toilet, something we really did not want to do So we looked for something and some way we could paint behind the toilet while leaving it in place. We had seen small rollers in the store before however they had always been foam so you could see the texture difference on the wall between the foam rollers and the fabric rollers.

Then we found these:
Hicks House | Half Bath | Woodlawn Blue

Fabric Mini Rollers they looked like they were the perfect size to fit behind the tank and the wall. So we found a long handle screwed it onto the mini roller, removed the top of the tank and tested it out – perfect. Here’s a size comparison with a regular size roller:
Hicks House | Half Bath | Woodlawn Blue

And here it is painting behind the toilet.
Hicks House | Half Bath | Woodlawn Blue

I know not the most exciting post in the world but we’re pretty excited to have one more painted room in the house. Since this bathroom is off the hall and next to the dining room, that half of the downstairs is done which is a huge accomplishment.

So here’s where our half bathroom list stands:

  • paint walls
  • get new light fixture for ove sink
  • get new mirror? or frame the mirror?
  • add toilet paper and towel holders

So what do you think, would you paint your bathroom or any other walls in your home Woodlawn Blue?
Hicks House


2 Comments

Ribbon Embossed Muslin Pillow

Hicks House | Ribbon Embossed Muslin Pillow

This is somewhat of an addendum to my Zippered Pillow Cover Tutorial

as I used the same basic assembly method.

As part of the never-ending quest to personalize this here Hicks House I am trying to work in custom pieces in with the pieces I purchase. When I purchased the sofa it came with two WAY overstuffed pillows on it. As the sofa is on the small side these gigantic pillows made sitting on the sofa next to impossible. Thus the pillows were removed and covered for the guest room in the original pillow tutorial where they work perfectly.

I was unsure at first what to do because although I love the look of lots of pillows on sofas, I don’t want to have to remove them whenever I want to sit down. Then on my first ever trip to IKEA (don’t judge me – I just went for the first time) I found these pillow inserts for less than $5!

Hicks House | Ribbon Embossed Pillow

They were meant to be used in conjunction with their pillow covers – however you cannot beat the price and they were just fluffy enough to give the look I wanted but still smoosh when you sat on it.

It just so happened I had a ton of muslin left over from years ago when I was first learning how to sew. It was the perfect oatmeal color to match the chairs in the living room. So I cut the fabric to size 1/2 inch wider and longer than my pillow so 16.5 x 24.5 (since this pillow is low on the fluff factor.) The only problem with muslin is that it’s so thin. Easily remedied by adding some fusible fleece interfacing to the back side.

Hicks House | Ribbon Embossed Muslin Pillow

Then I got started laying out my design with 1/4 inch gray ribbon that matches the sofa. I measured 4 inches up from the long edge of my fabric (I figured 4 inches up from the top and bottom would leave about 7.5 inches in the middle of the ribbon border – seemed like a good guestimate) and started pinning the ribbon directly to the fabric measuring at various intervals to ensure the line was straight.
Hicks House | Ribbon Embossed Pillow

I kept going until I was about 1.5 inches from the edge. Remember not to get too close about 1/4 – 1/2 inch will be your inseam and you don’t want your design too close to the edge. To turn the corner I folded the ribbon directly down:
Hicks House | Ribbon Embossed Muslin Pillow
Then up creating a box corner.
Hicks House | Ribbon Embossed Muslin Pillow

Make sure to pin very well. Make another corner going in the other direction 1.5 inches from the next edge.
Hicks House | Ribbon Embossed Muslin Pillow

Then create a third turn that folds back over your original line creating a square.
Hicks House | Ribbon Embossed Muslin Pillow

Continue pinning your straight line 4 inches from the edge of the fabric until you reach the 1.5 inches from the edge then repeat your corner process to create a second box. Repeat two more times and you have this.
Hicks House | Ribbon Embossed Muslin Pillow

For a nice clean edge fold over the top piece of ribbon where it overlaps your starting point.
Hicks House | Ribbon Embossed Muslin Pillow

This is where you will begin sewing along one edge of the ribbon – Make sure to backstitch at the beginning.
Hicks House | Ribbon Embossed Muslin Pillow

This is probably the most important step in the entire tutorial for having a professional looking finished product… When you get to the areas that overlap backstitch when you reach the overlap then stitch back to right where your top ribbon is. PICK UP YOUR NEEDLE move it to after the overlap then backstitch again and continue on.
Hicks House | Ribbon Embossed Muslin Pillow

You will want to use your seam ripper to remove the extra thread.
Hicks House | Ribbon Embossed Muslin Pillow

Once you have made it all the way around the pillow repeat on the other side.
Hicks House | Ribbon Embossed Muslin Pillow

Here is a close up of a finished professional looking overlap. If you do not take the extra step to backstitch and move your needle you would have stitches in an # symbol where the ribbon overlaps (not necessarily a bad thing – personal preference).
Hicks House | Ribbon Embossed Muslin Pillow

The top of your pillow is now done!
Hicks House | Ribbon Embossed Muslin Pillow

Now follow the directions for the zippered pillow covers to complete your pillow.

Hicks House | Ribbon Embossed Muslin Pillow

There you have it! A one of a kind ribbon embossed pillow that cost less than $10 to make start to finish!

I also made the two pillows behind it using the zippered pillow cover tutorial. I just love how they work together with the gray and oatmeal colors.

What do you think?