
After over a year in our house, the day is finally approaching where we will be able to park both cars in our two car garage. Yes, you read that right TWO cars in a two-car garage. To some, this may seem like an obvious thing that would happen right at the beginning, however half of our garage has been devoted to the storage of the essentials (such as the riding mower, the snow blower) and the recreational (two dirt bikes) that prevented the second bay from being used for a car.
My friends that is about to change. That’s right, we’re getting a storage shed. Before any good shed can be delivered a base foundation needs to be set up. The retailer we purchased the shed from suggested crushed stone in an area one foot larger on all sides than the shed – that’s all well and good, but not very tidy – crushed stone could get everywhere.
Not to worry, Ken had a plan. He purchased several pressure treated 4×4’s and cut them to the lengths he needed plus 4 inches (I would go into super specifics but the overall length is dependednt on your base) used a dado blade to create lap joints that would overlap creating a longer base than the original 4×4. (you’ll see this in a later photo). Here is a video we found online on how this is done watch here.
This is what the lap joints looked like:
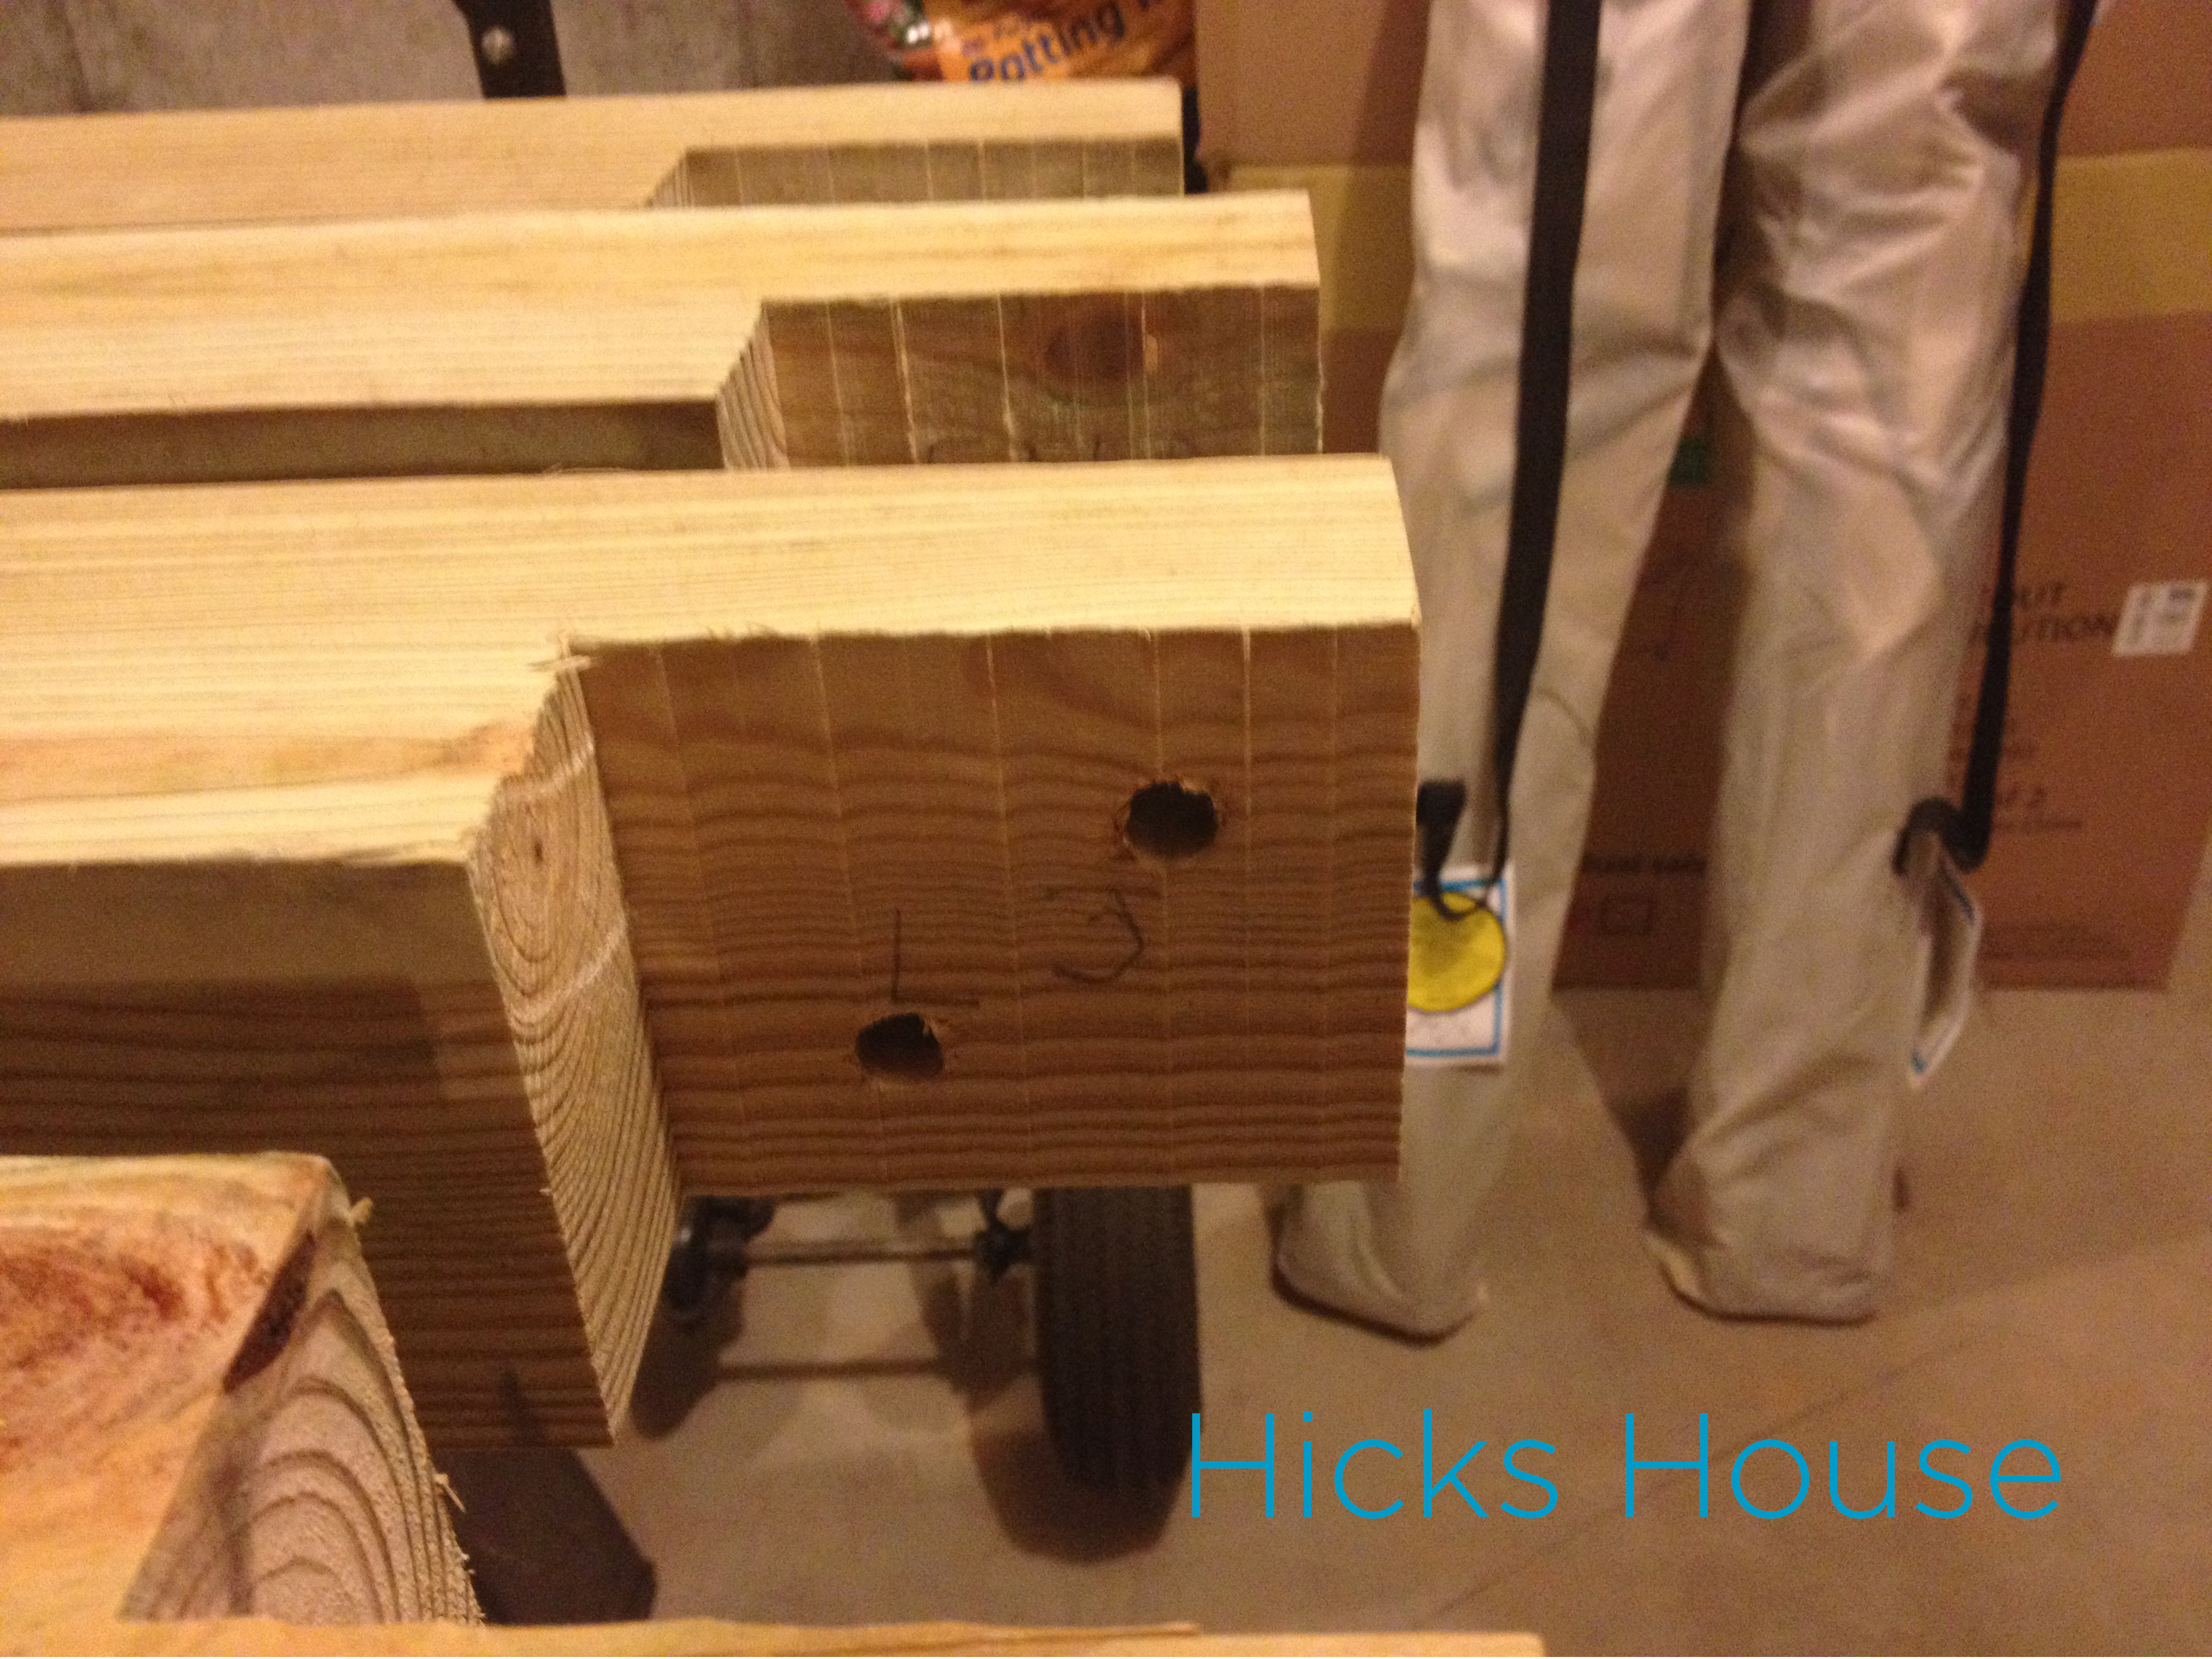
He then drilled those diagonal holes you see in the above shot. These are for the 6″ galvanized metal lag bolts that will hold the two pieces together.
Before we could move all the wood outside, the site needed to be measured out and leveled. This was mostly handled with a small tiller used to dig down the high spots.

Then we brought out all the wood pieces 8 in total and laid them out making sure they were level. This took some finagling.
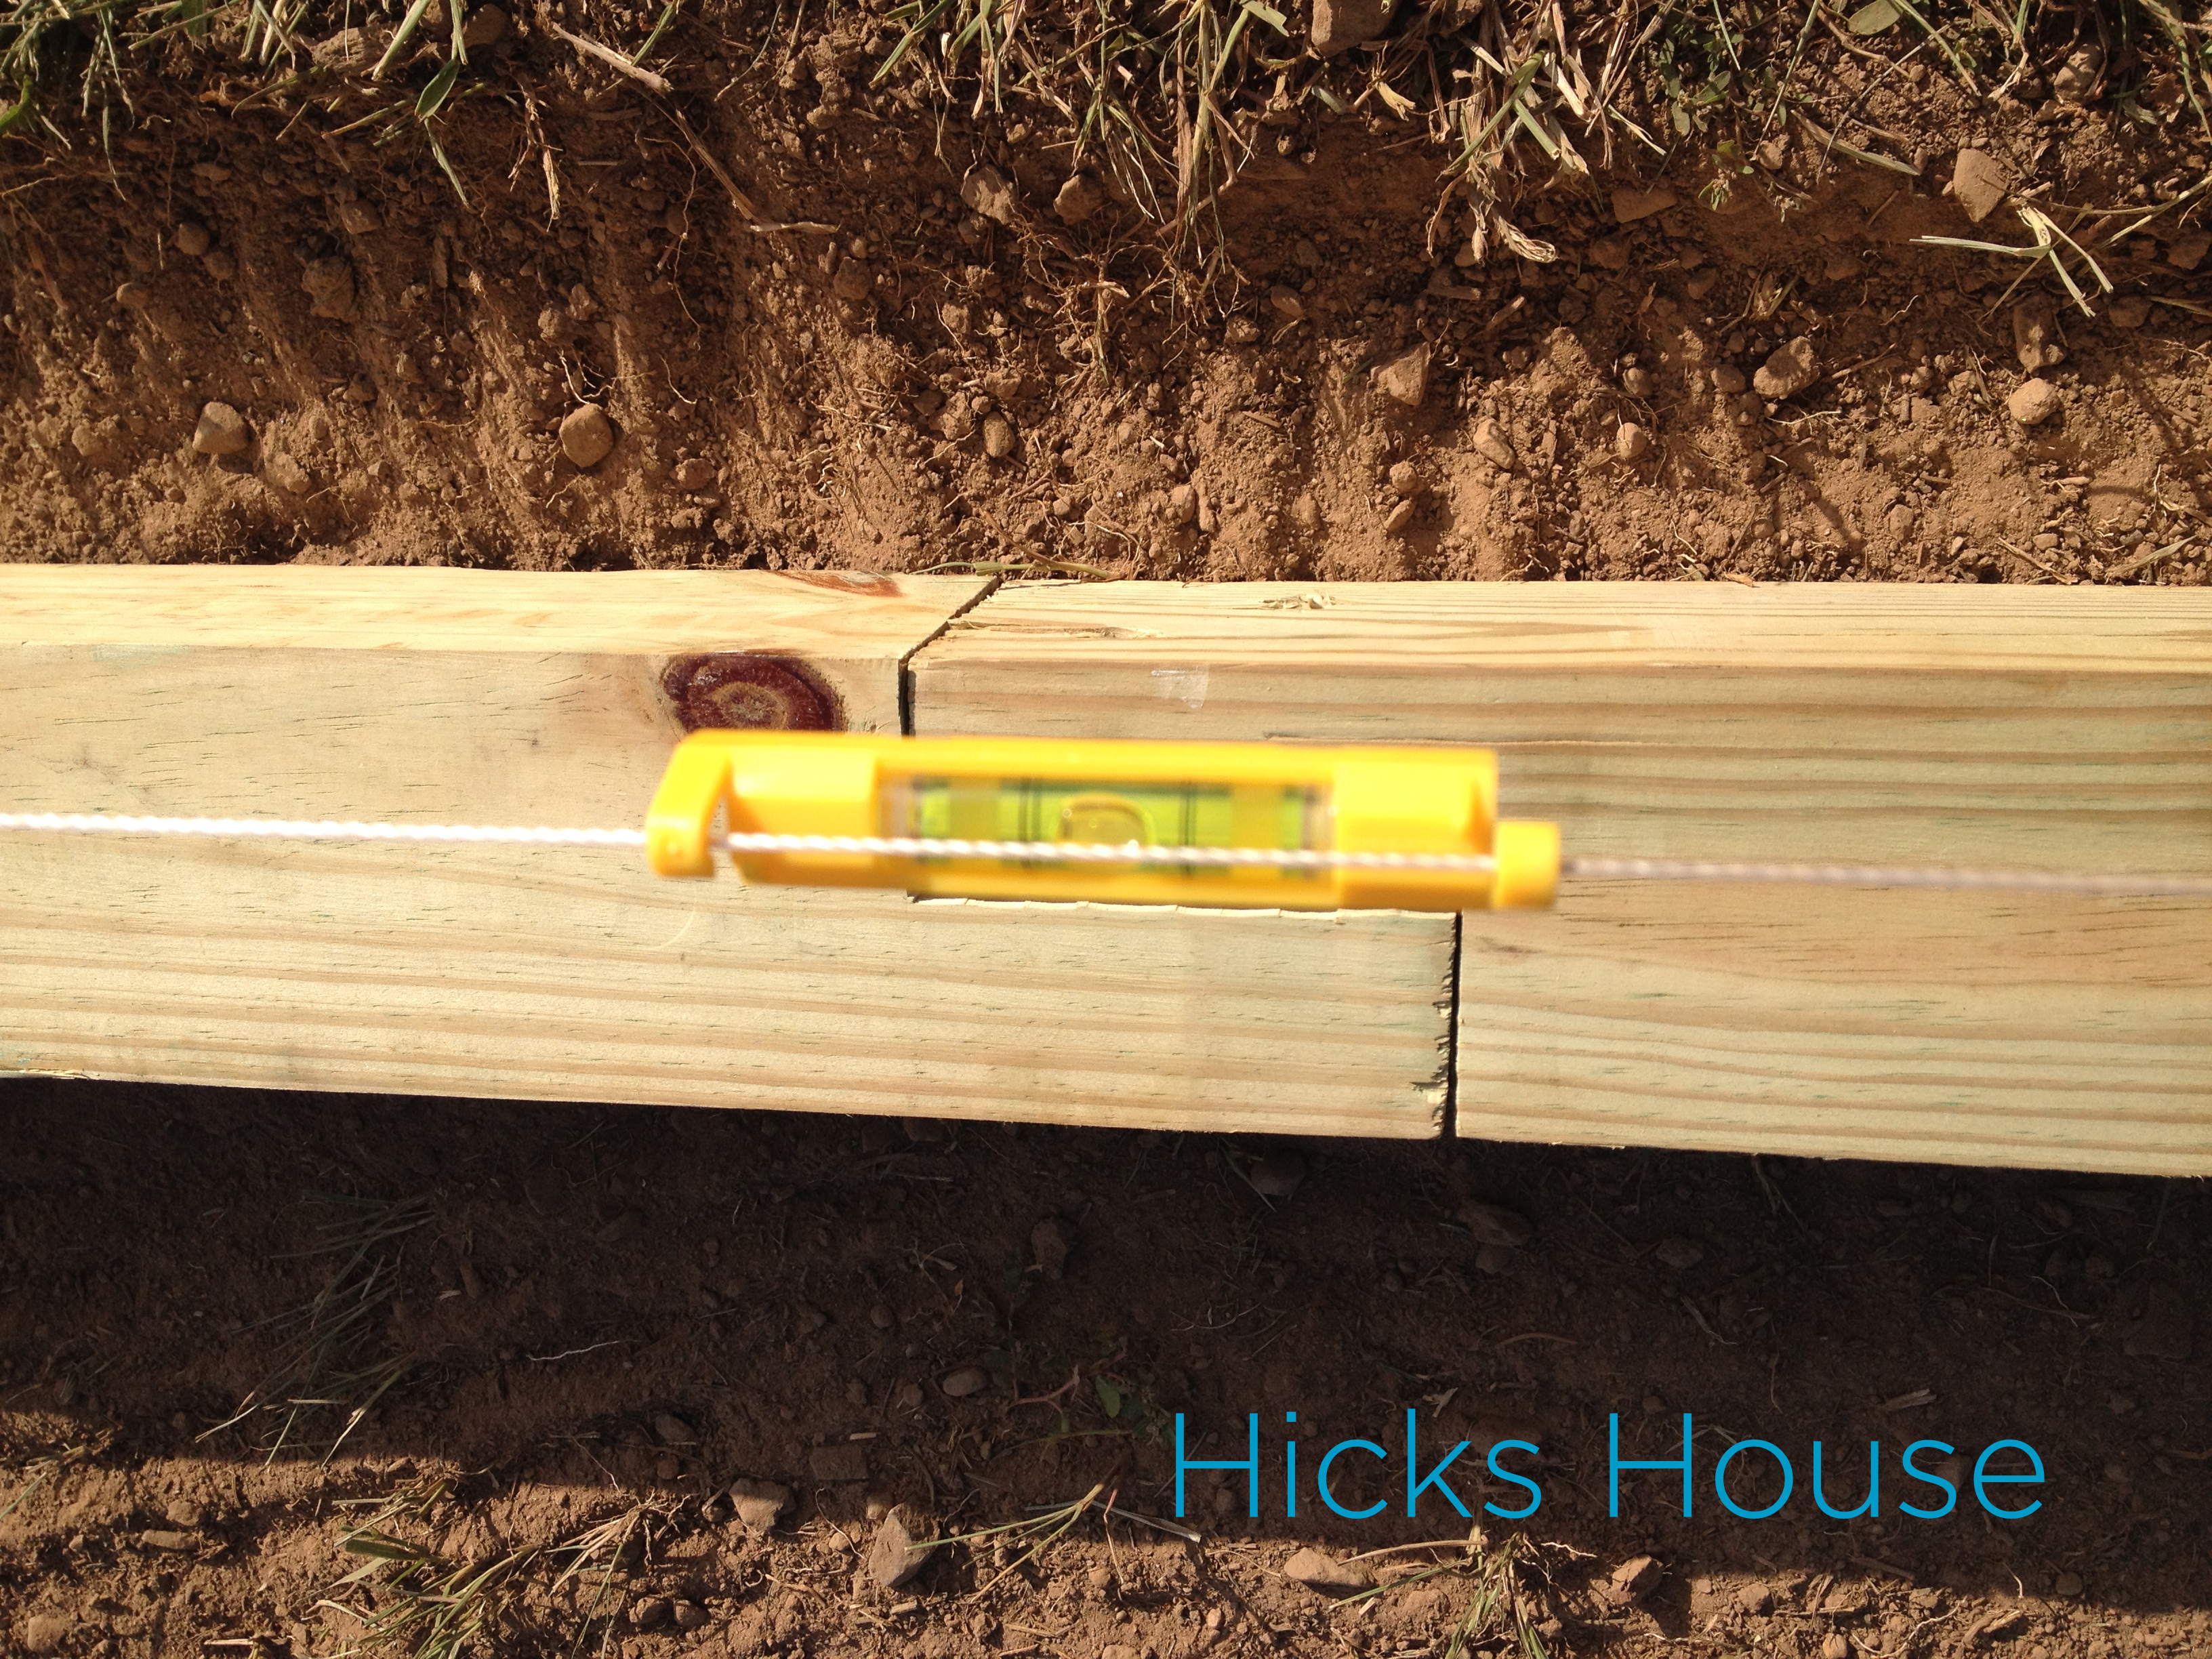
And here is a photo of the lap joint lined up and ready for the bolts.

The bolts were hammered in with a washer between the bolt head and wood.
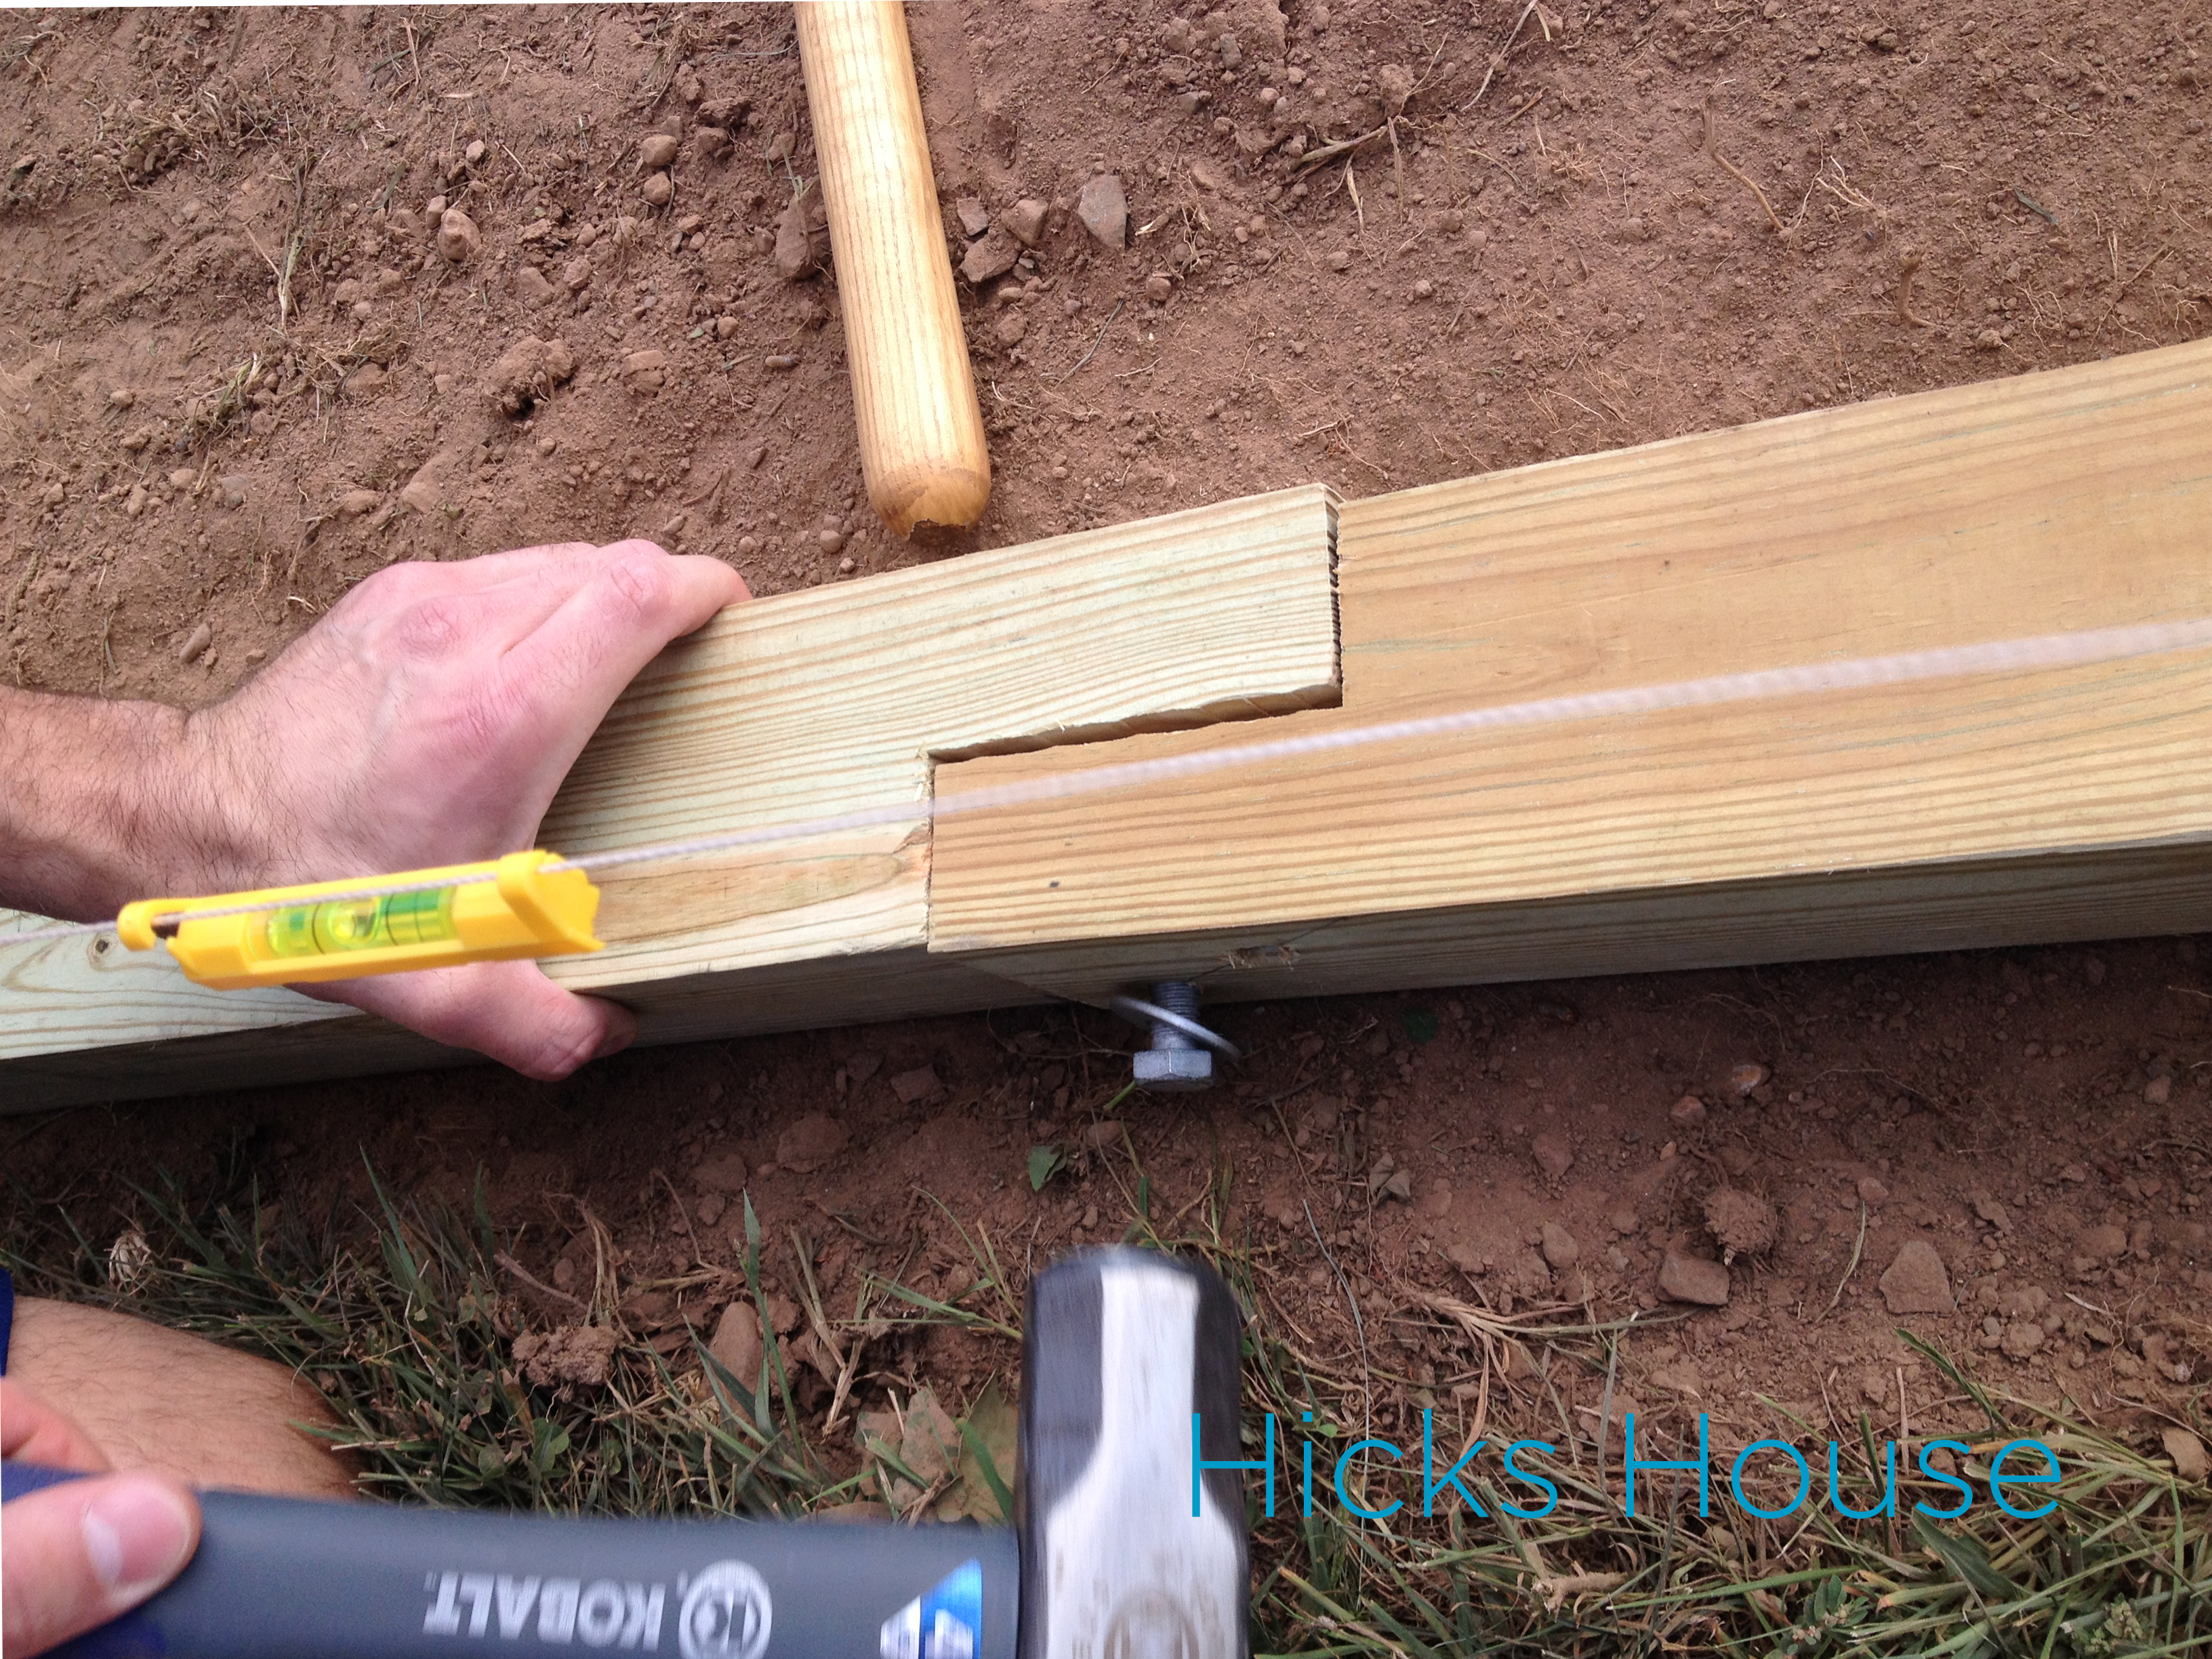
Then they were secured with a washer and nut on the opposite side. Here is a close up of the pieces bolted together as well as some of our weeds.

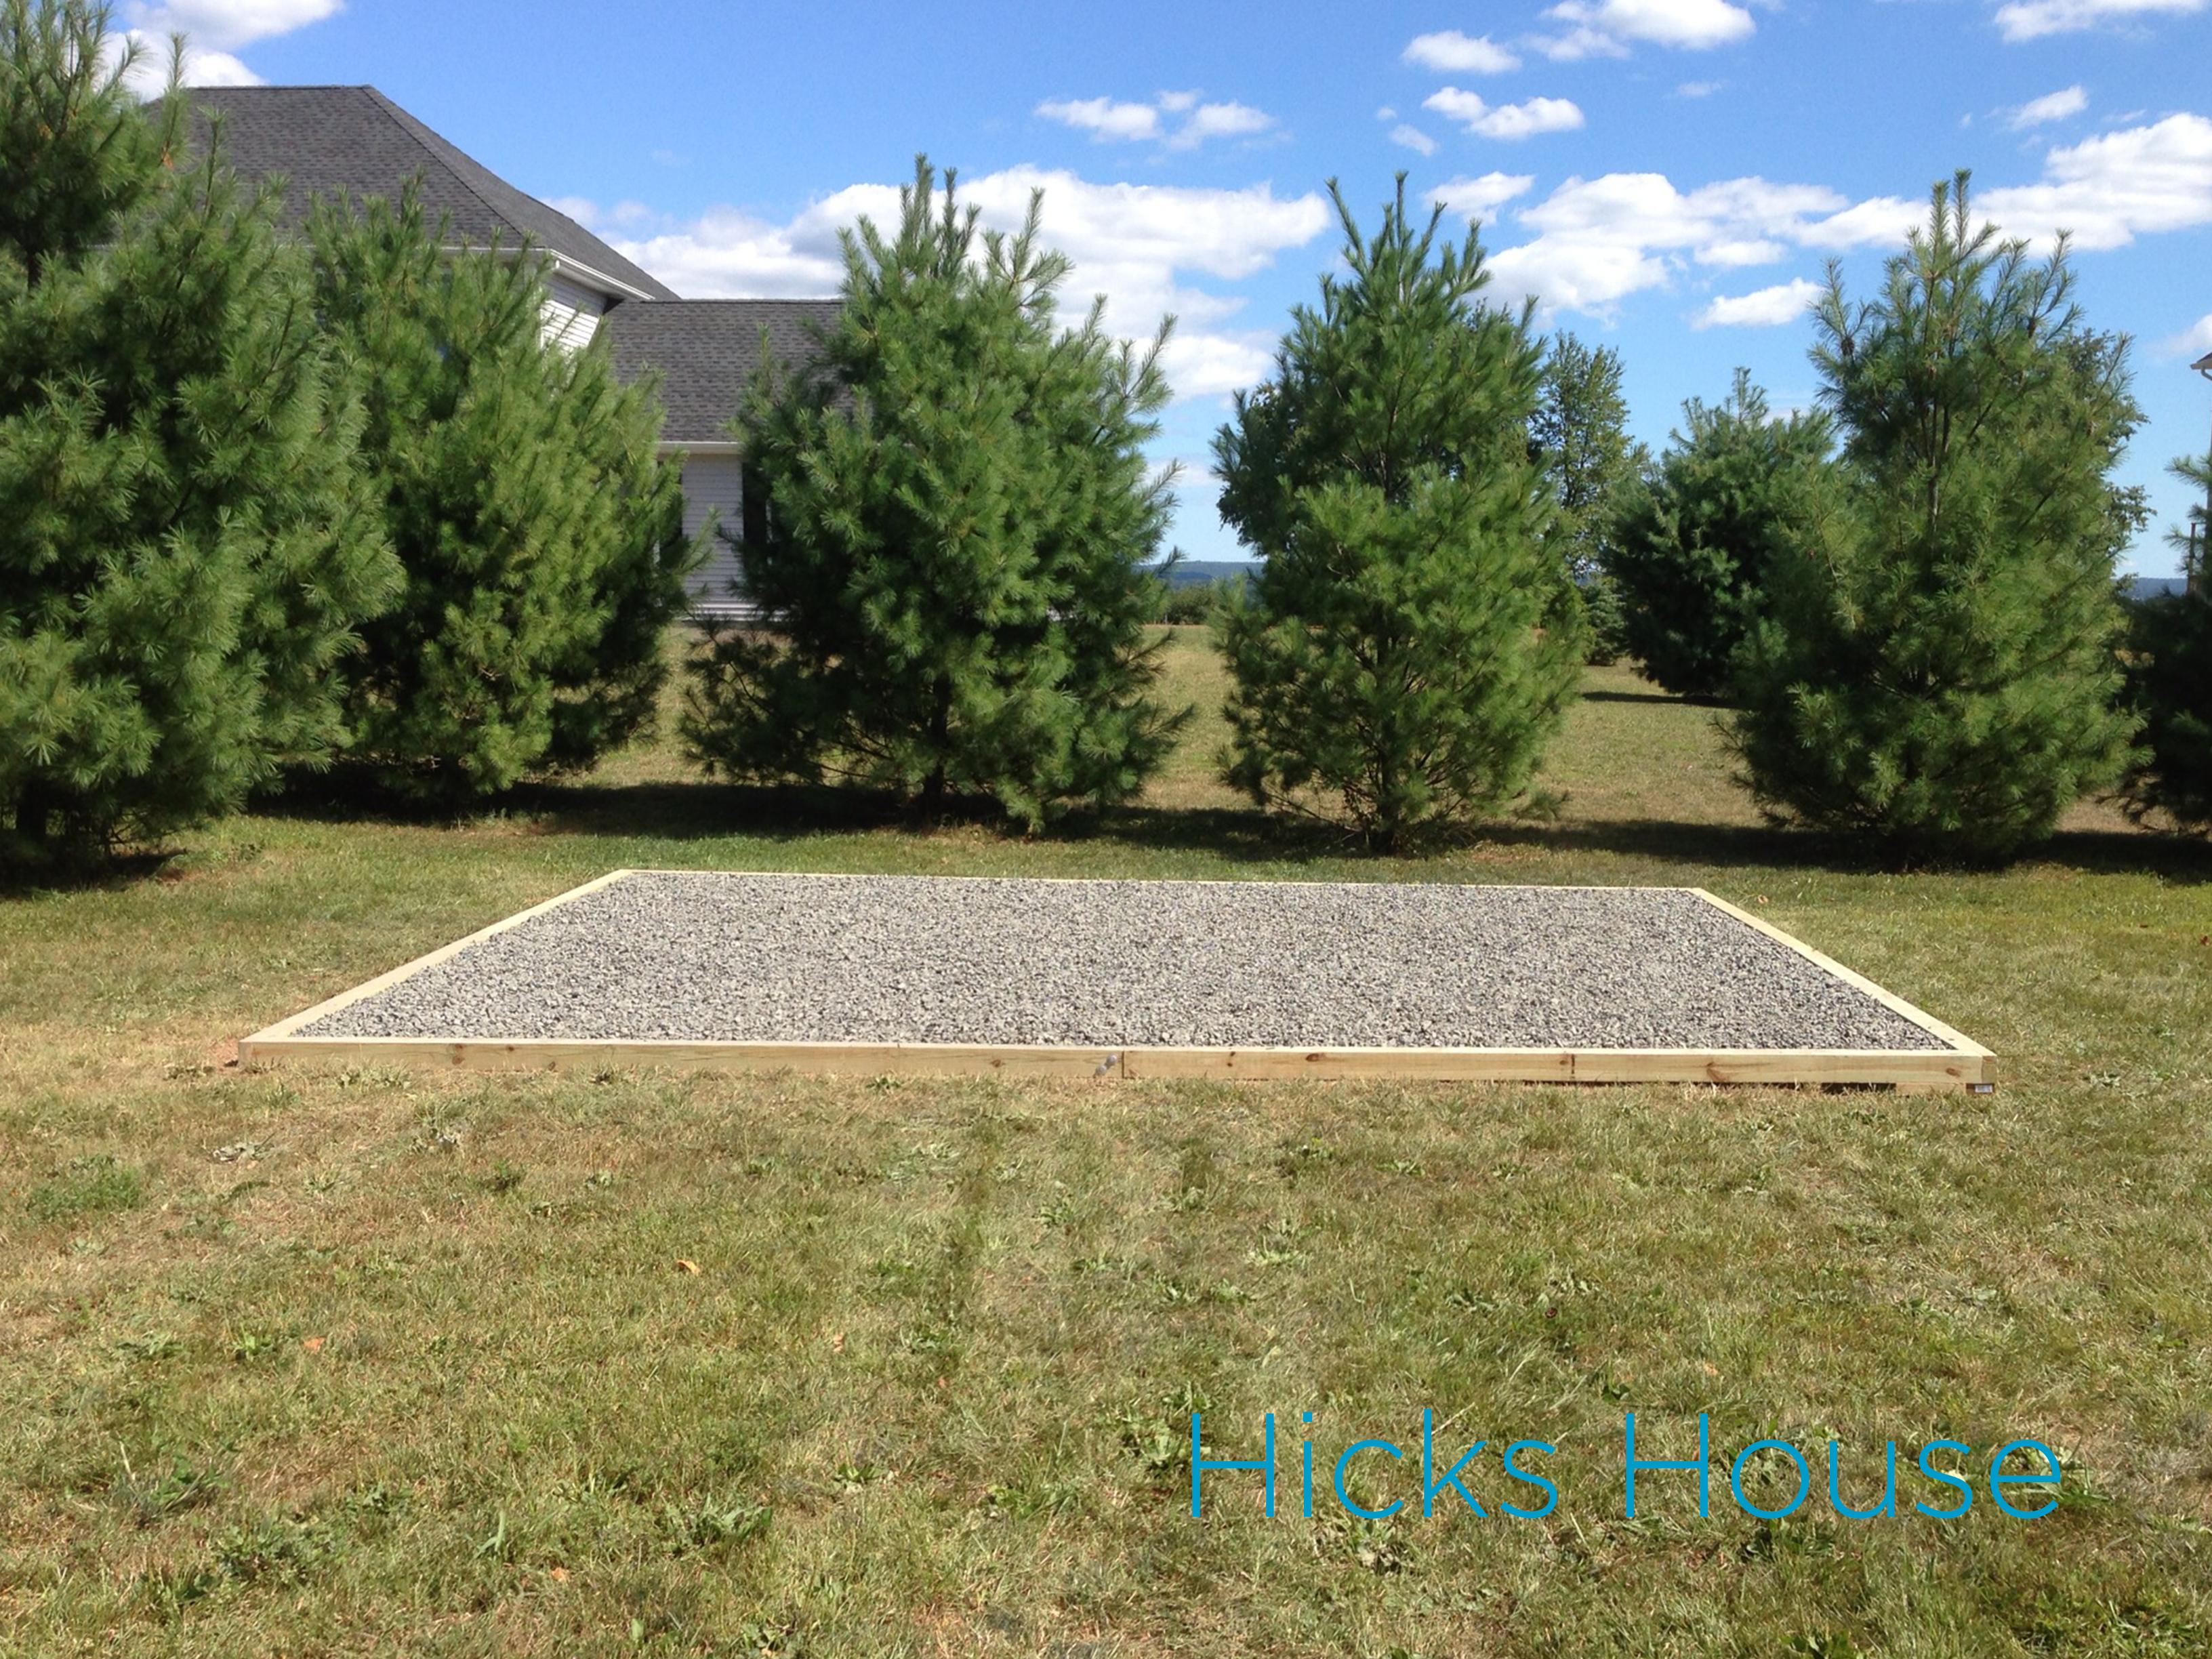
The entire structure then had to be lined in landscape fabric.
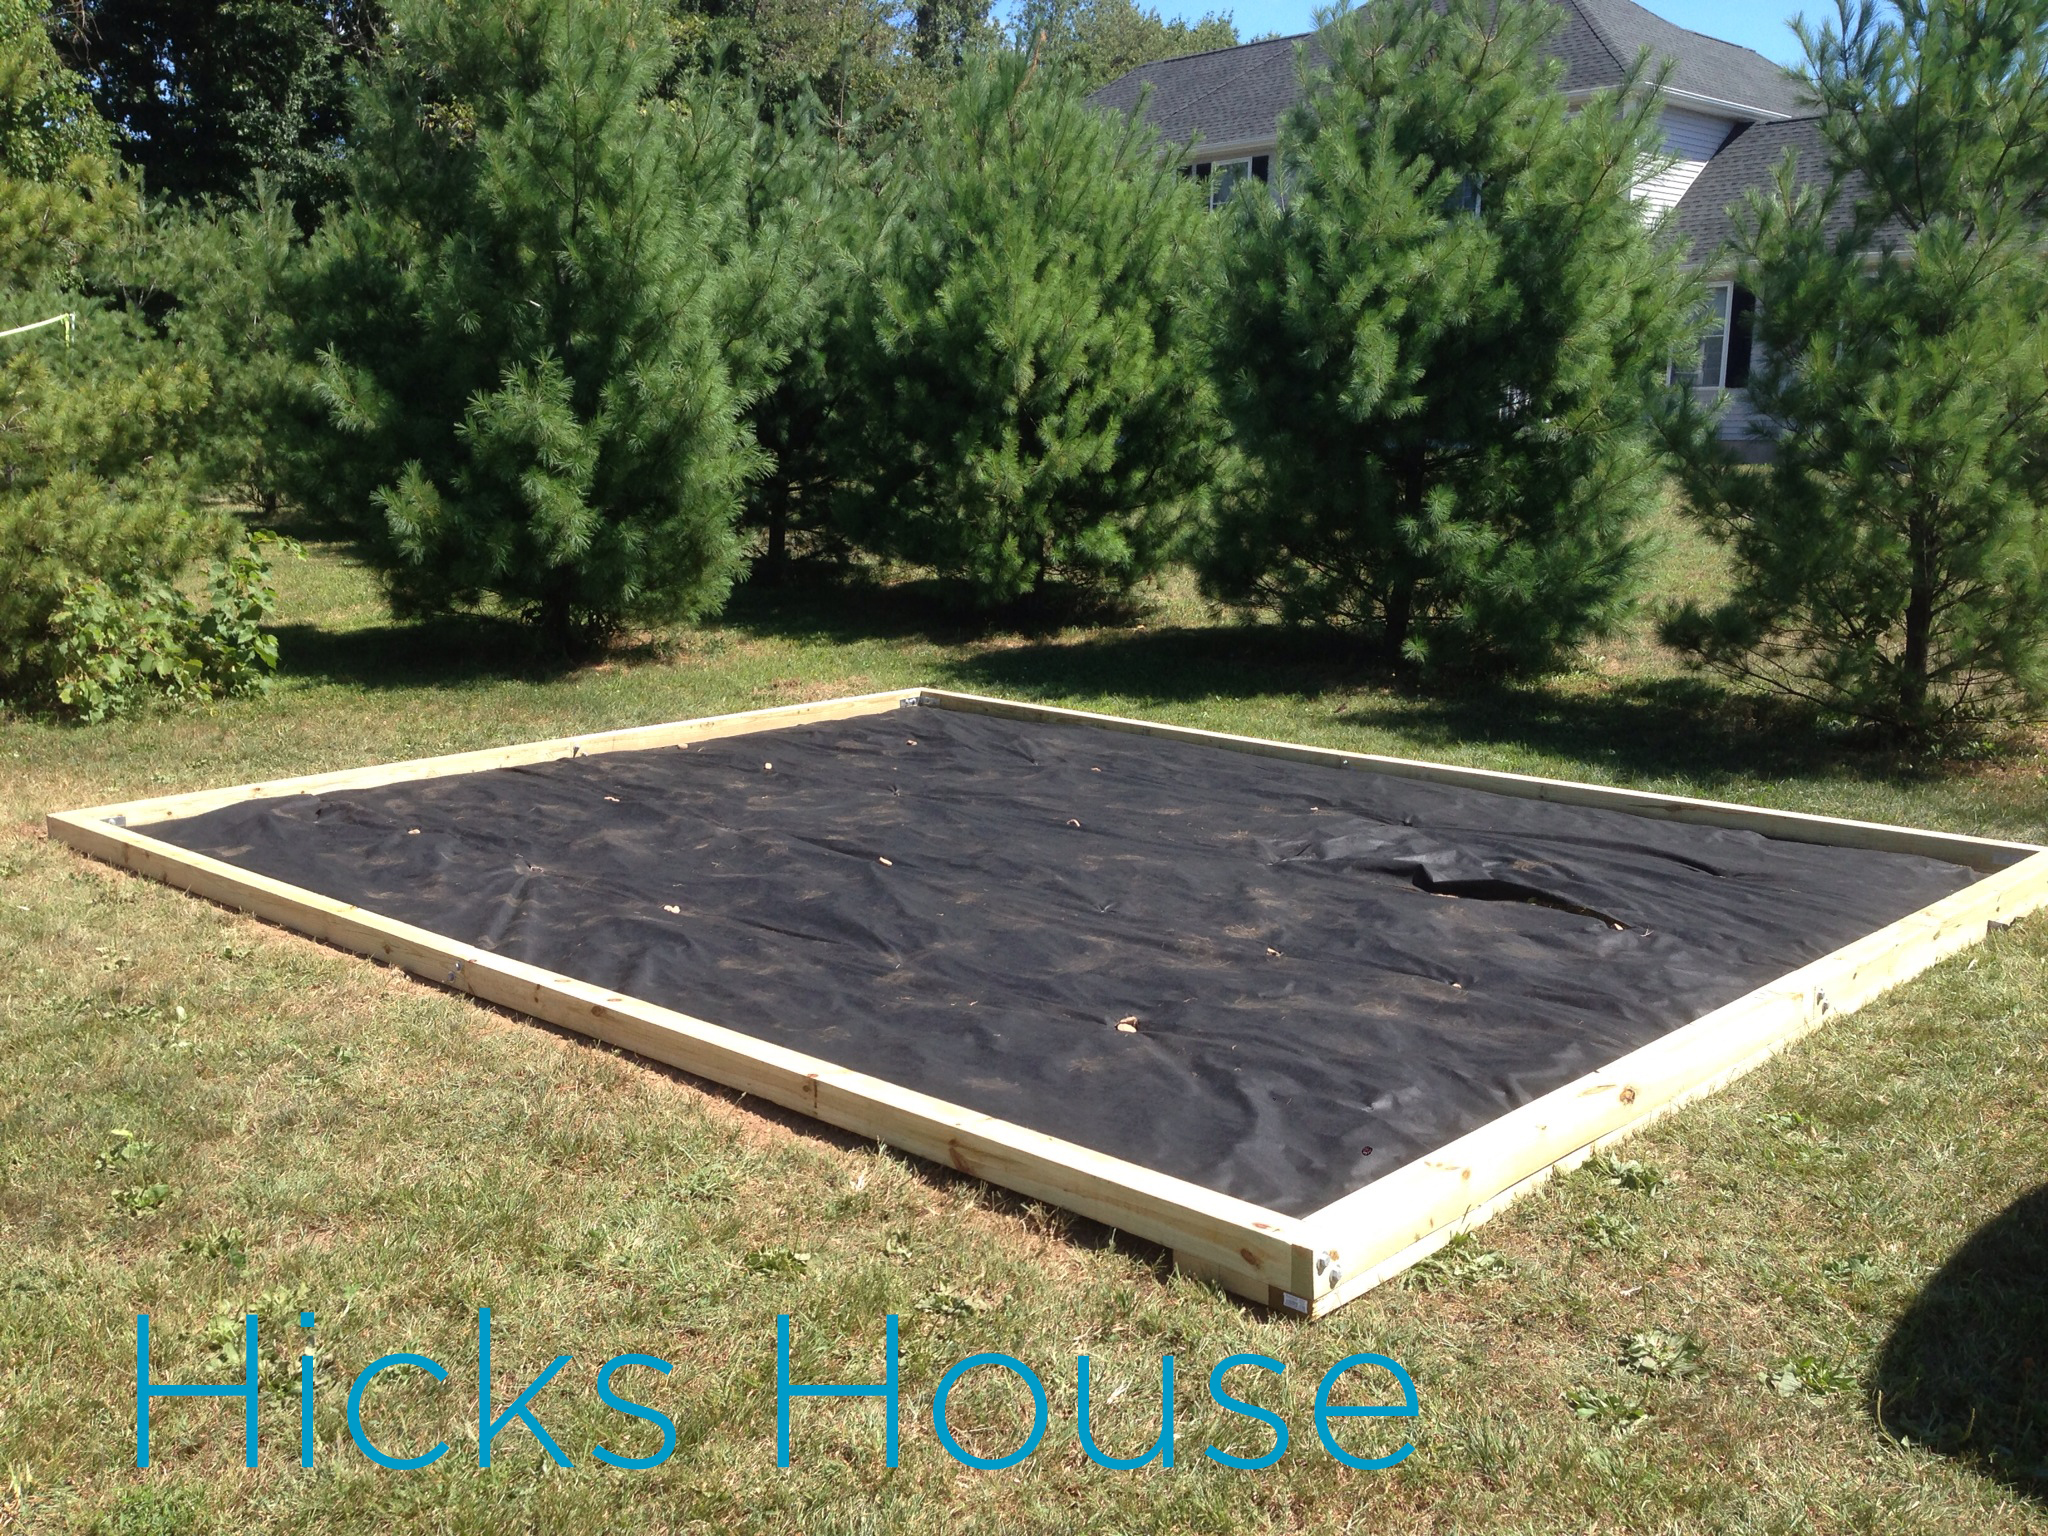
Then filled with the crushed stone. Several tons worth. The place Ken ordered the stone from was willing to do this in two loads so they could drive up to the base and dump inside it rather than dump one huge load in the driveway that would then need to be transferred, or drive the humongo truck over our lawn and rip up all of our “lush vegetation”.
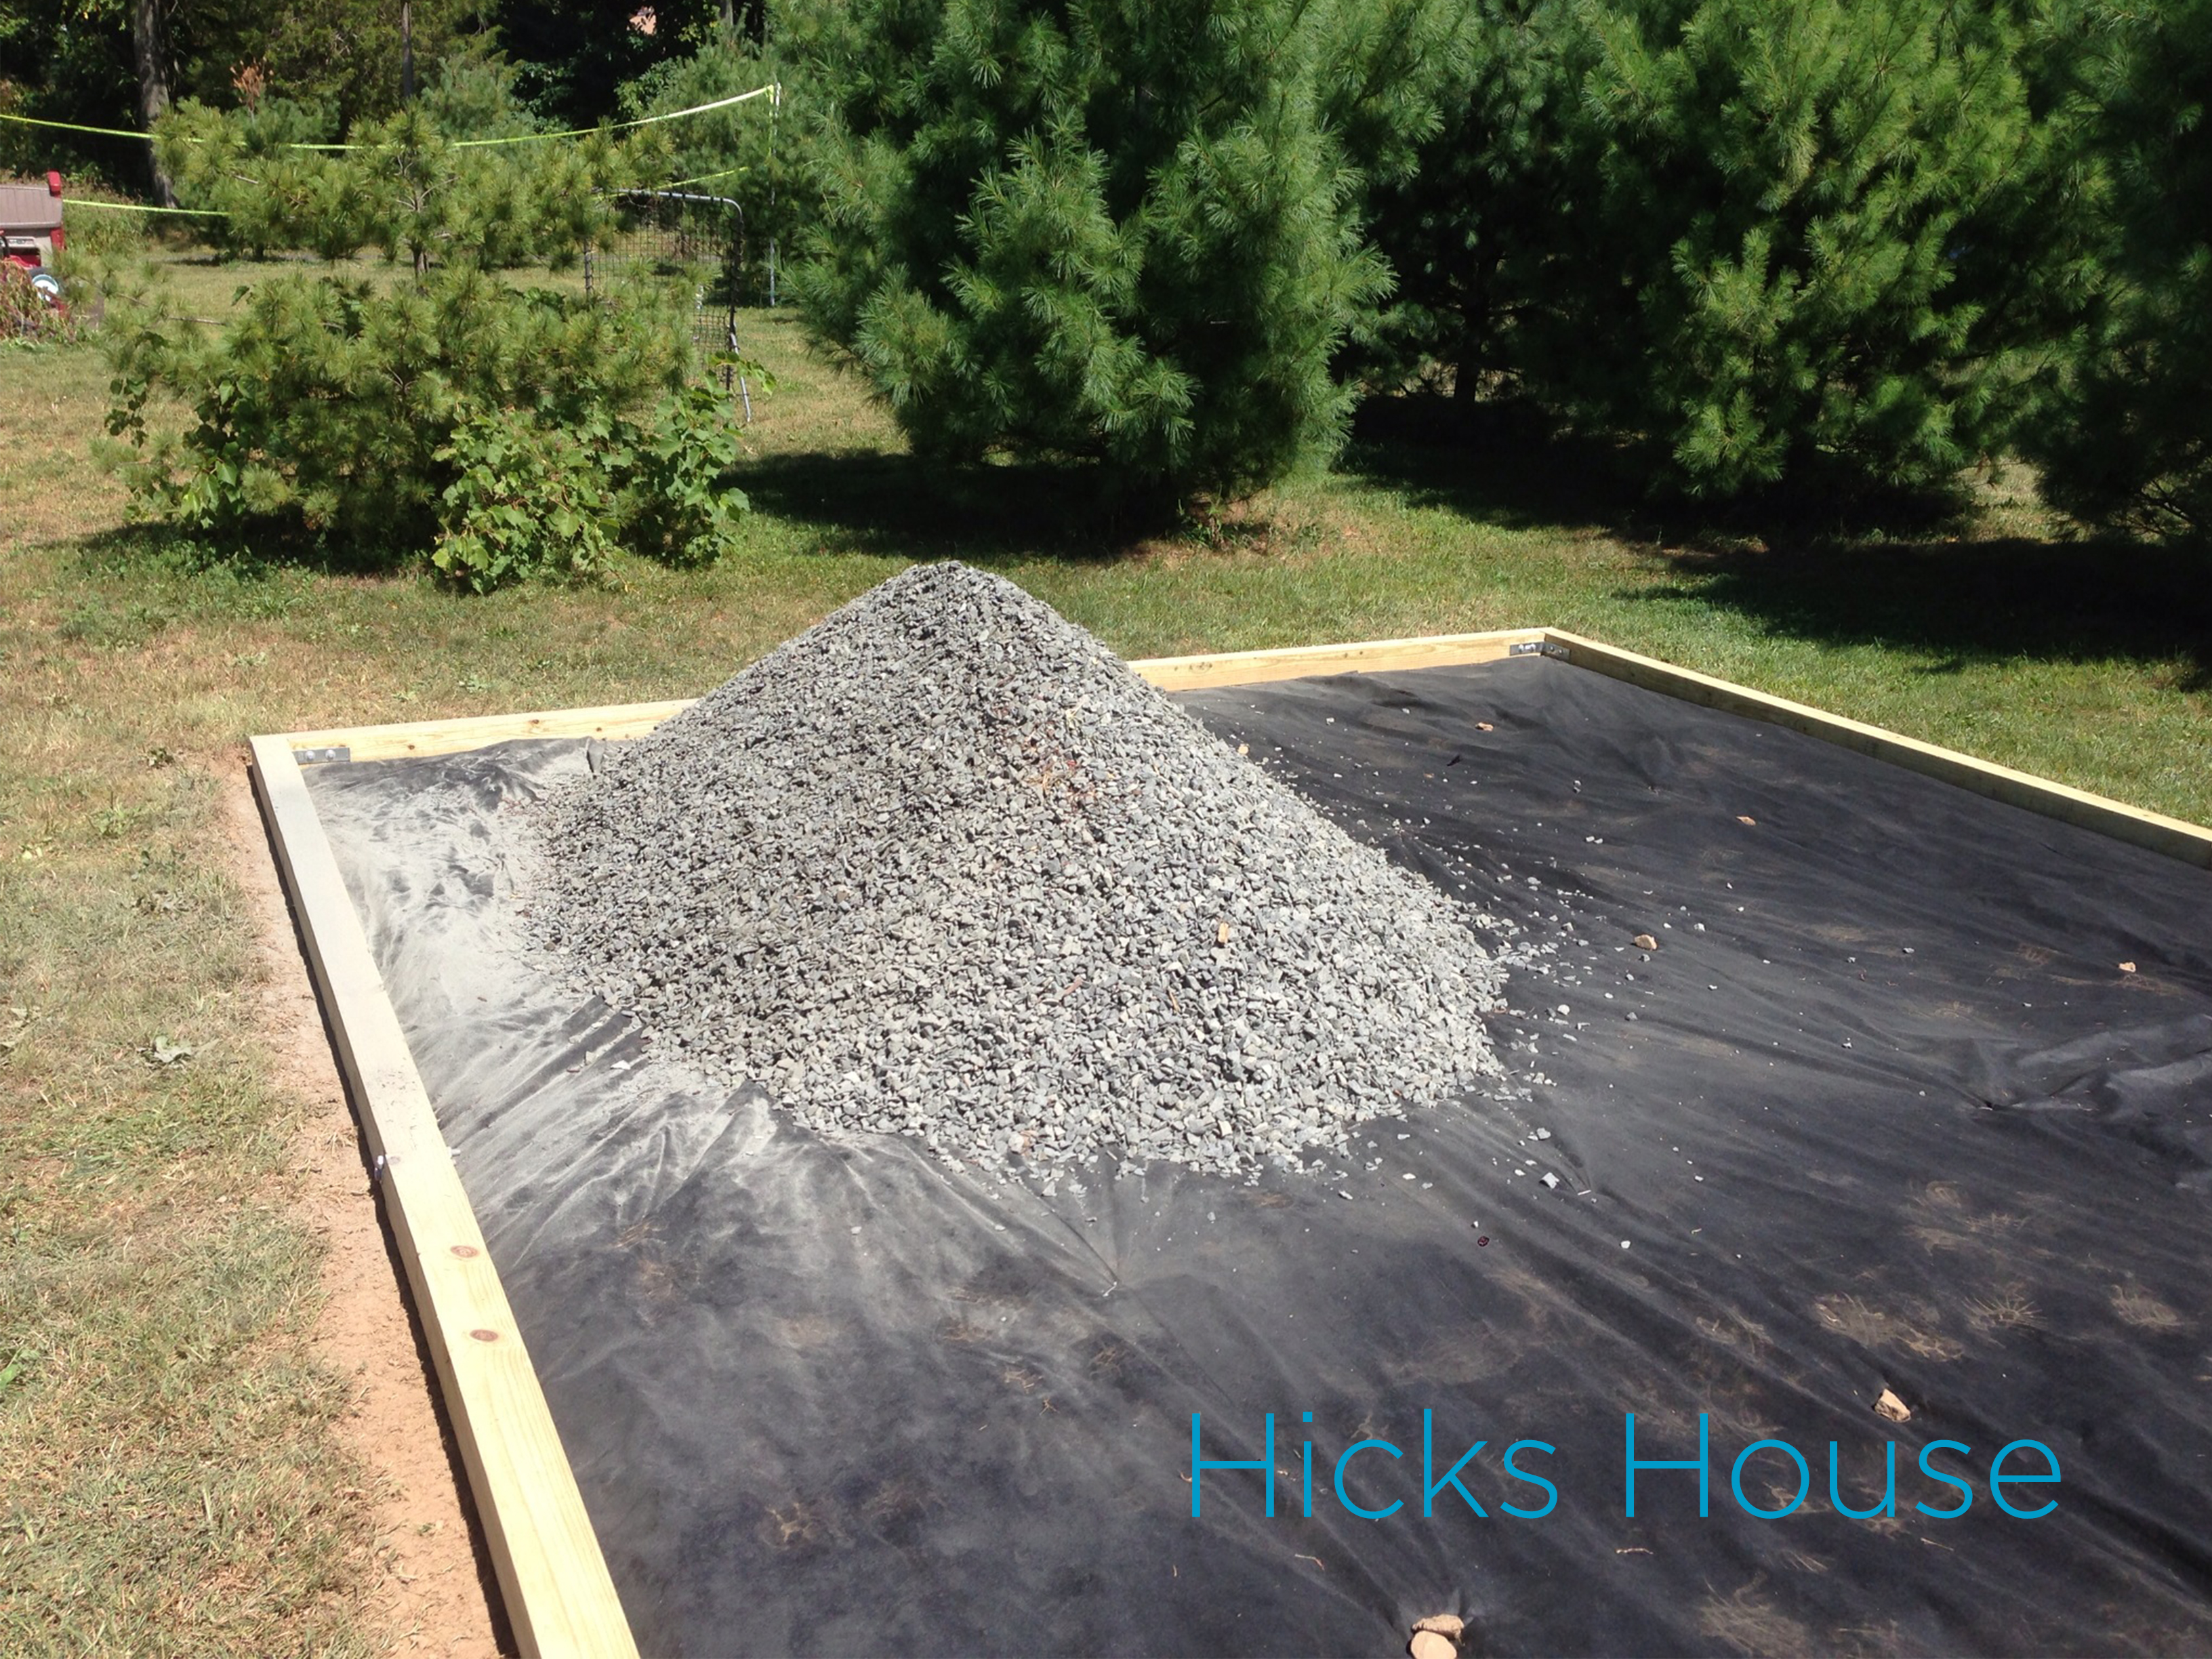

Ken used a rake to spread the stone out and that’s all for now folks!
I’ll be back next week with an update on how Ken added some extra support to prevent the wood from bowing out over time due to the weight of the stone and shed delivery.
Is it normal to be super excited about having both cars in the garage? Or is it something most people take as a duh! That’s what a garage is for!


Pingback: Lofty Ideas | Hicks House
Pingback: Special Delivery | Hicks House