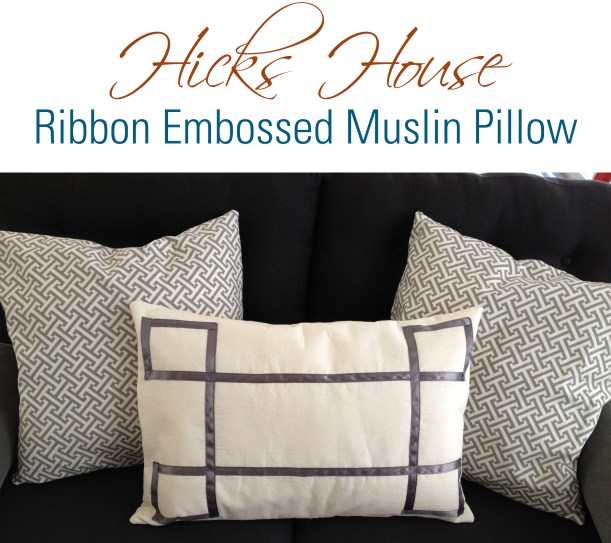
This is somewhat of an addendum to my Zippered Pillow Cover Tutorial
as I used the same basic assembly method.
As part of the never-ending quest to personalize this here Hicks House I am trying to work in custom pieces in with the pieces I purchase. When I purchased the sofa it came with two WAY overstuffed pillows on it. As the sofa is on the small side these gigantic pillows made sitting on the sofa next to impossible. Thus the pillows were removed and covered for the guest room in the original pillow tutorial where they work perfectly.
I was unsure at first what to do because although I love the look of lots of pillows on sofas, I don’t want to have to remove them whenever I want to sit down. Then on my first ever trip to IKEA (don’t judge me – I just went for the first time) I found these pillow inserts for less than $5!

They were meant to be used in conjunction with their pillow covers – however you cannot beat the price and they were just fluffy enough to give the look I wanted but still smoosh when you sat on it.
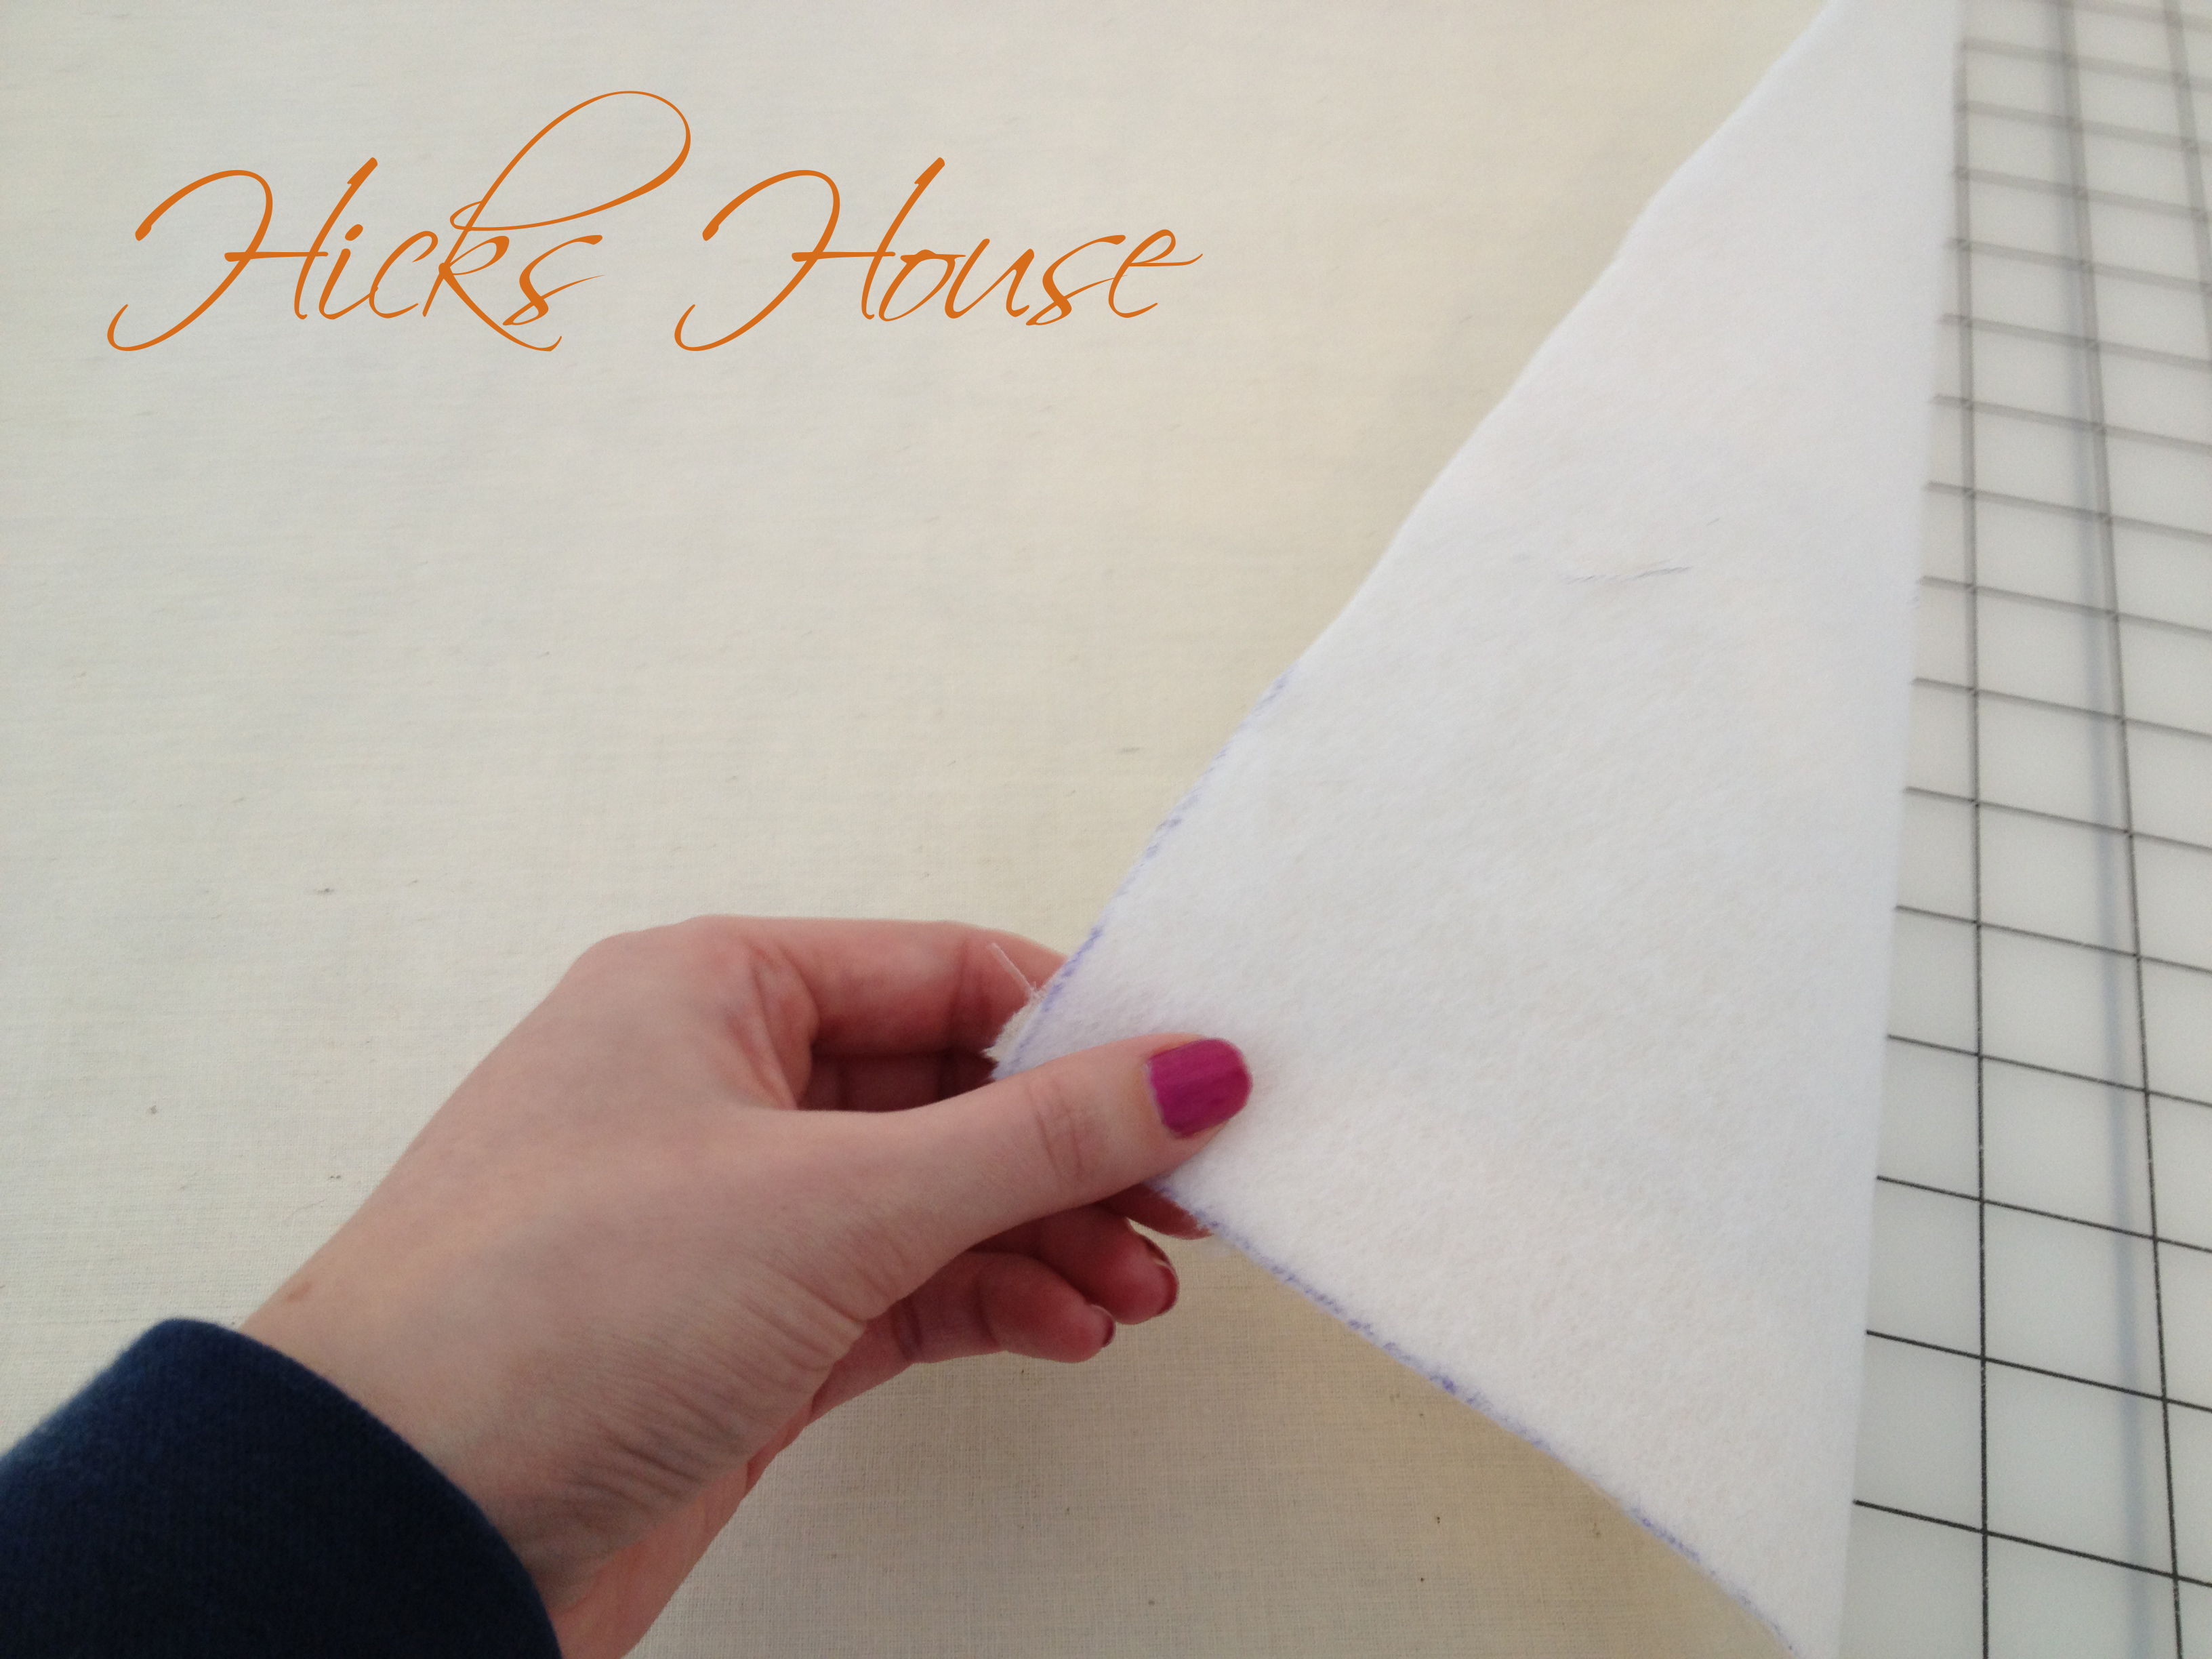
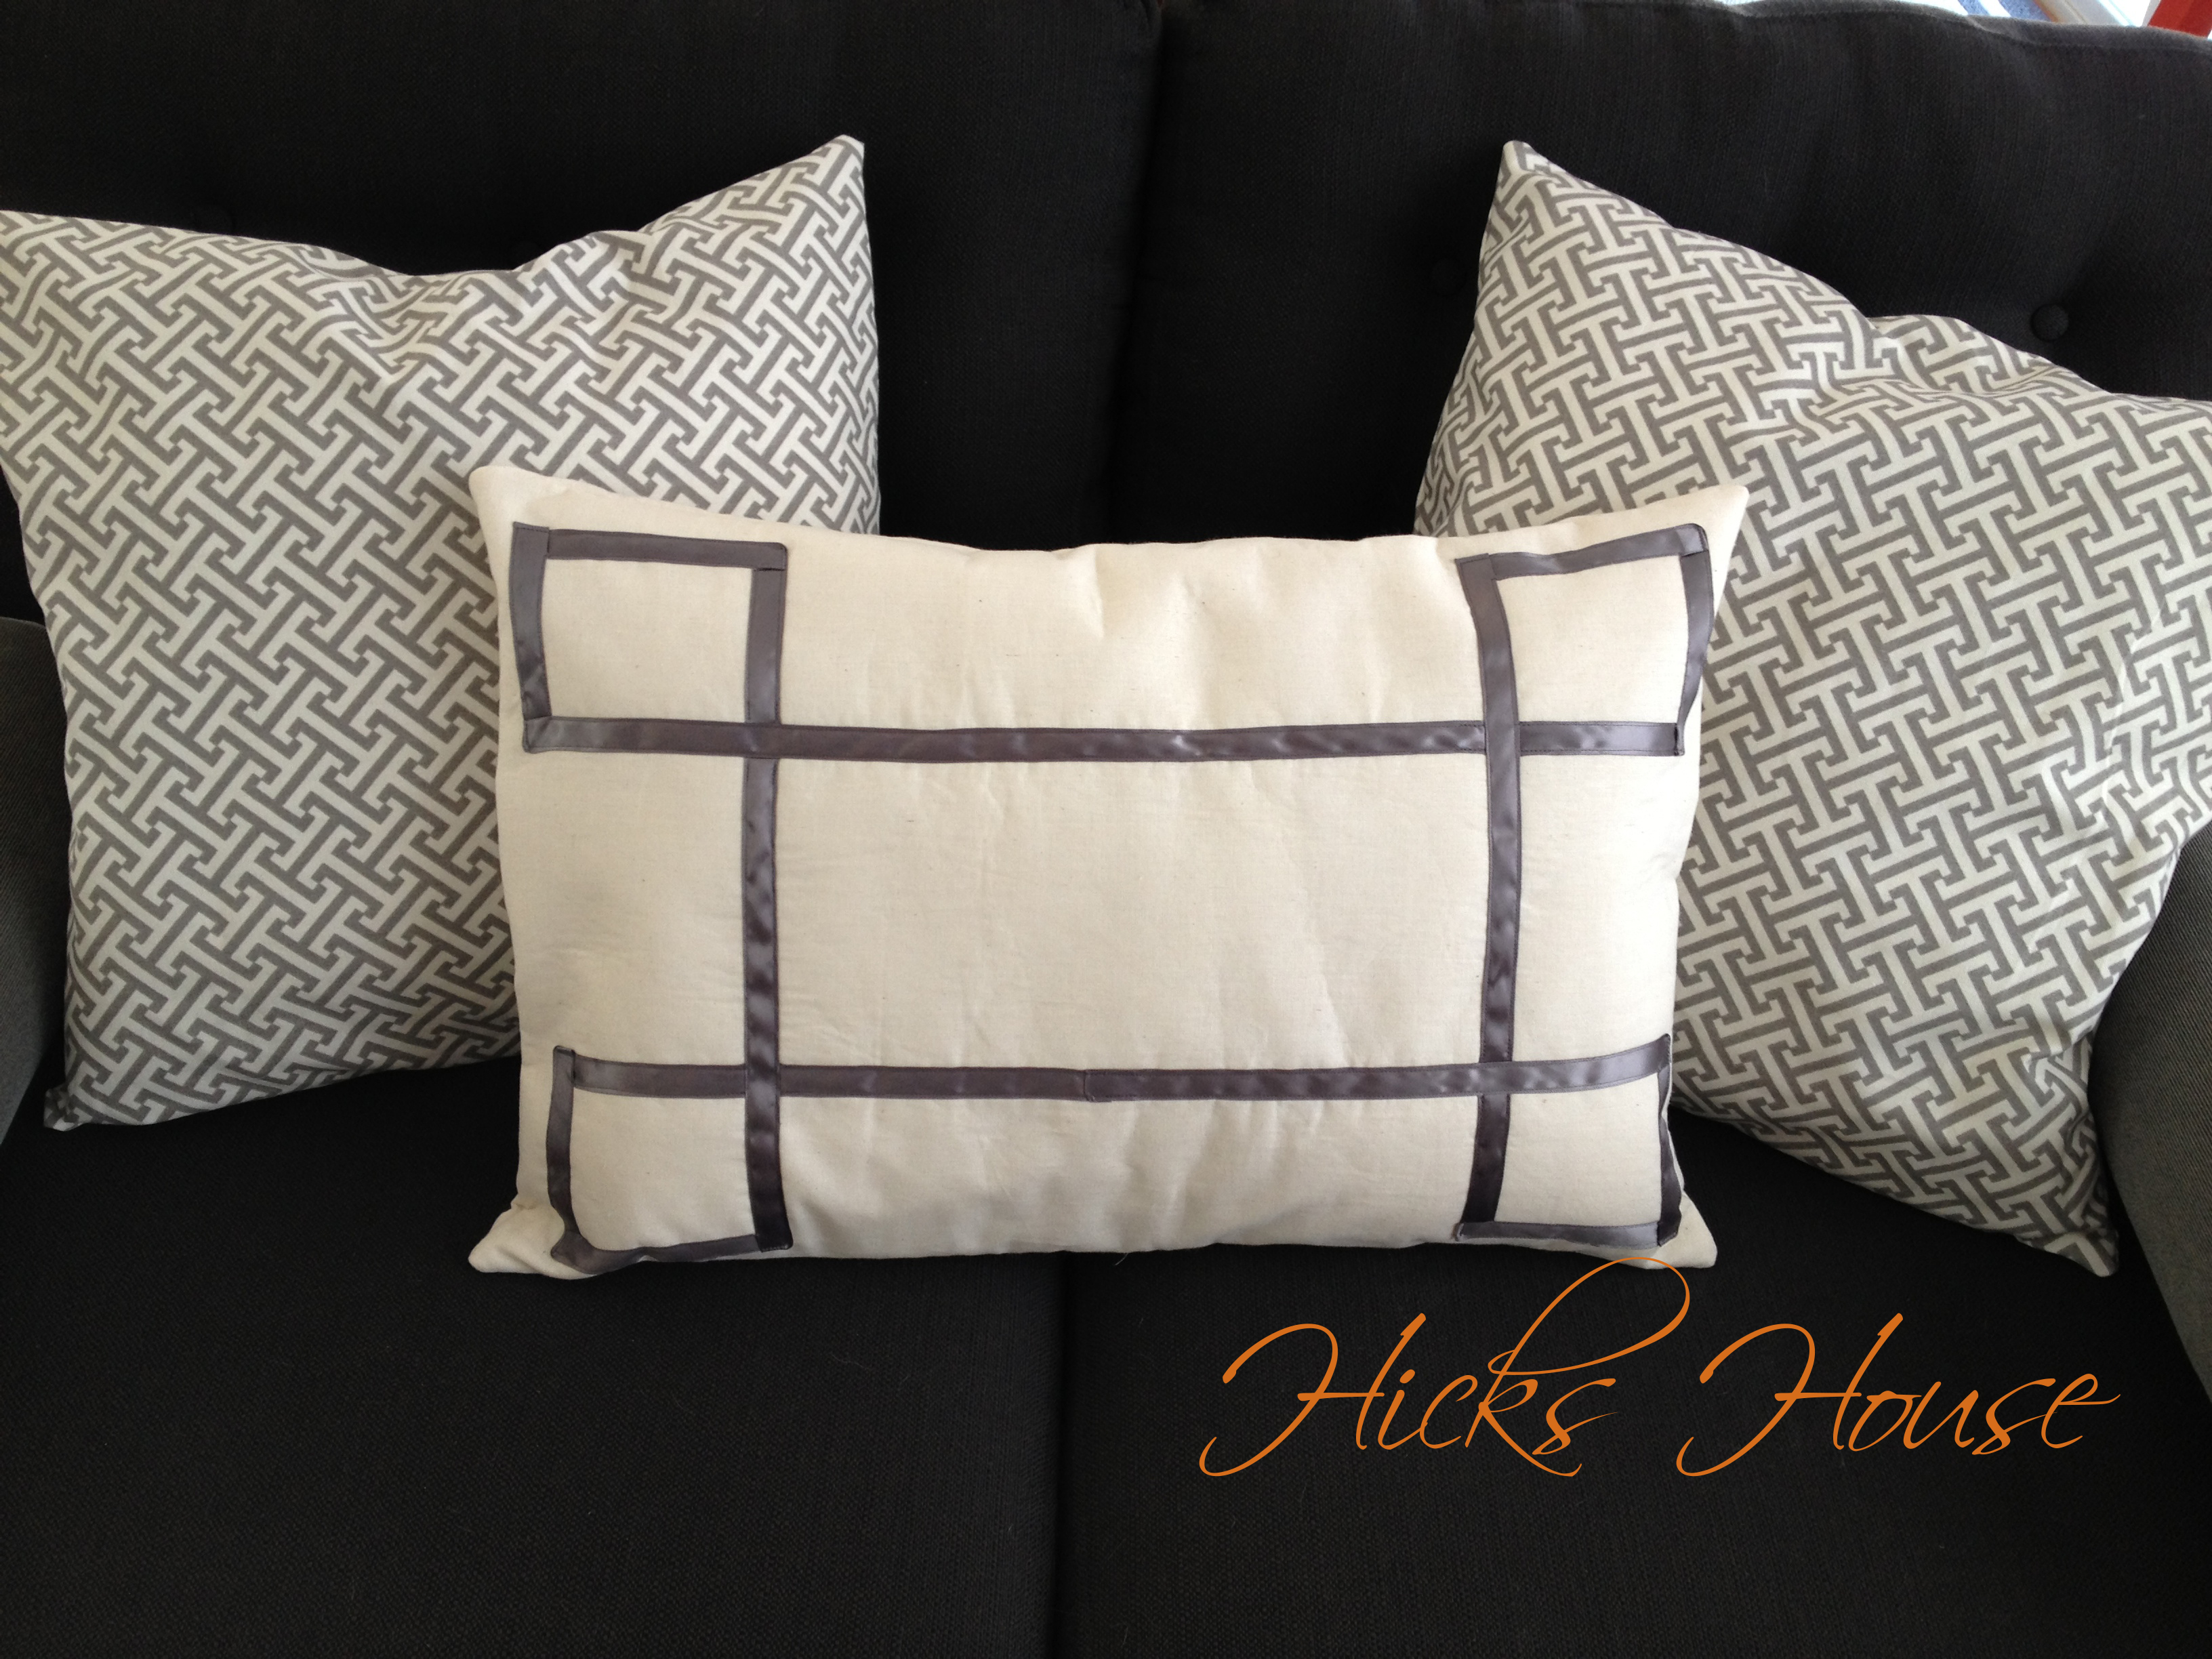
It just so happened I had a ton of muslin left over from years ago when I was first learning how to sew. It was the perfect oatmeal color to match the chairs in the living room. So I cut the fabric to size 1/2 inch wider and longer than my pillow so 16.5 x 24.5 (since this pillow is low on the fluff factor.) The only problem with muslin is that it’s so thin. Easily remedied by adding some fusible fleece interfacing to the back side.

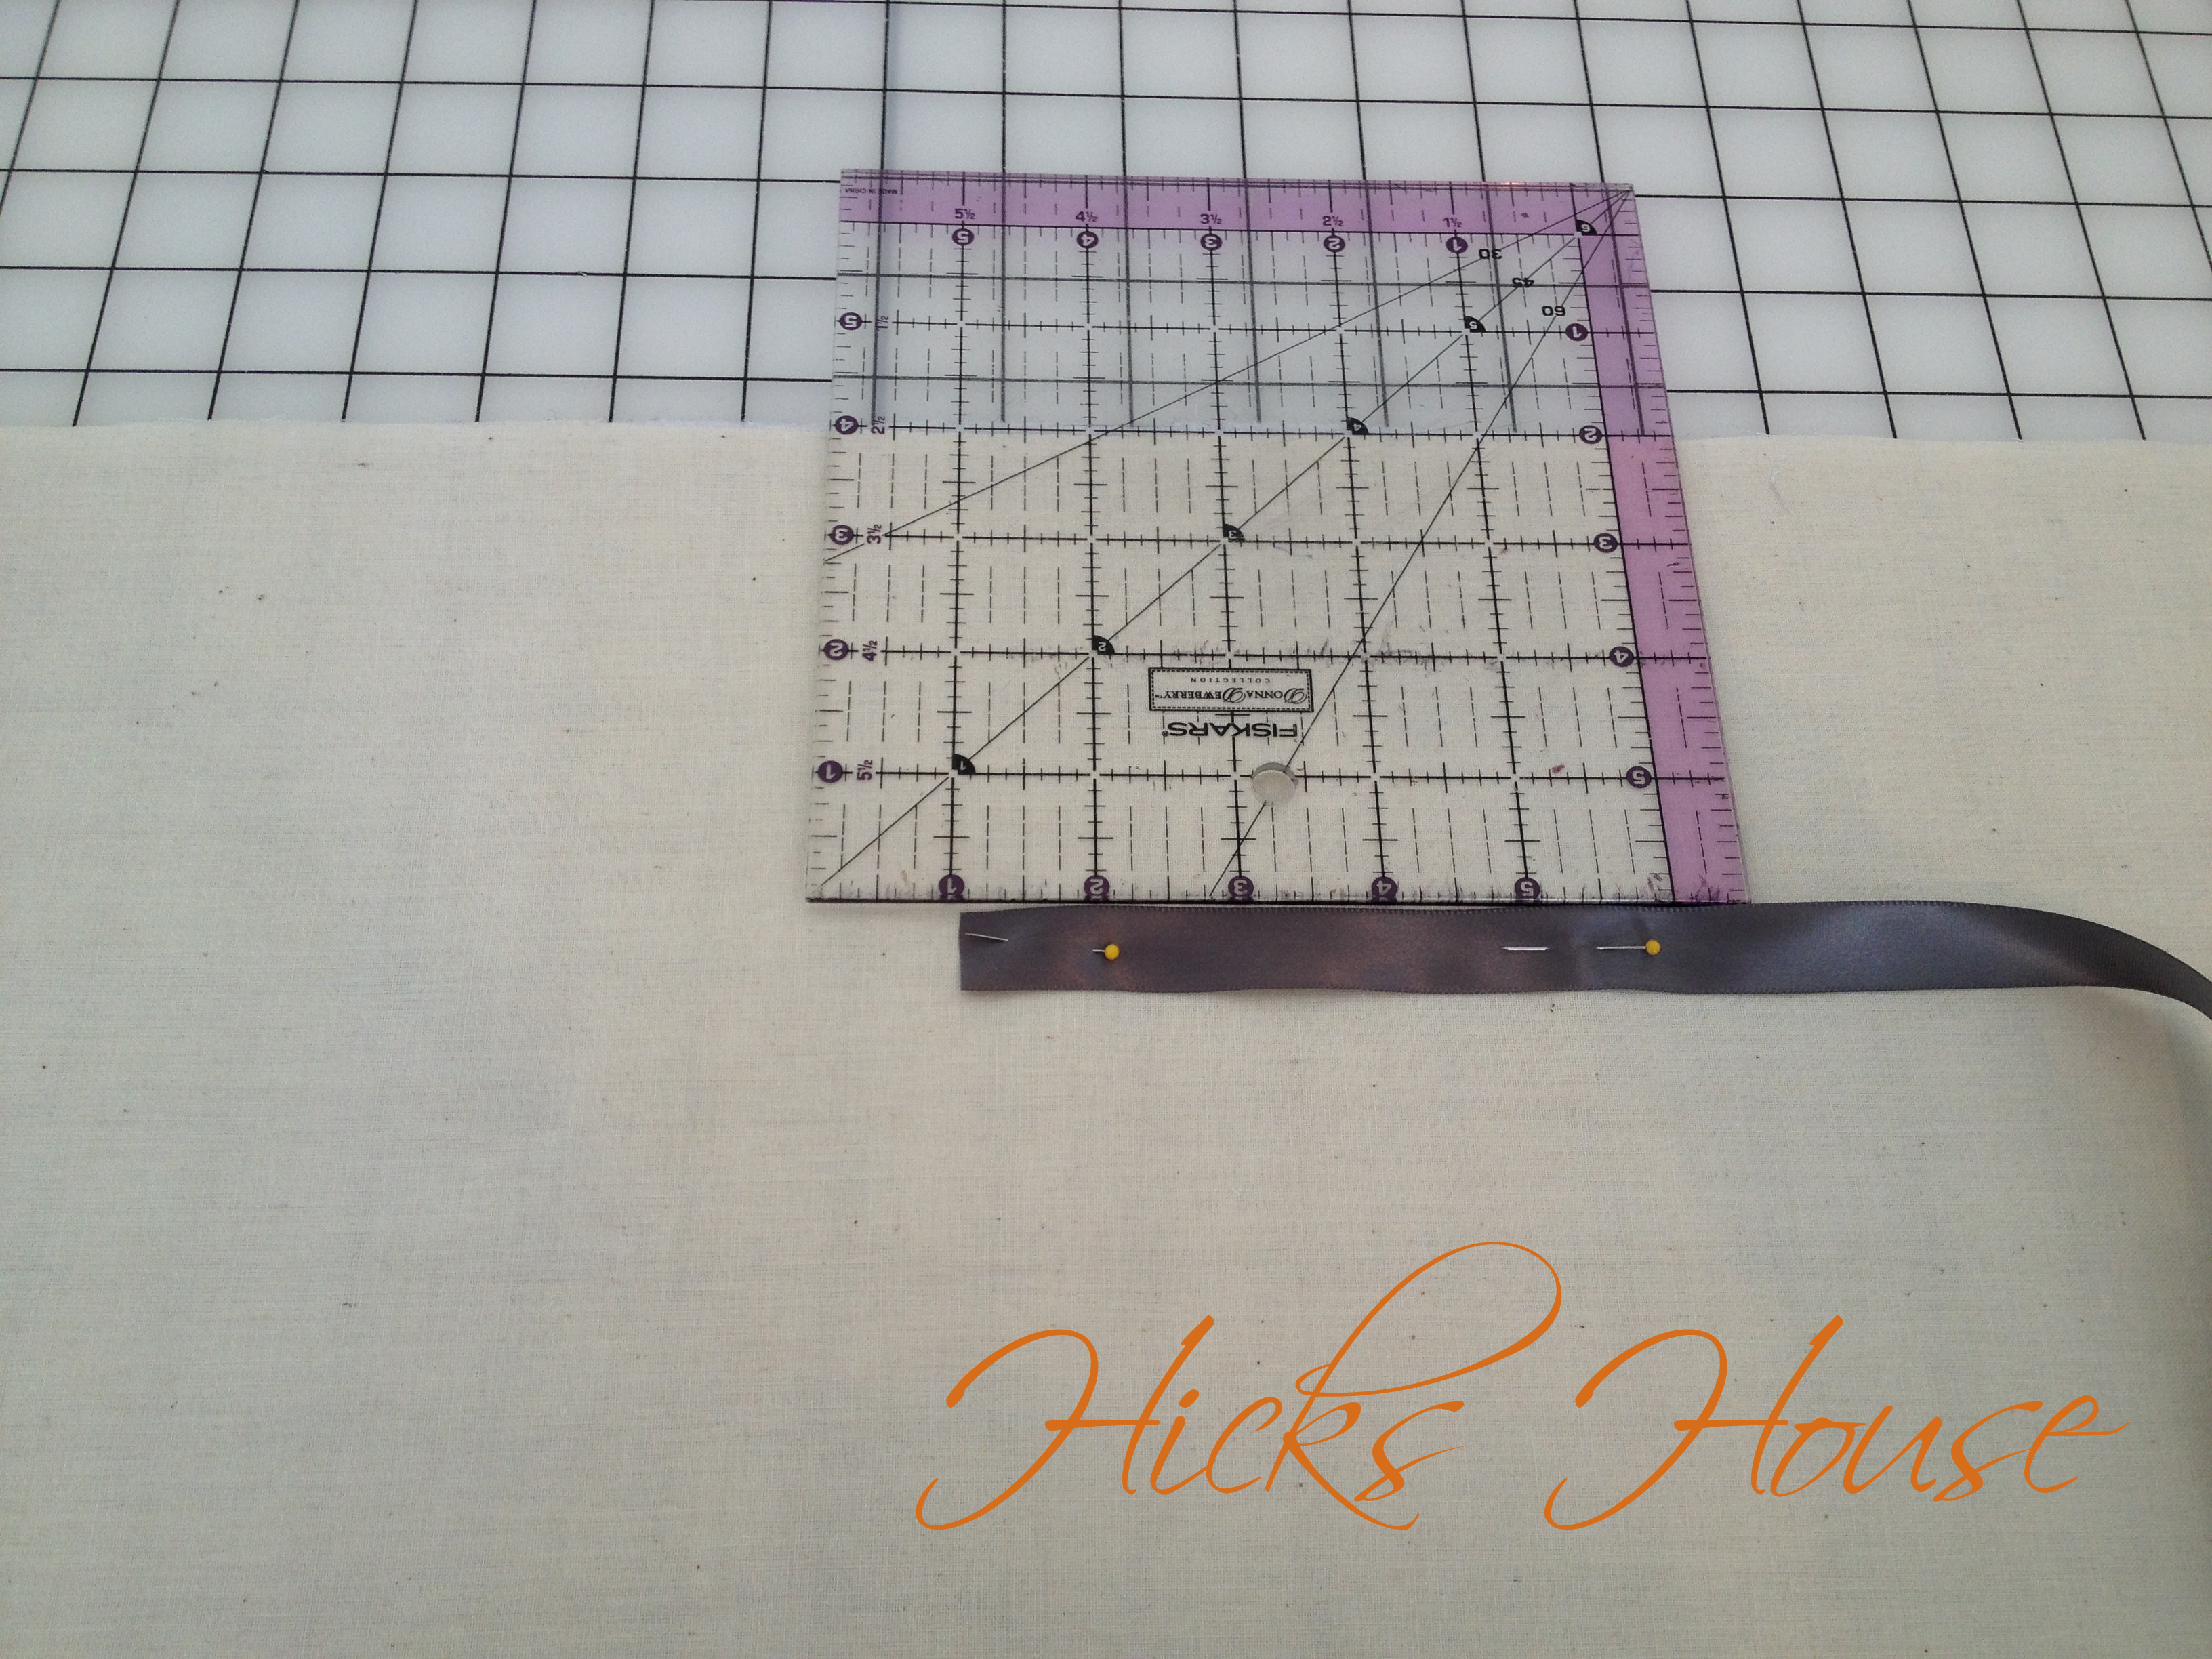
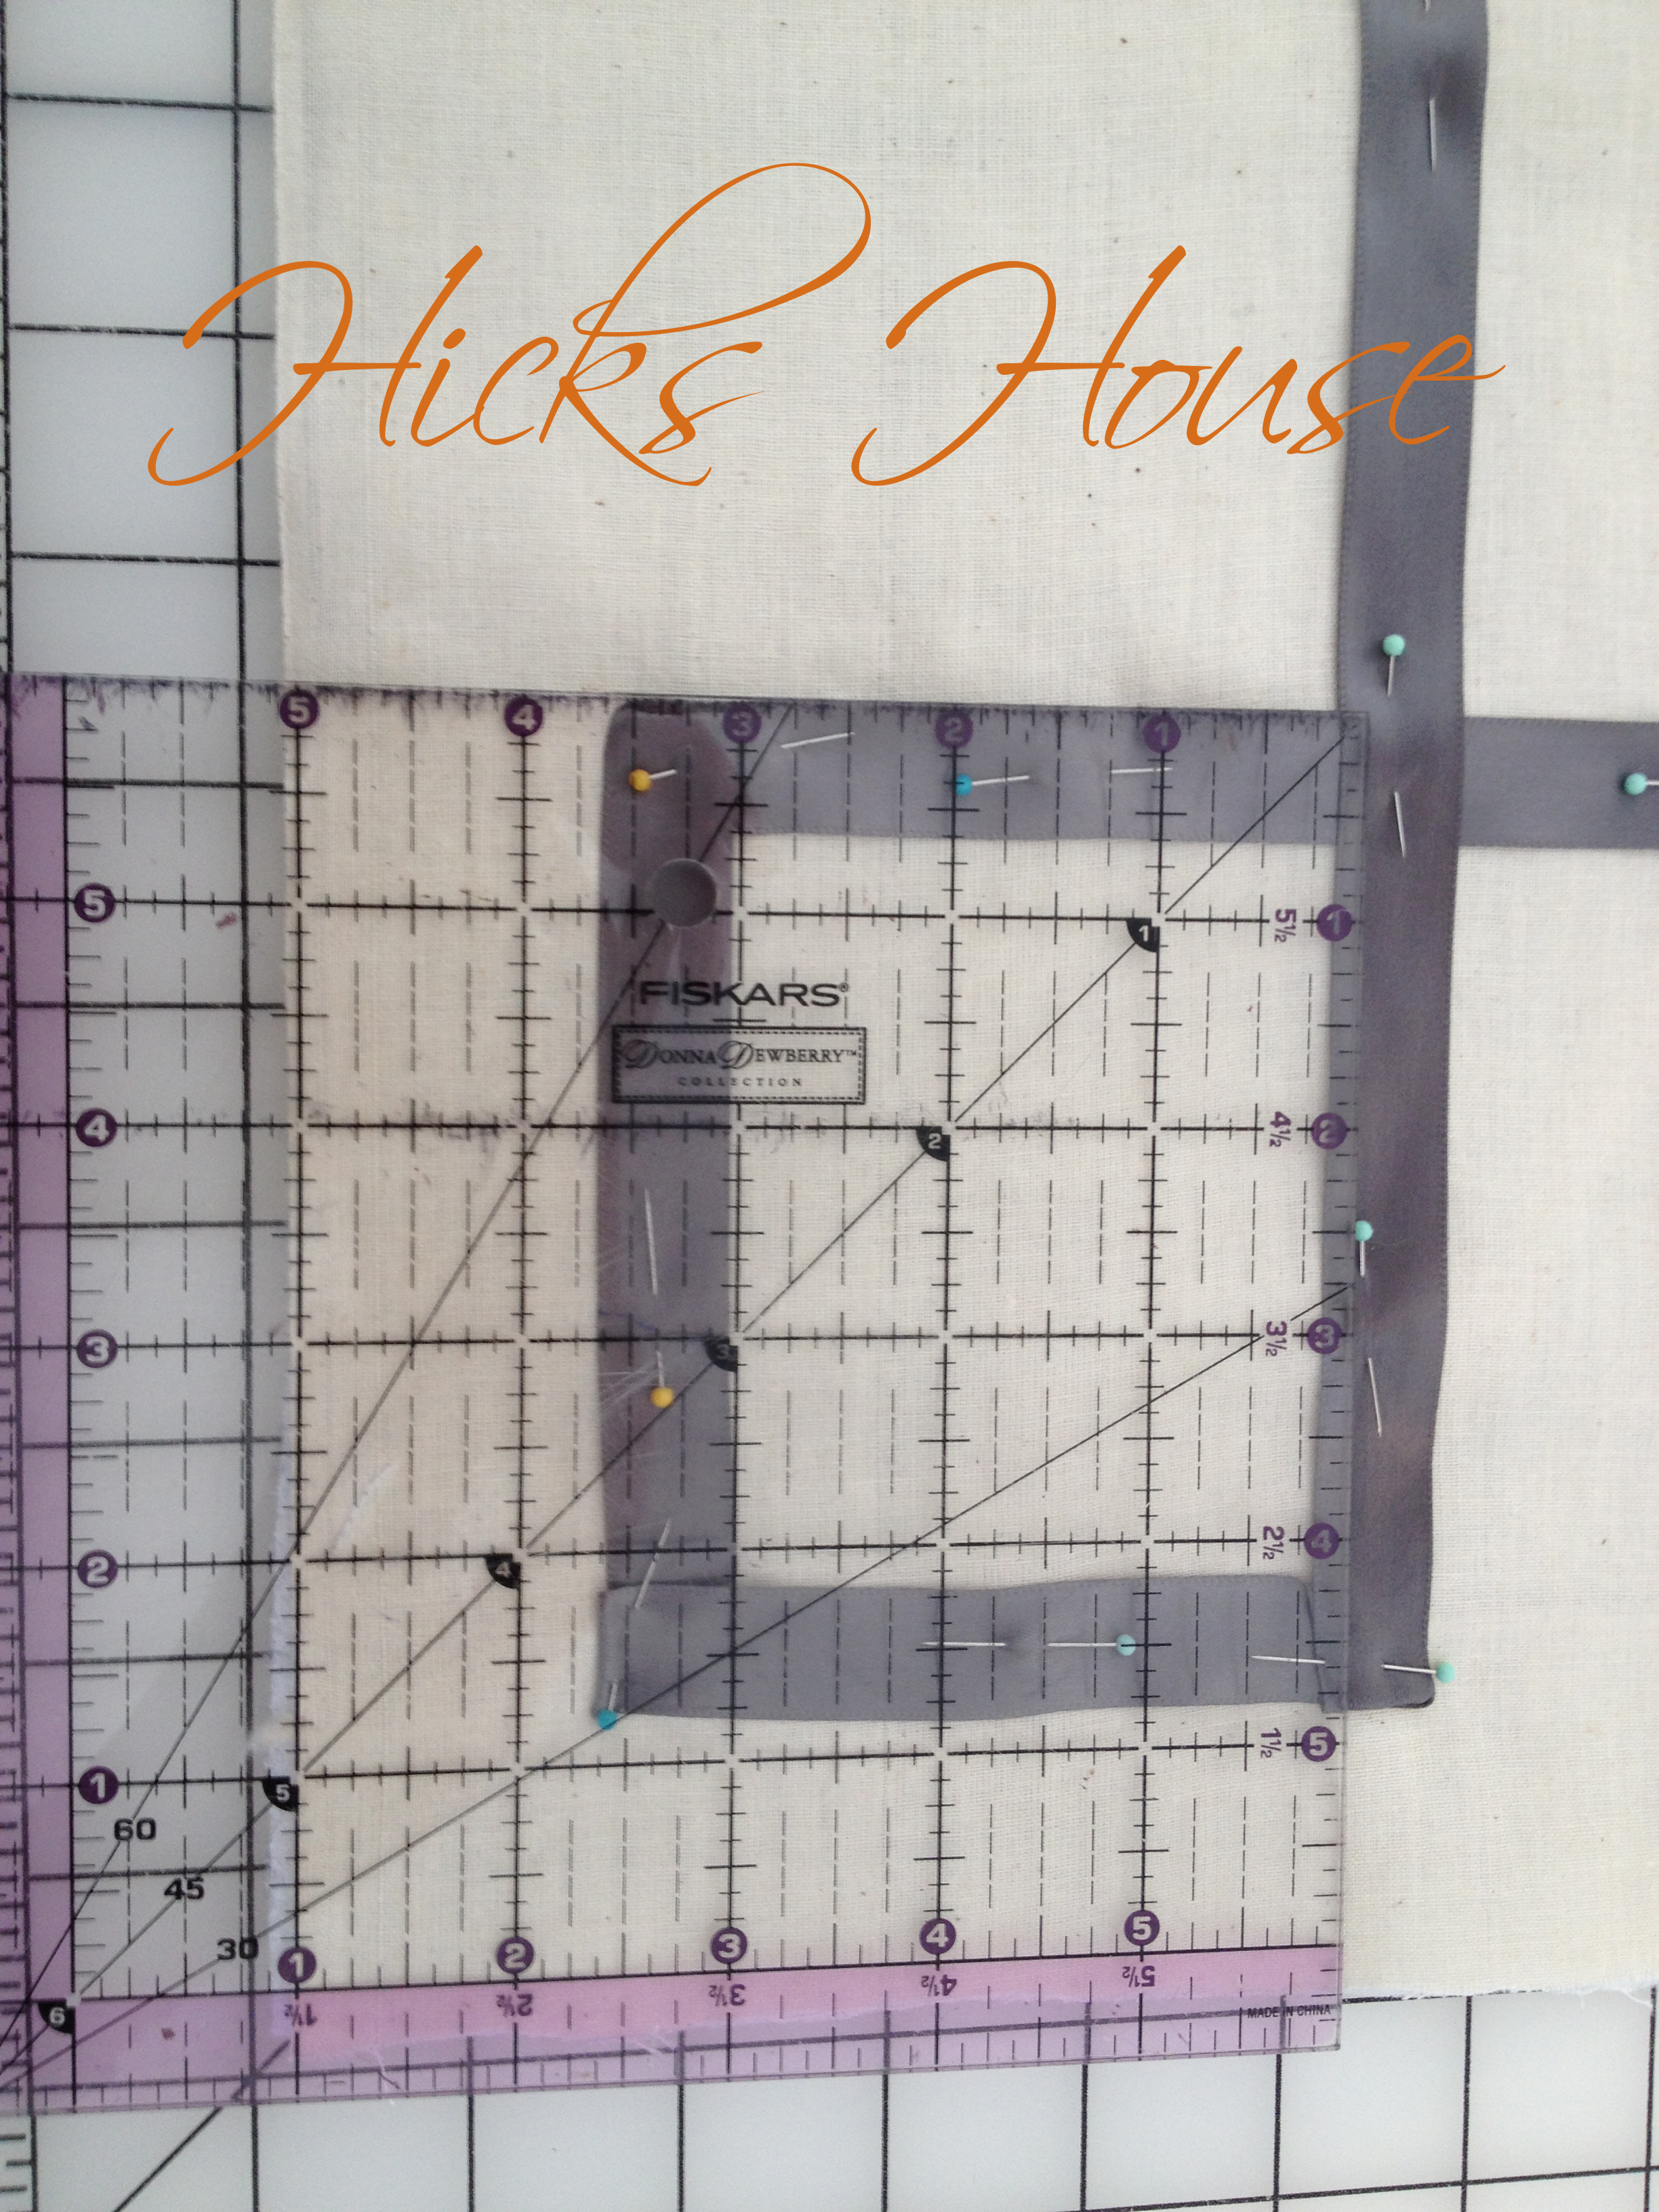
Then I got started laying out my design with 1/4 inch gray ribbon that matches the sofa. I measured 4 inches up from the long edge of my fabric (I figured 4 inches up from the top and bottom would leave about 7.5 inches in the middle of the ribbon border – seemed like a good guestimate) and started pinning the ribbon directly to the fabric measuring at various intervals to ensure the line was straight.

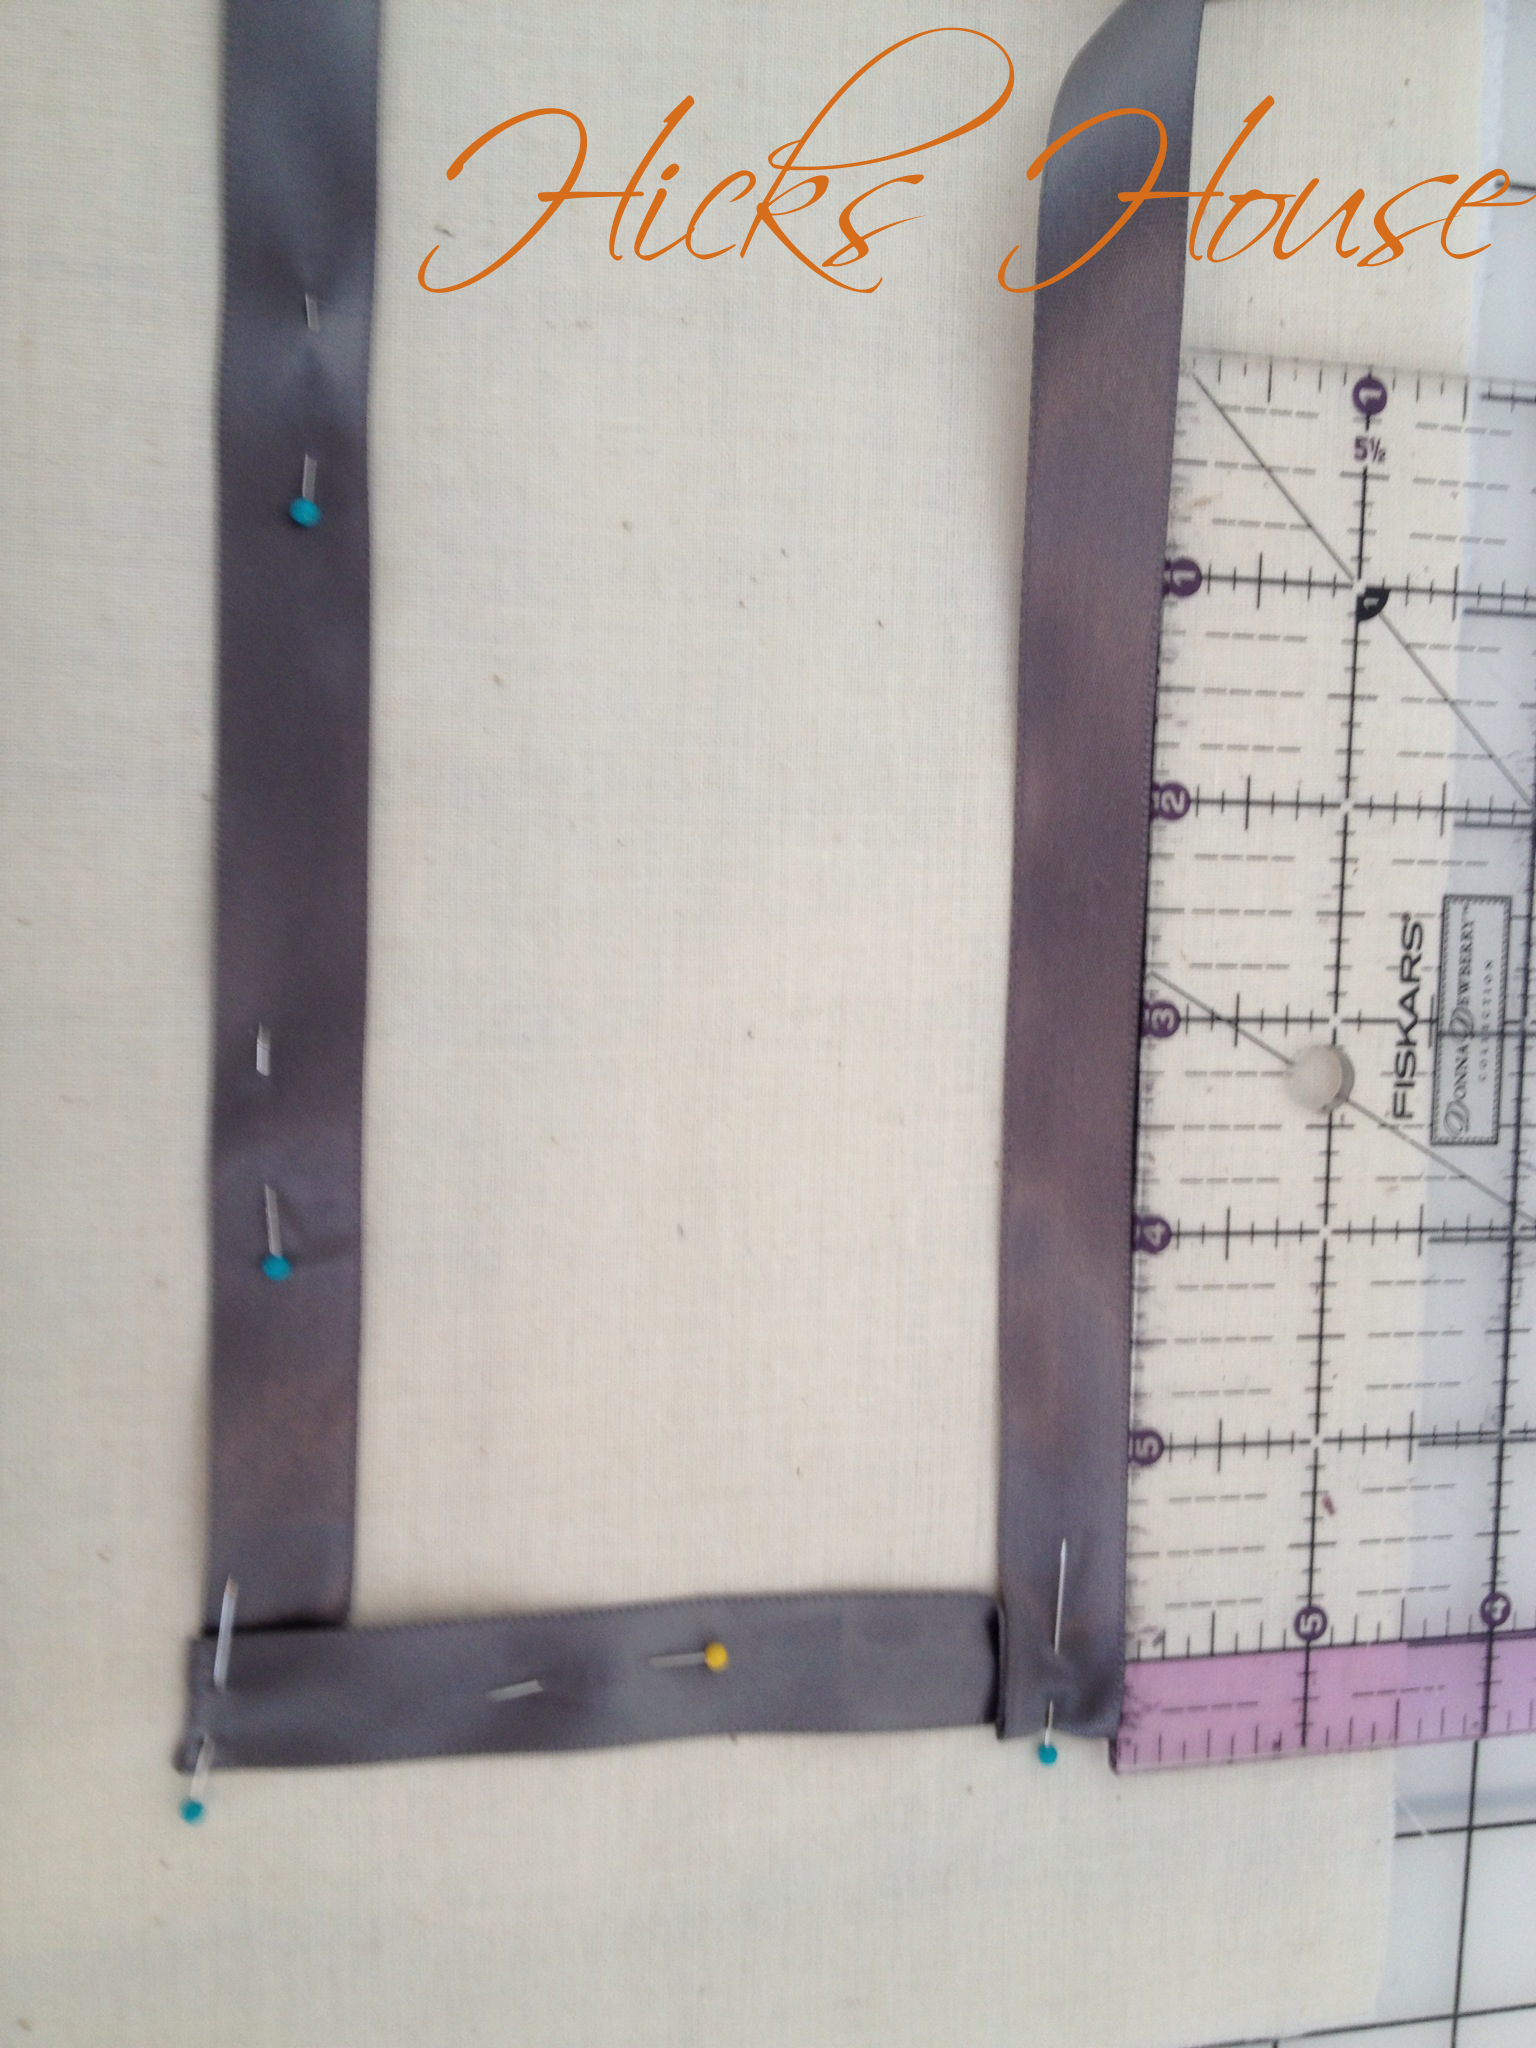
I kept going until I was about 1.5 inches from the edge. Remember not to get too close about 1/4 – 1/2 inch will be your inseam and you don’t want your design too close to the edge. To turn the corner I folded the ribbon directly down:
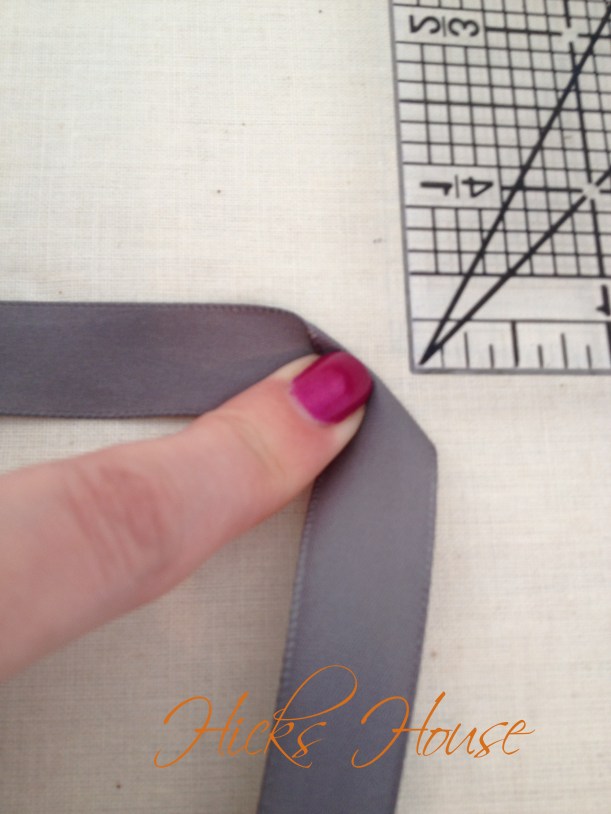
Then up creating a box corner.

Make sure to pin very well. Make another corner going in the other direction 1.5 inches from the next edge.

Then create a third turn that folds back over your original line creating a square.

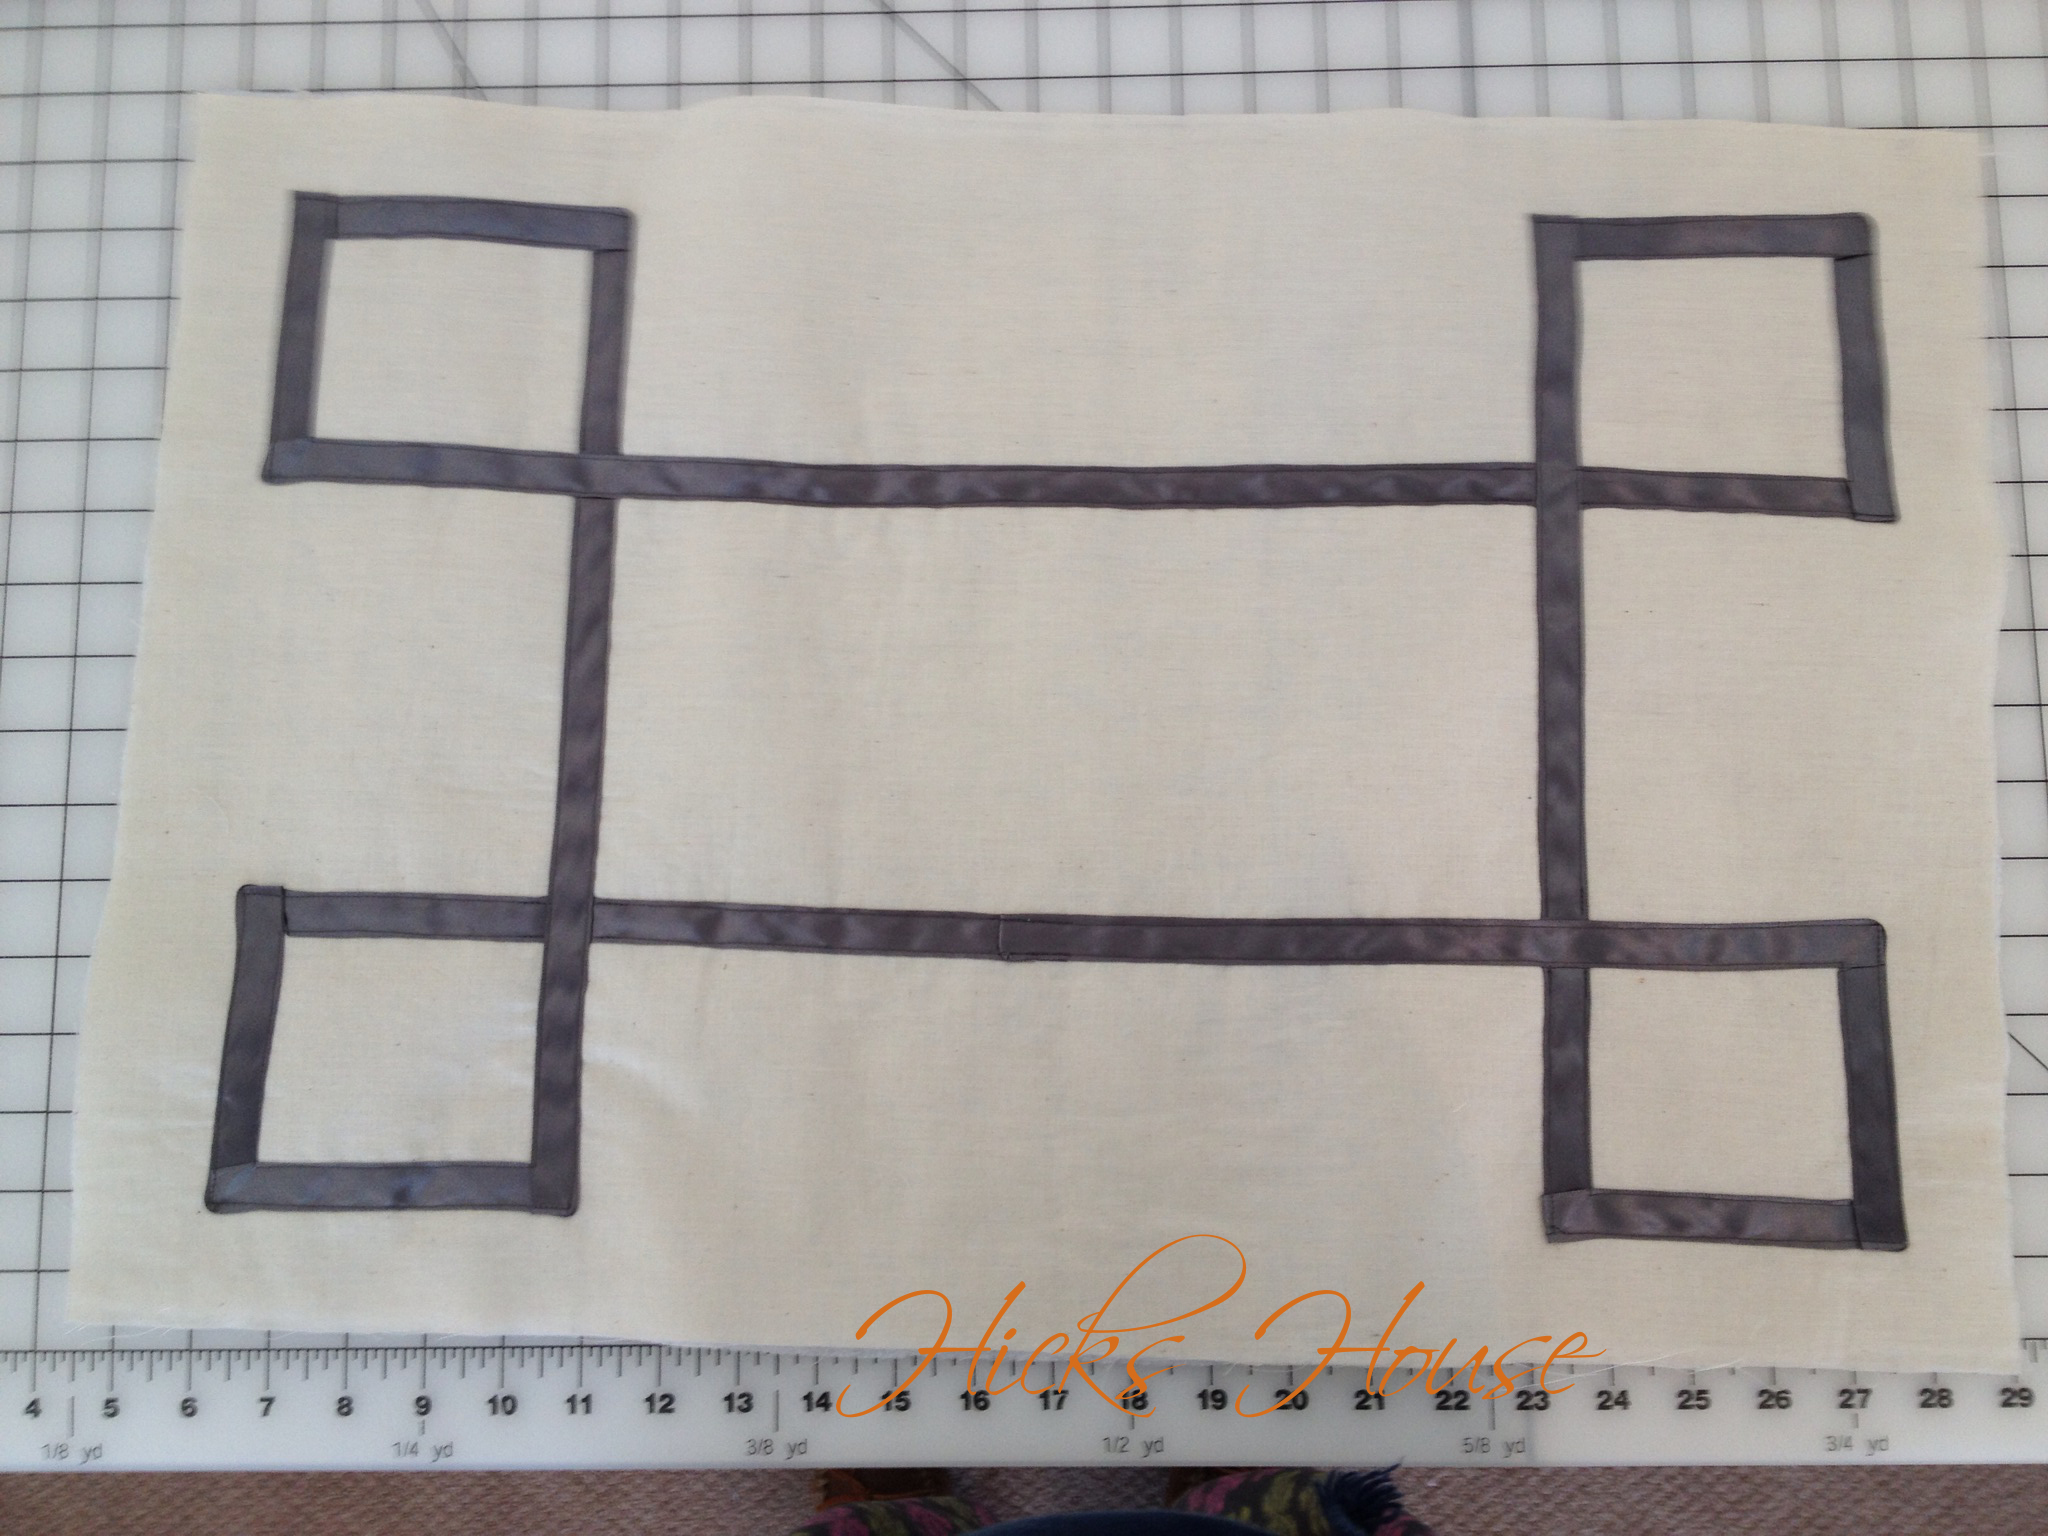
Continue pinning your straight line 4 inches from the edge of the fabric until you reach the 1.5 inches from the edge then repeat your corner process to create a second box. Repeat two more times and you have this.

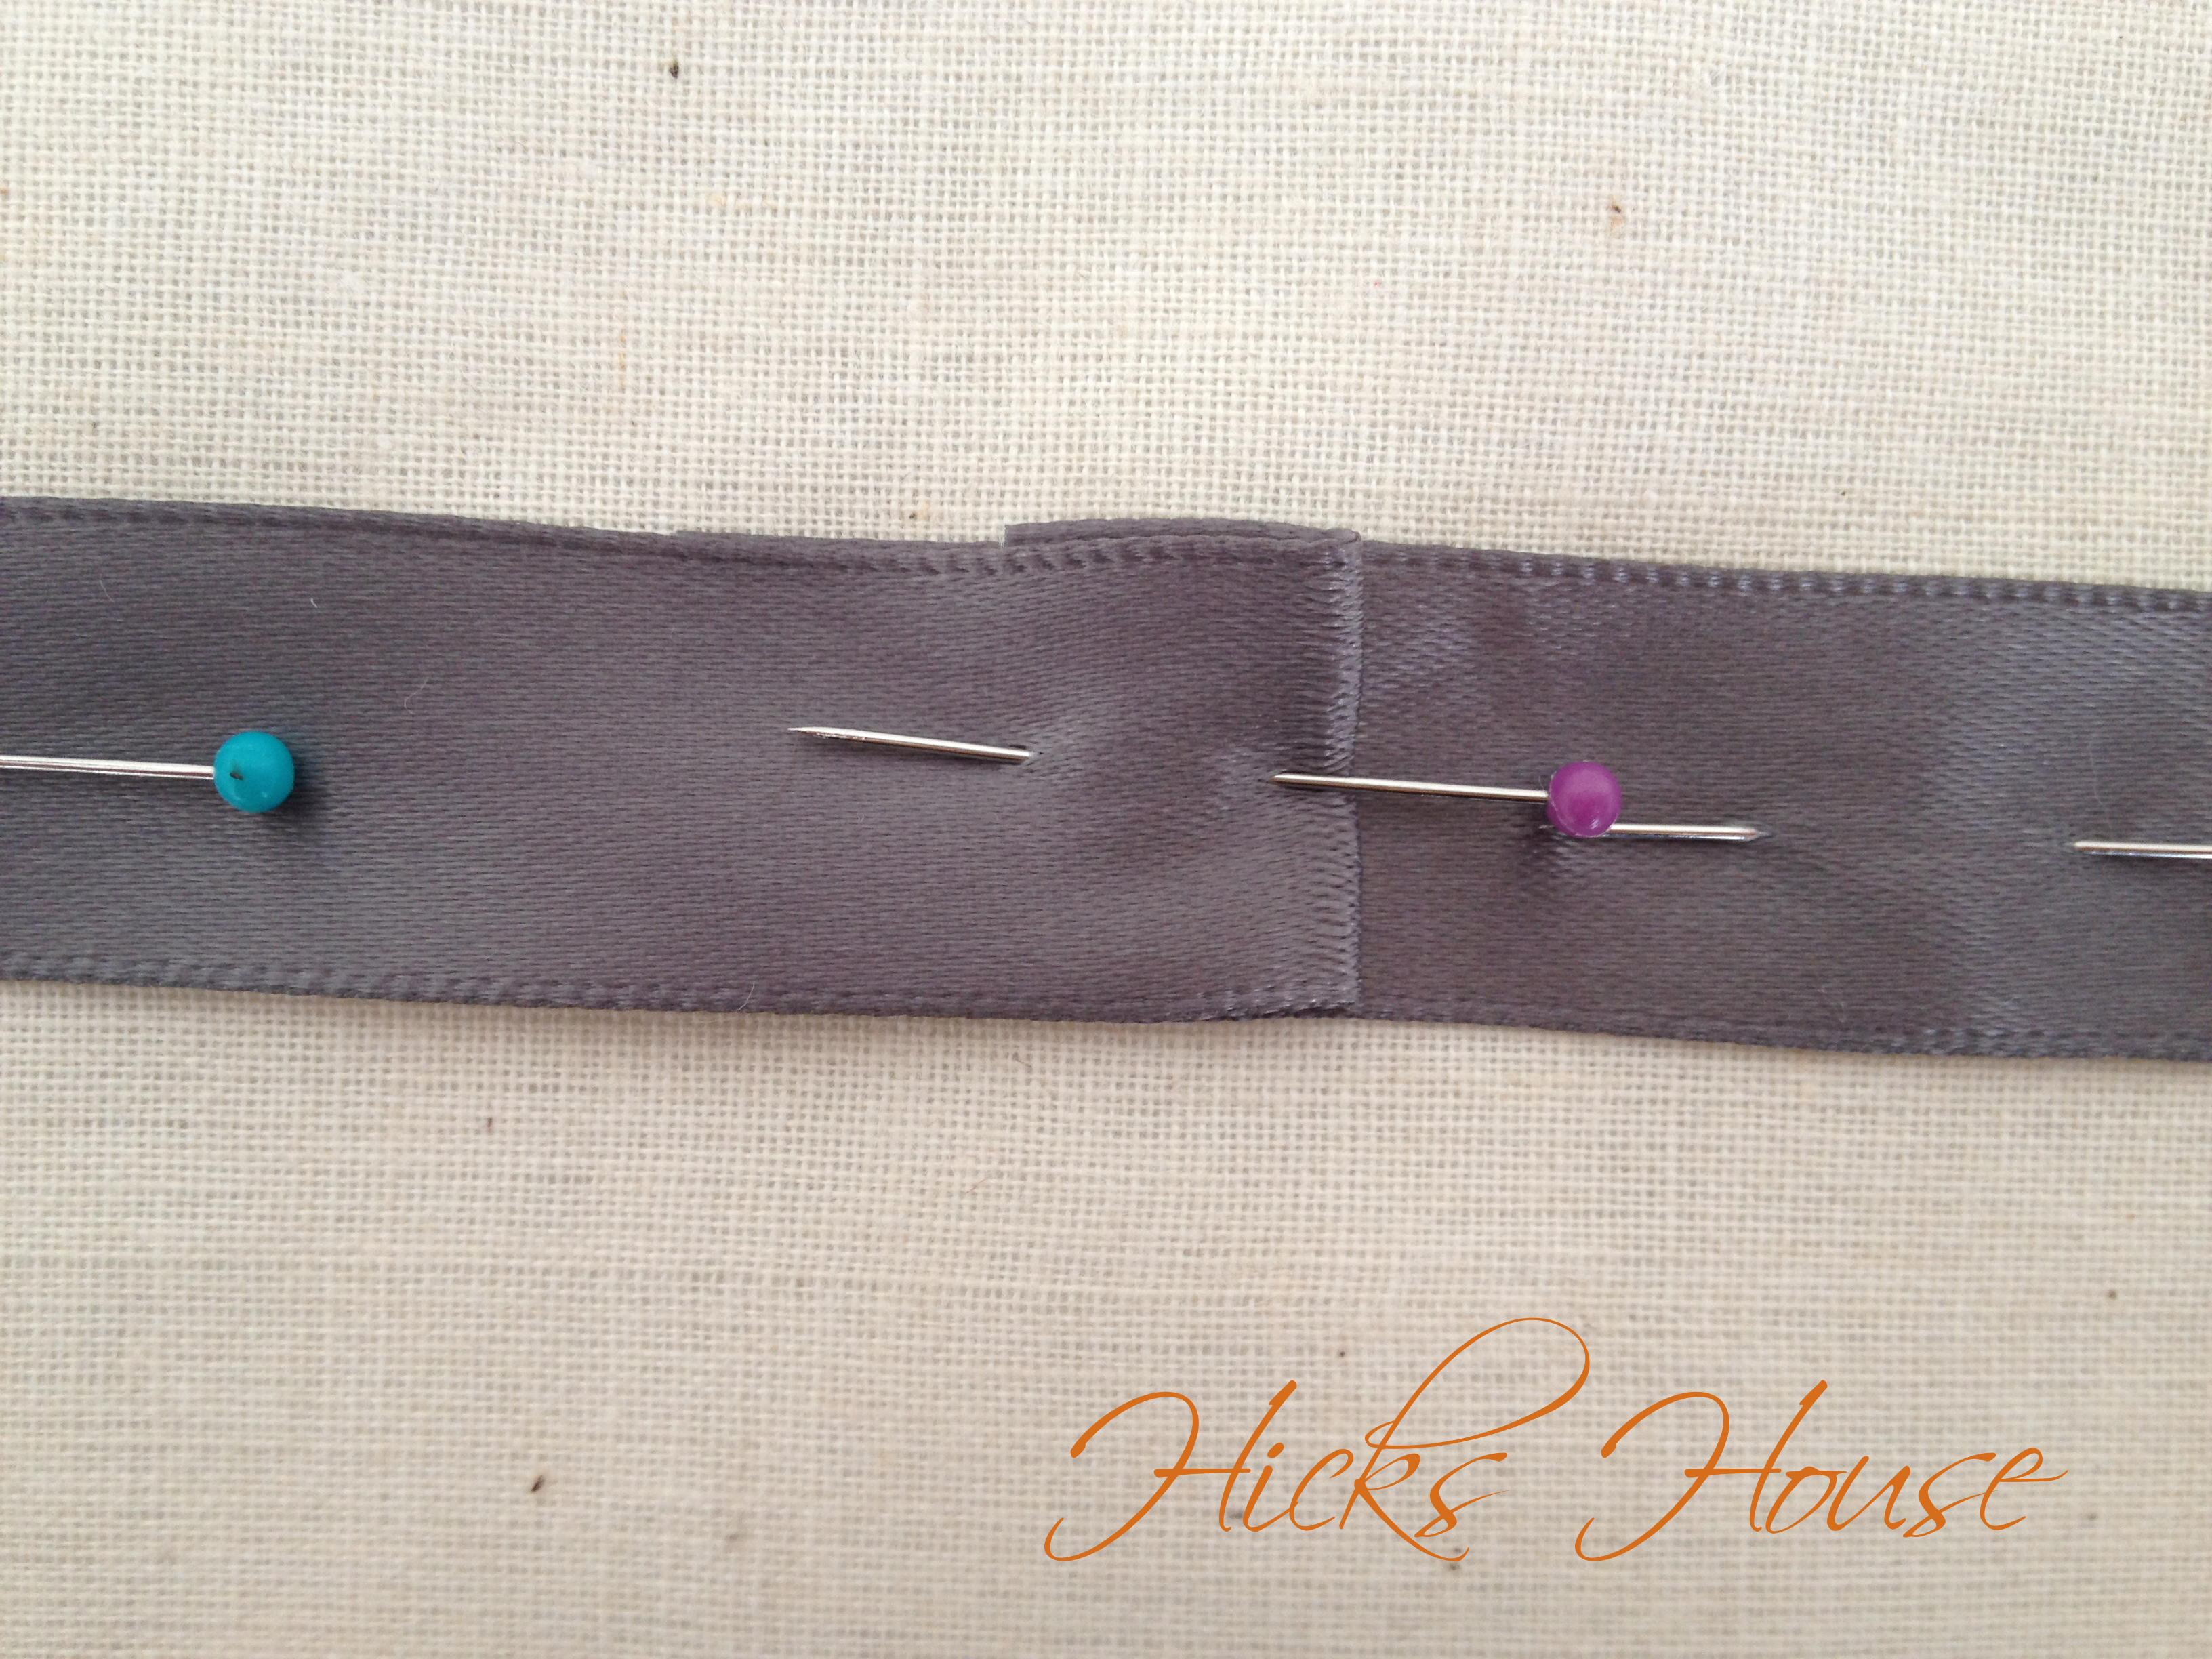
For a nice clean edge fold over the top piece of ribbon where it overlaps your starting point.

This is where you will begin sewing along one edge of the ribbon – Make sure to backstitch at the beginning.
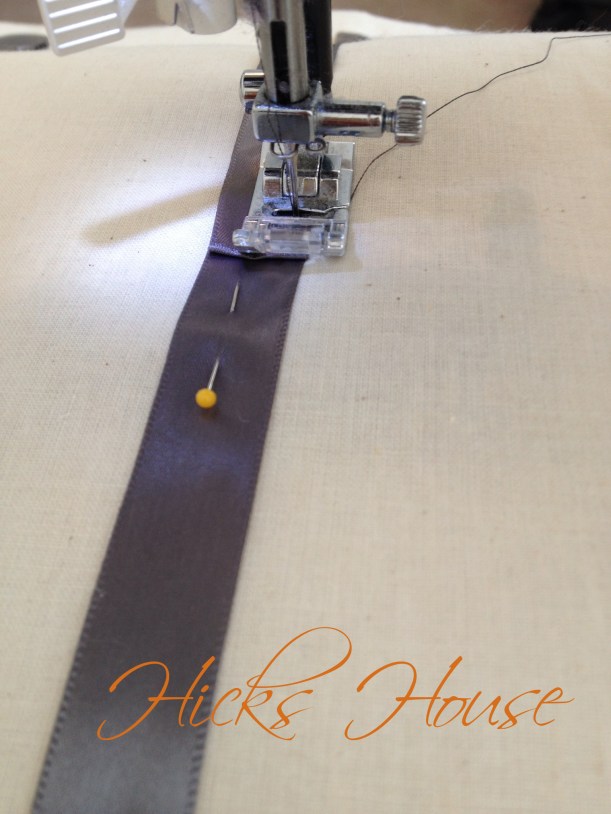
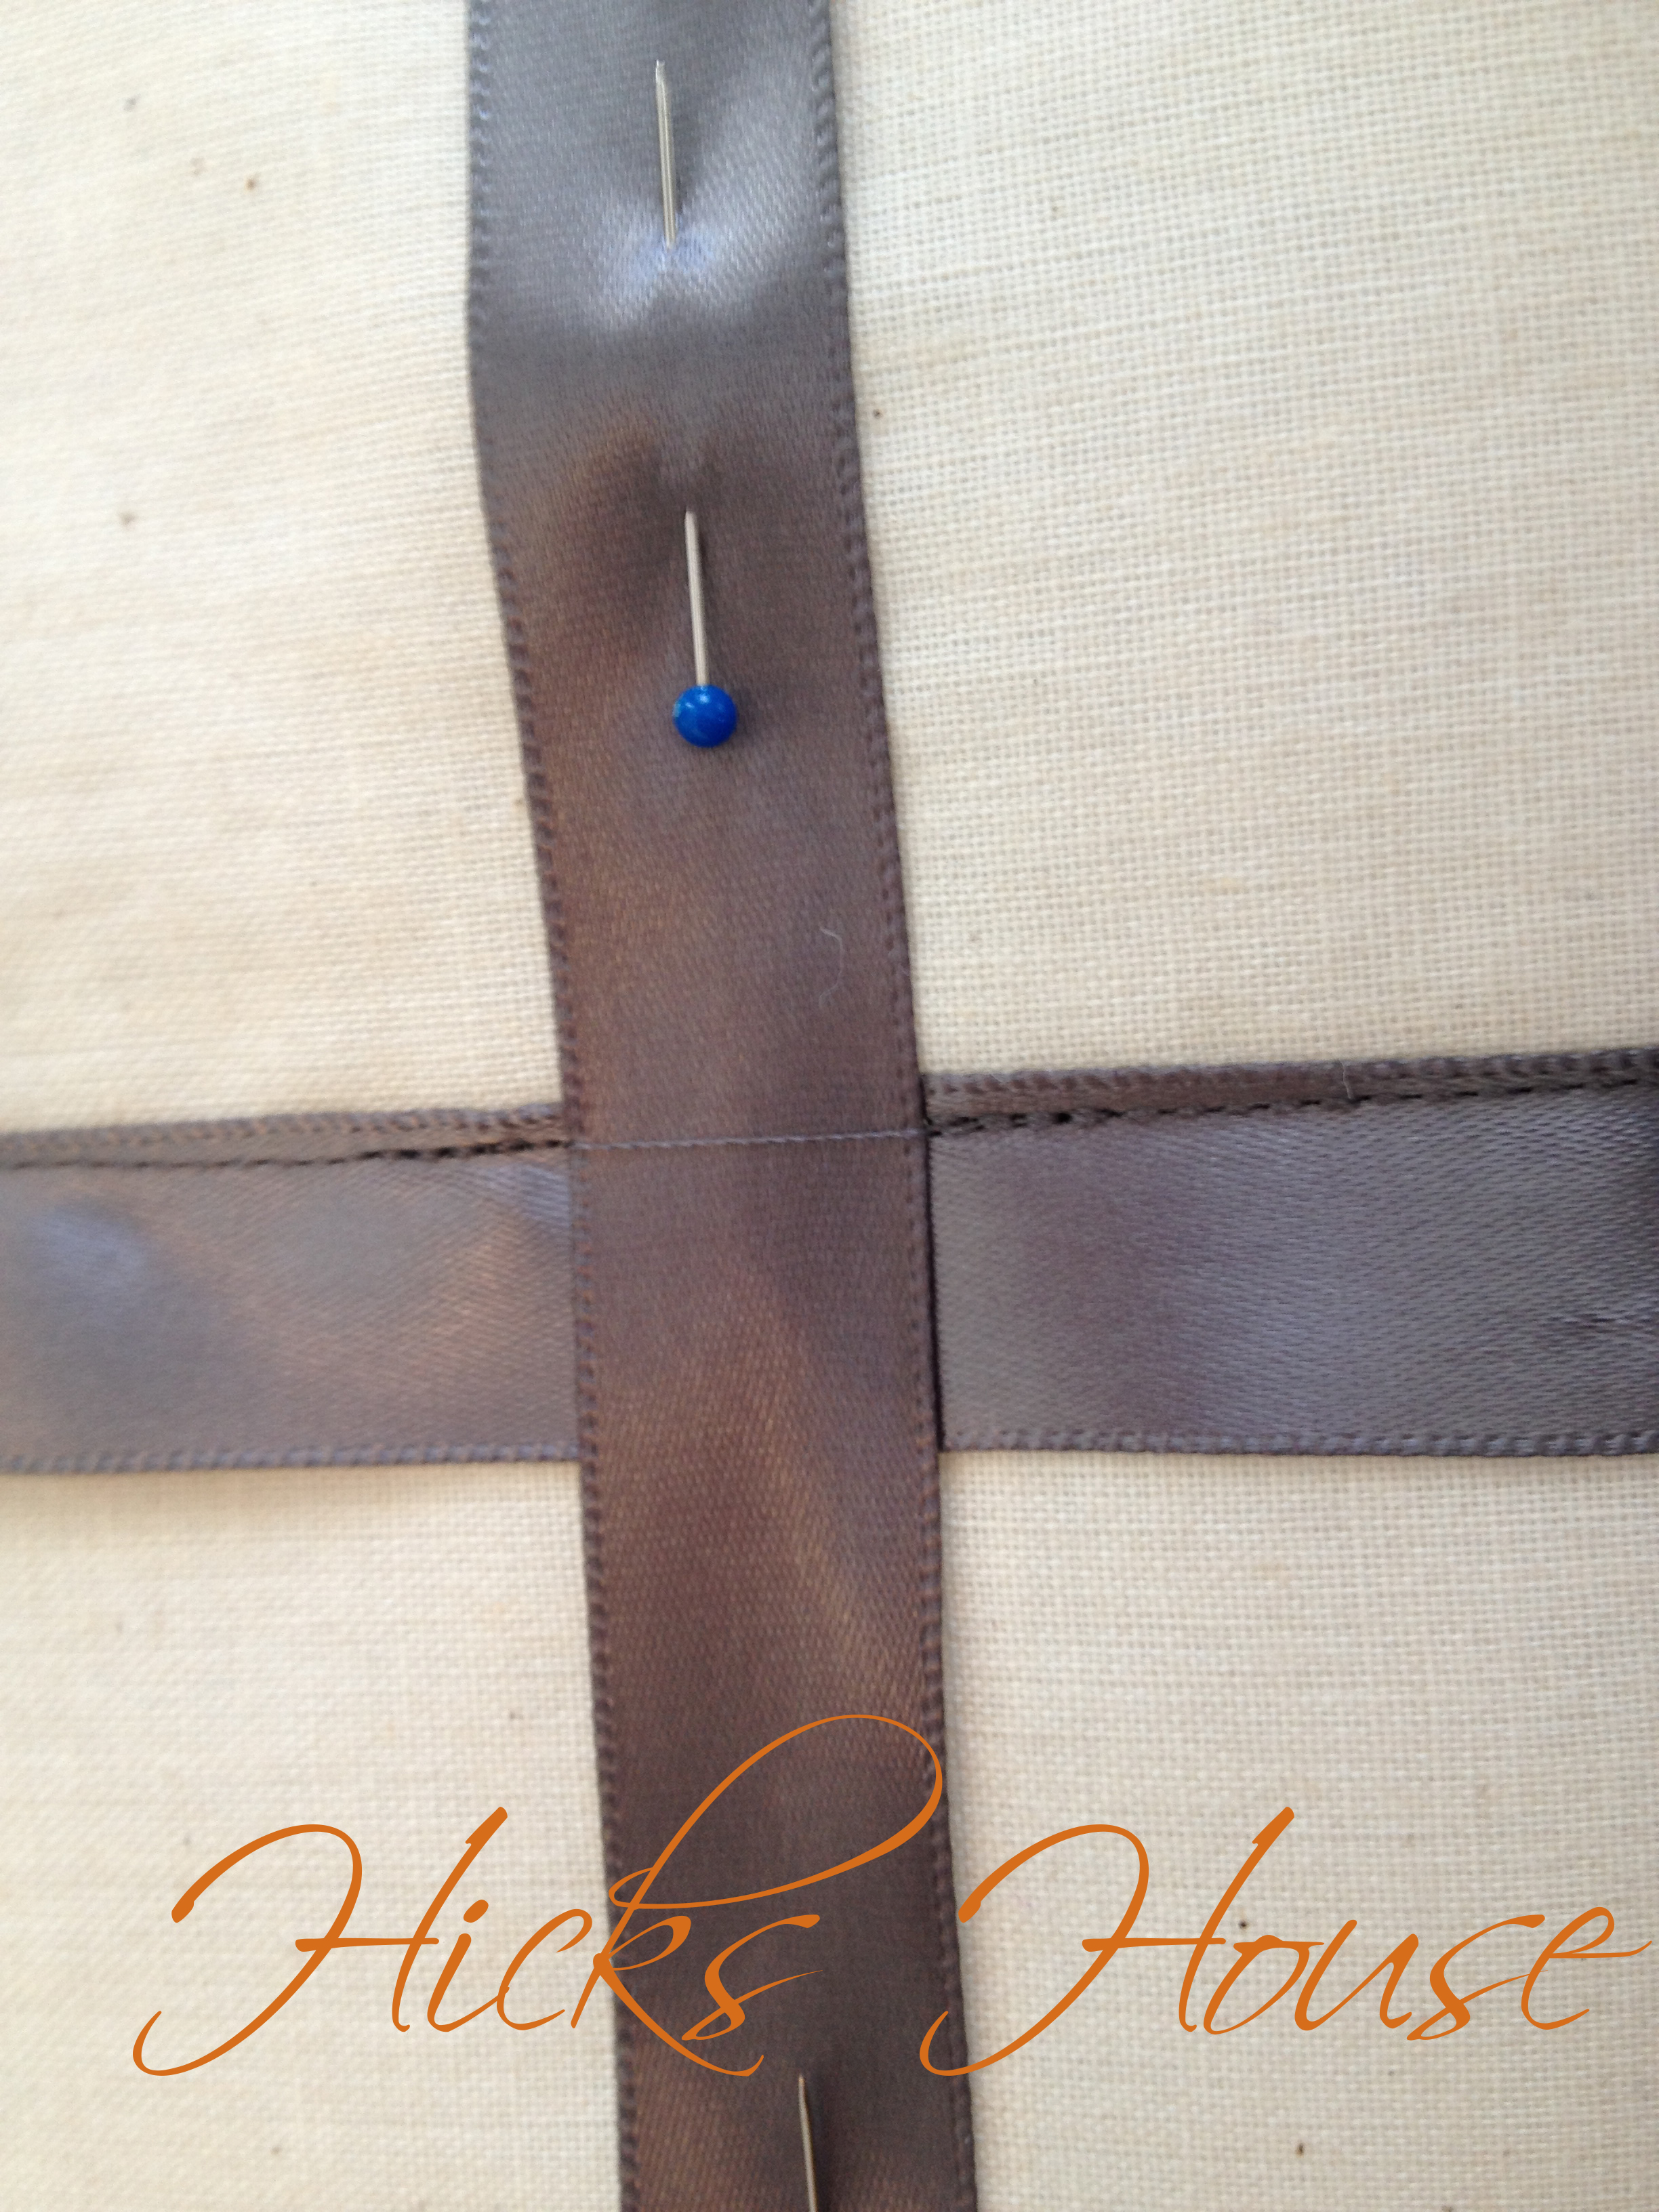
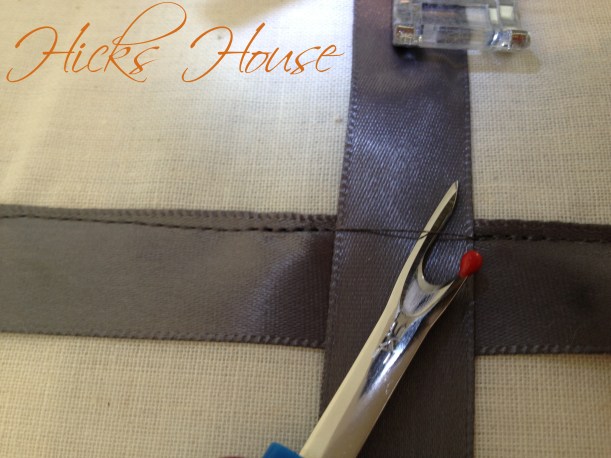
This is probably the most important step in the entire tutorial for having a professional looking finished product… When you get to the areas that overlap backstitch when you reach the overlap then stitch back to right where your top ribbon is. PICK UP YOUR NEEDLE move it to after the overlap then backstitch again and continue on.

You will want to use your seam ripper to remove the extra thread.
Once you have made it all the way around the pillow repeat on the other side.

Here is a close up of a finished professional looking overlap. If you do not take the extra step to backstitch and move your needle you would have stitches in an # symbol where the ribbon overlaps (not necessarily a bad thing – personal preference).

The top of your pillow is now done!

Now follow the directions for the zippered pillow covers to complete your pillow.

There you have it! A one of a kind ribbon embossed pillow that cost less than $10 to make start to finish!
I also made the two pillows behind it using the zippered pillow cover tutorial. I just love how they work together with the gray and oatmeal colors.
What do you think?